

Sculpting a 54mm Polo player
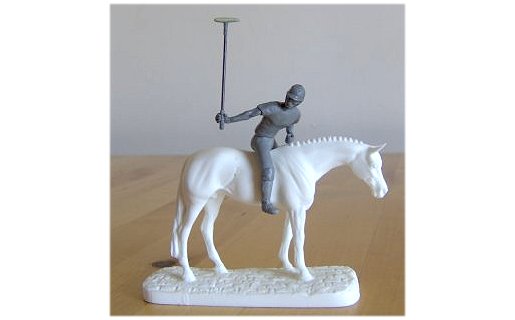

This is a more advanced section of the website, and is intended for older children and adults, as the tools and materials involved can be dangerous. Here you will how I sculpted a 54mm miniature figure. This figure was a commision for a model horse company, and was designed to have a relatively low level of detail. But the basic procedures and twchniques are the same as I use for more detailed historical figurines.
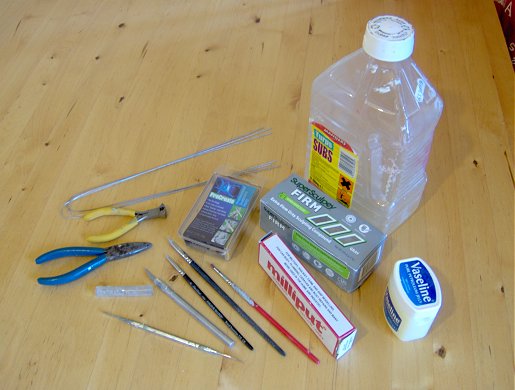
Below you'll see a picture of the tools and materials I use when sculpting. You don't need all of them, and will probably find the tools and products that suit your style as you go. Sculpting is a very personal thing, and there are as many ways of doing it as there are sculpters. So feel free to adapt or alter the tutorial below to suit what works for you.
You will need:
- I use the SG dental tool from Tiranti of London.
Some wire, or an armature.
Some epoxy putty, ideally ProCreate.
What to do
1. The first thing to do is get an accurate scale reference. I use a copy of Da Vinci's 'Vitruvian man', and adjust it's size on my printer to suit the current project. One important thing to note is that most 54mm figures nowadays are 1/32nd scale, rather than 1/35th. This means they are genrally 60 to 65mm tall to the top of the head. I use cheap wire from a DIY or garden shop, and make an armature. Basically a length of wire folded over gives me a head, body and two legs. I then need a second piece of wire for the arms. I attach these together with Miliput. Once dry, it sets rock hard. Then I bulk out the head, torso and legs with more Milliput. I could use ProCreate for this, but Milliput is cheaper. I avoid using glue of any kind - if the miniature is to undergo vulcanisation when moulded, most glues will cause problems. So it's best to be safe, and avoid them altogether.
2. Then bend the armature into whatever position you require - I had a design brief from my client, so positioned the armature to match that.

3. Next is the face. With a sharp knife, I carved the rough shape of a face into the Milliput head. I then added a couple of blobs of putty for the eyes, and shaped them into rough almond shapes. Once they were dry, I realised I hadn't cut enough Milliput off the nose, and had to go in with the knife again!
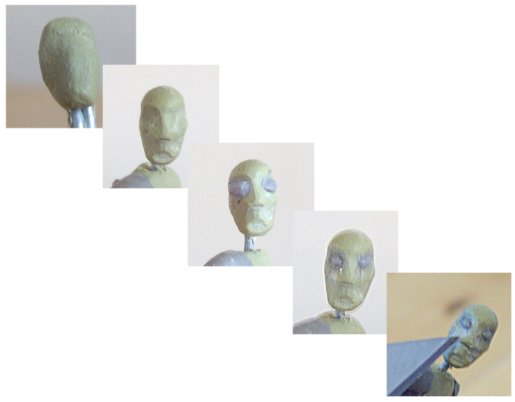
4. Then I added a 'T' shaped piece of putty to the face, for the brow and nose, and a couple of blobs of putty for cheeks. I shaped these, and used some of the cheek to form the lower eyelids, and some of the brow to form the upper eyelids. I then added a couple of chunks of putty to the sides of the head - human heads tend to expand a bit behind the eyes.
5. Next I added another piece of putty to the lower face, for the mouth and chin,and shaped it as shown in the picture below. If you have trouble with the face, there's some tips in our Face Sculpting tutorial.
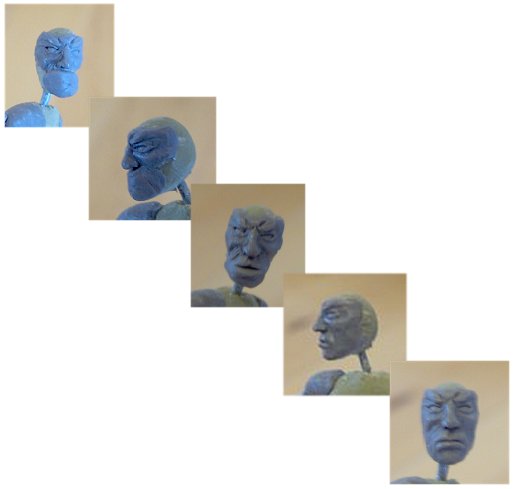
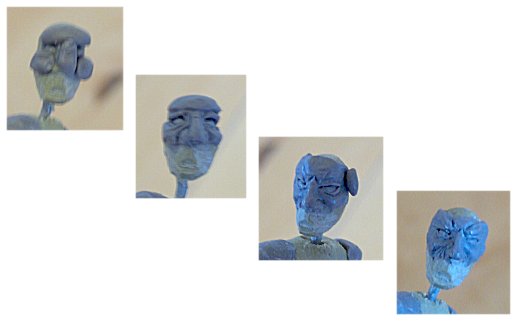
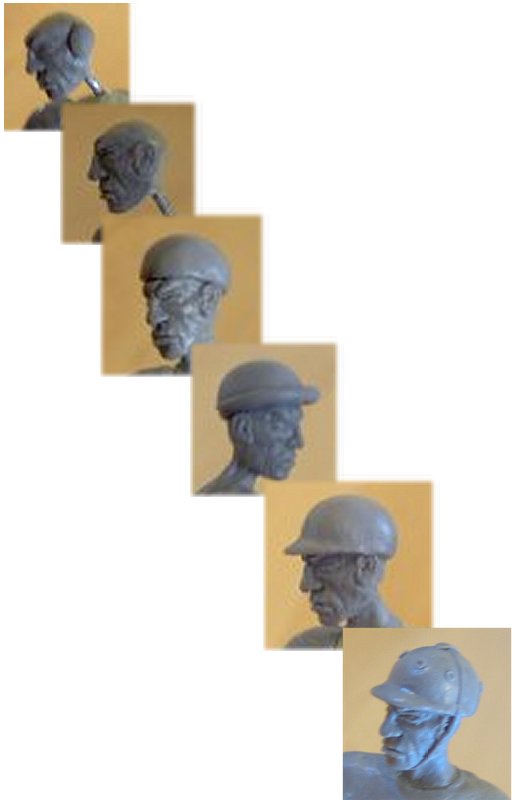
6. Next came the ears. There's no easy way to do them - you need good reference material. I'm quite fortunate, as there's usually someone in the room - I ask them to stand still and copy their ears! Ones the face ans ears where dry, I added the basic helmet shape. I let that cure before adding the rim. After that, I detailed the helmet - the ventilation holes are just small balls of putty, flattened and with a tiny dent in the middle. The straps are just a very thin 'sausage' of putty, rolled out, pressed into place and then gently flattened.
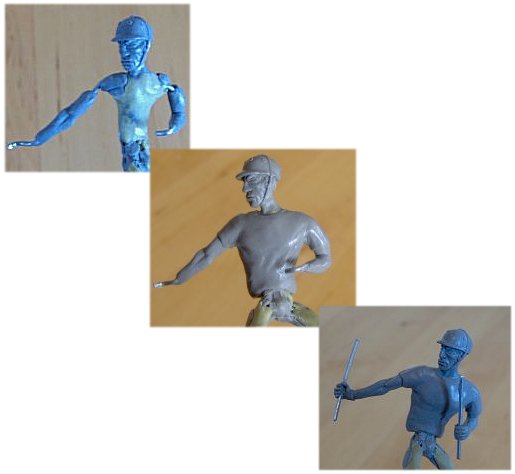
7. With the head out of the way, things speeded up a bit. I did the arms next, using anatomy books for reference. The 'Art' section of your local library can be a big help with that. I did the arms before the gloves or t-shirt, because the clothing overlaps the arms, so it was easier to add the clothing with them already in place. The hands were a bit of a challenge - the figure wears gloves, which means I don't have to do fingernails and stuff, but the client wanted the hands to be hollow through the middle, so the figure could hold things. After a bit of head scratching, I decided to sculpt the hands around a couple of pieces of wire. Once the hands were cured, I pushed the wire out. It worked pretty well!
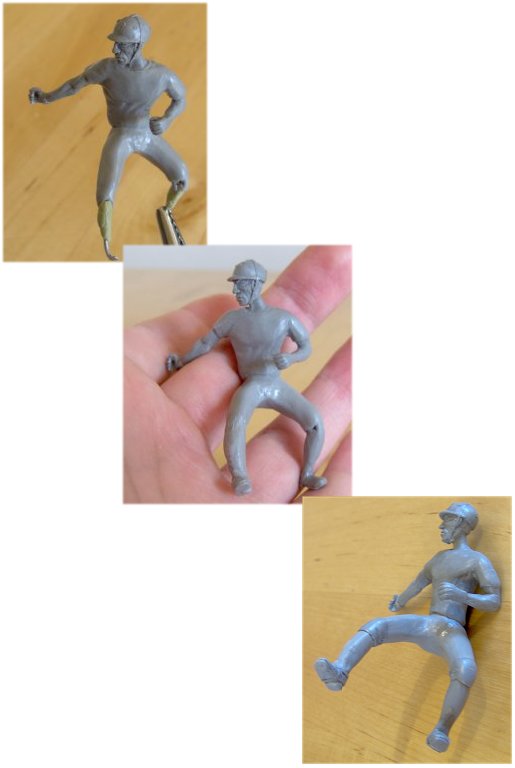
8. Now I was on the home stretch. I did the trousers in one go, and let them cure. Then I added the boots, and after they cured, the straps for his spurs. Again, the straps are simply long bits of putty rolled out, pressed into place and flattened. Finally the kneepads were added, and he was finished.
Back to the Sculpting and Modelling menu...