

Cold Porcelain Roses
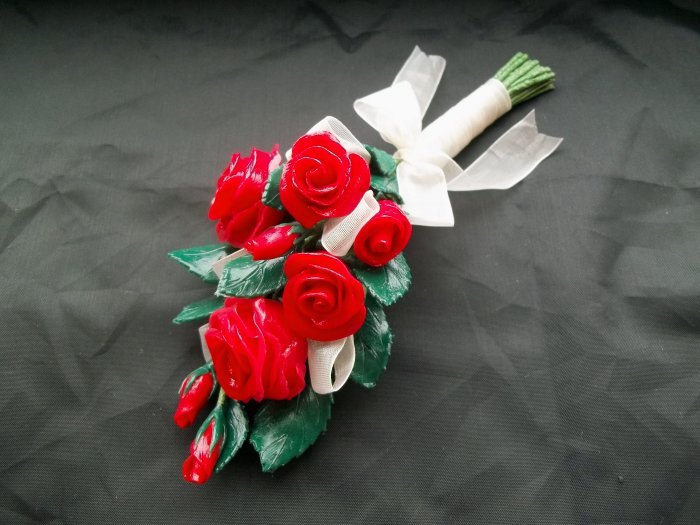

Cold Porcelain is air-drying modelling clay that can be easily made at home (for recipe & instructions click here). When dry it has the translucent quality that looks similar to porcelain. This type of clay is best used to make fine detail flower arrangements such as displays that would adorn a wedding/celebration cake. The clay can be coloured by mixing with a little acrylic paint, and the final display must be protected with Mod-Podge/clear acrylic varnish when dry.
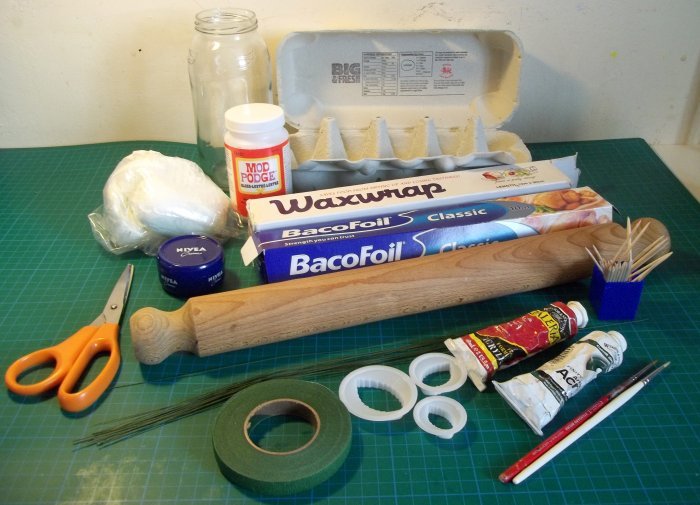
You will need:
Plastic sandwich/freezer bags
Non-greasy moisturiser
Acrylic paint (to colour clay)
Wax paper & scissors
Rolling pin
Paper covered wire (found in floristry or cake decorating supply shops)
Floristry tape (found in floristry or cake decorating supply shops)
Glass jar (flowers are hung over the side to dry)
Egg box & kitchen foil
Leaf cutters
Cocktail sticks
Mod-Podge or clear acrylic varnish & small paintbrush
What to do
**TOP TIP - As there are long periods of drying times during this project you do not have to wait to complete the flowers before making the leaves -TOP TIP**
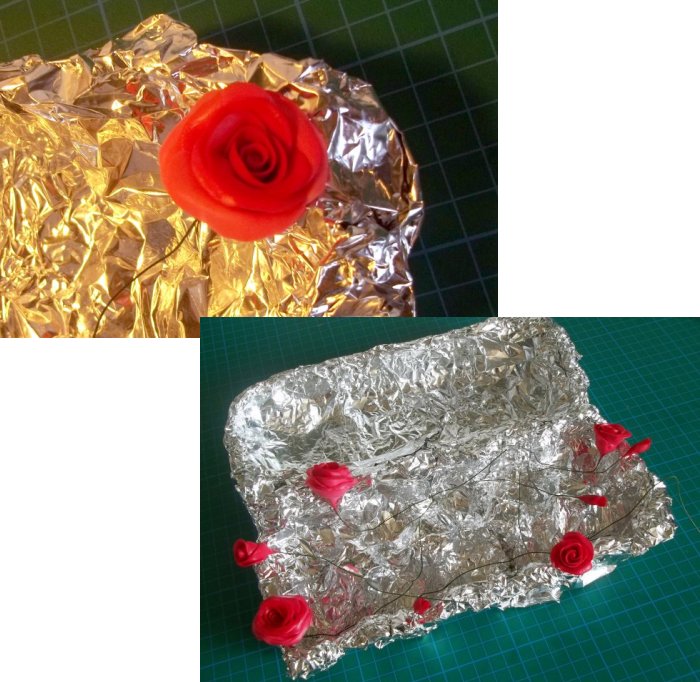
1. Cover the egg box with some foil, shaping it so as to hold the flowers while you shape the next petal.

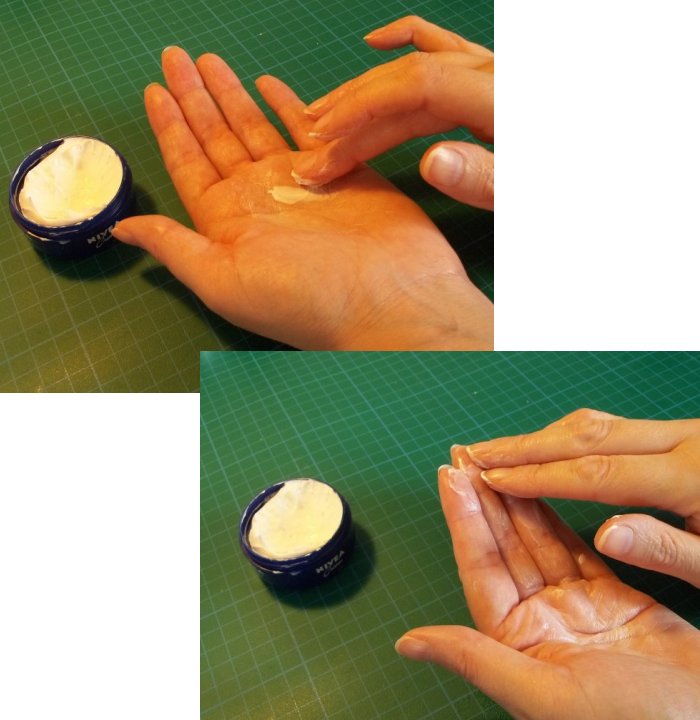
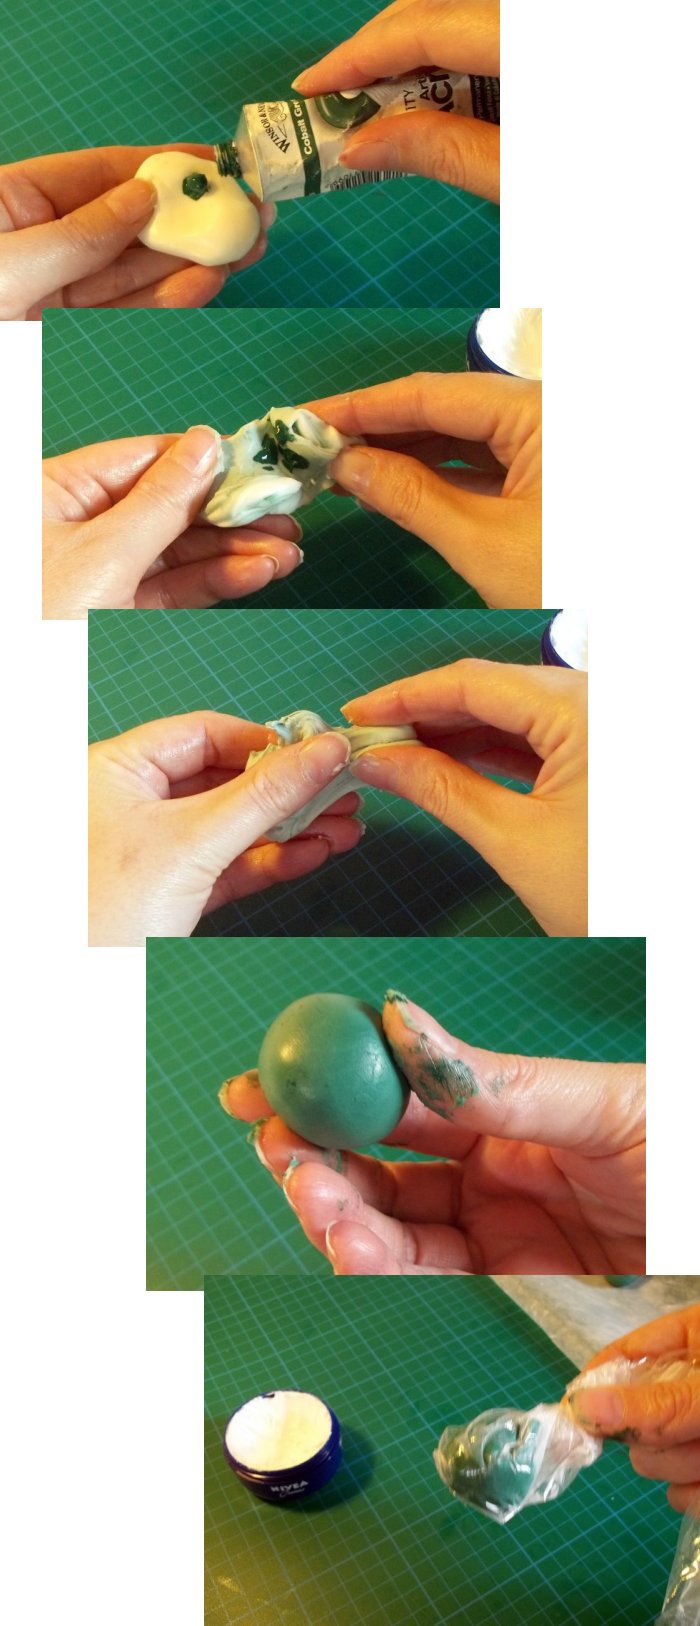
2. Rub a little moisturiser in your hands and especially the tips of your fingers (you will need to do this regularly to stop the clay from sticking to your hands).
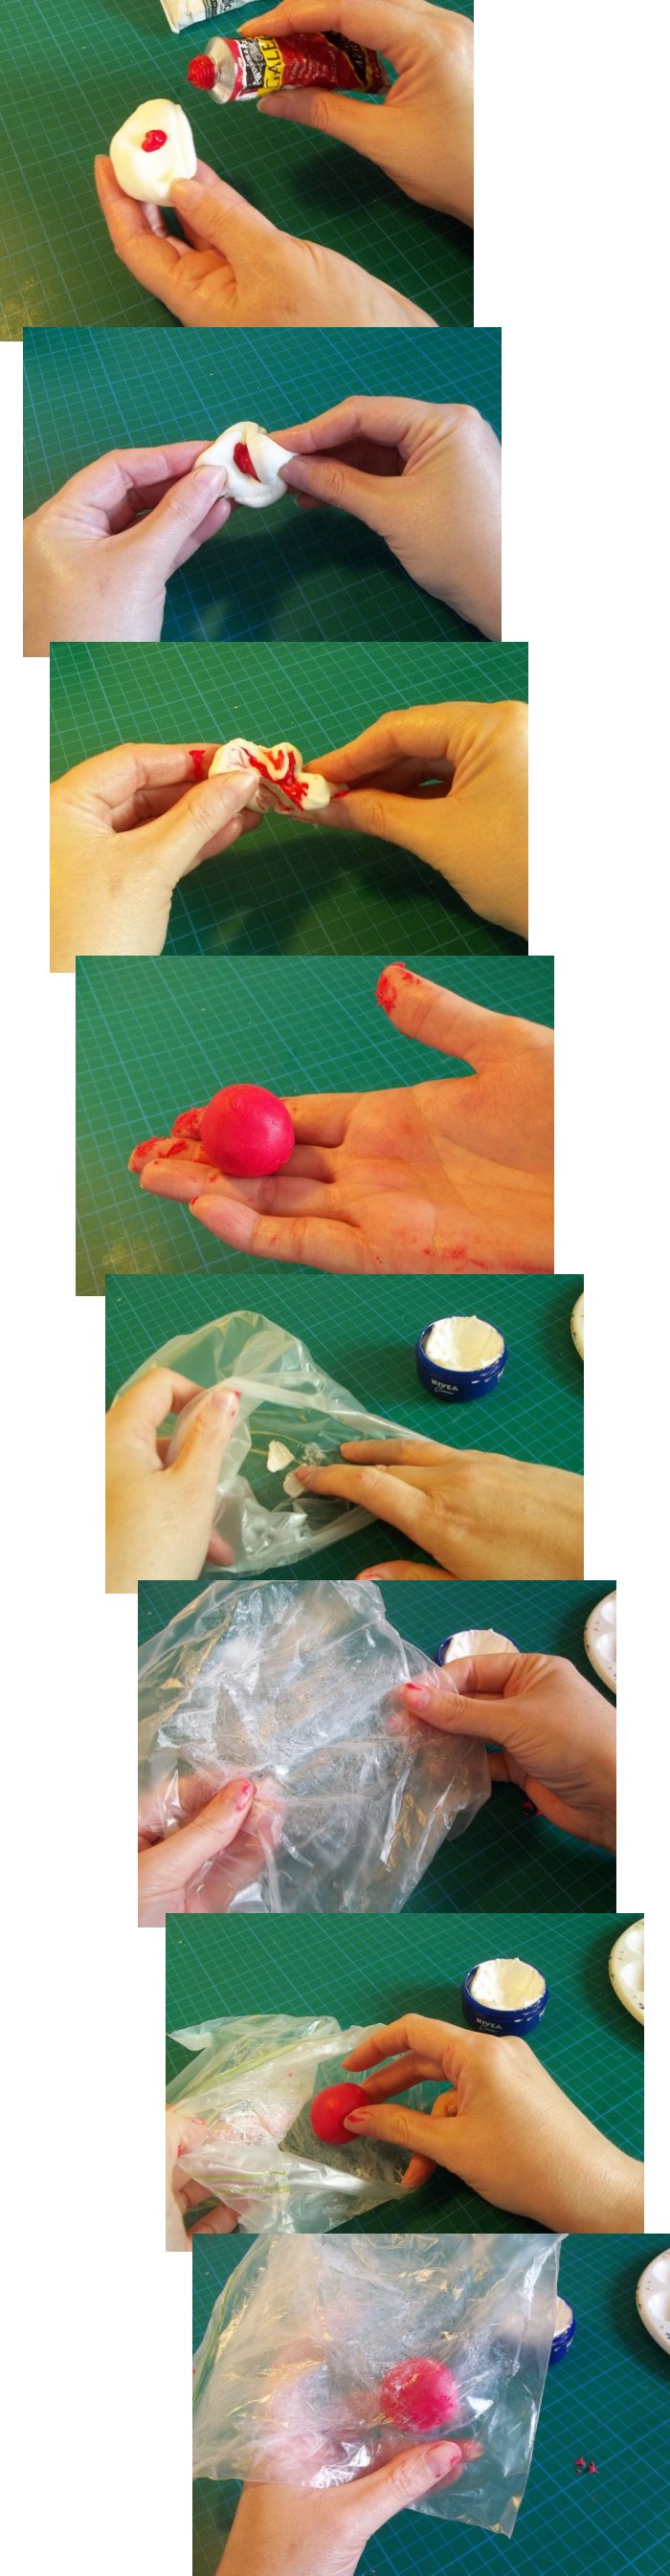
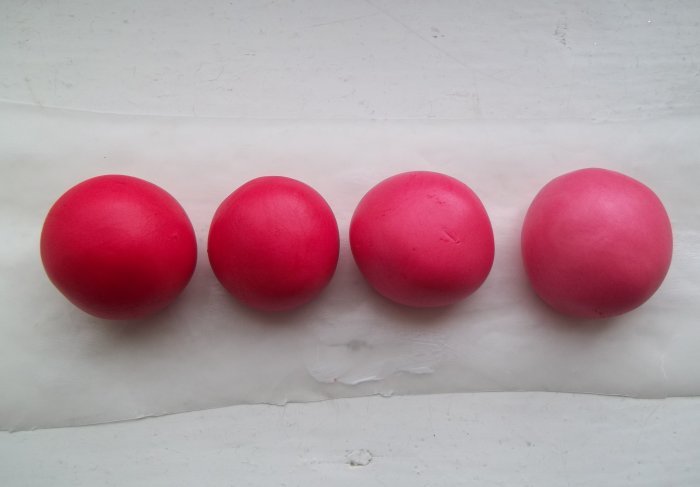
3. If you are going to colour the clay, take the amount you are going to use and add a drop of acrylic paint. Knead with your fingers until the colour is completely mixed in (remember to moisturise your fingers to stop the clay sticking). Keep adding a little more paint and mixing it in until you have the colour you desire. Remember to protect the clay from drying out by keeping it in a sealed sandwich/freezer bag.
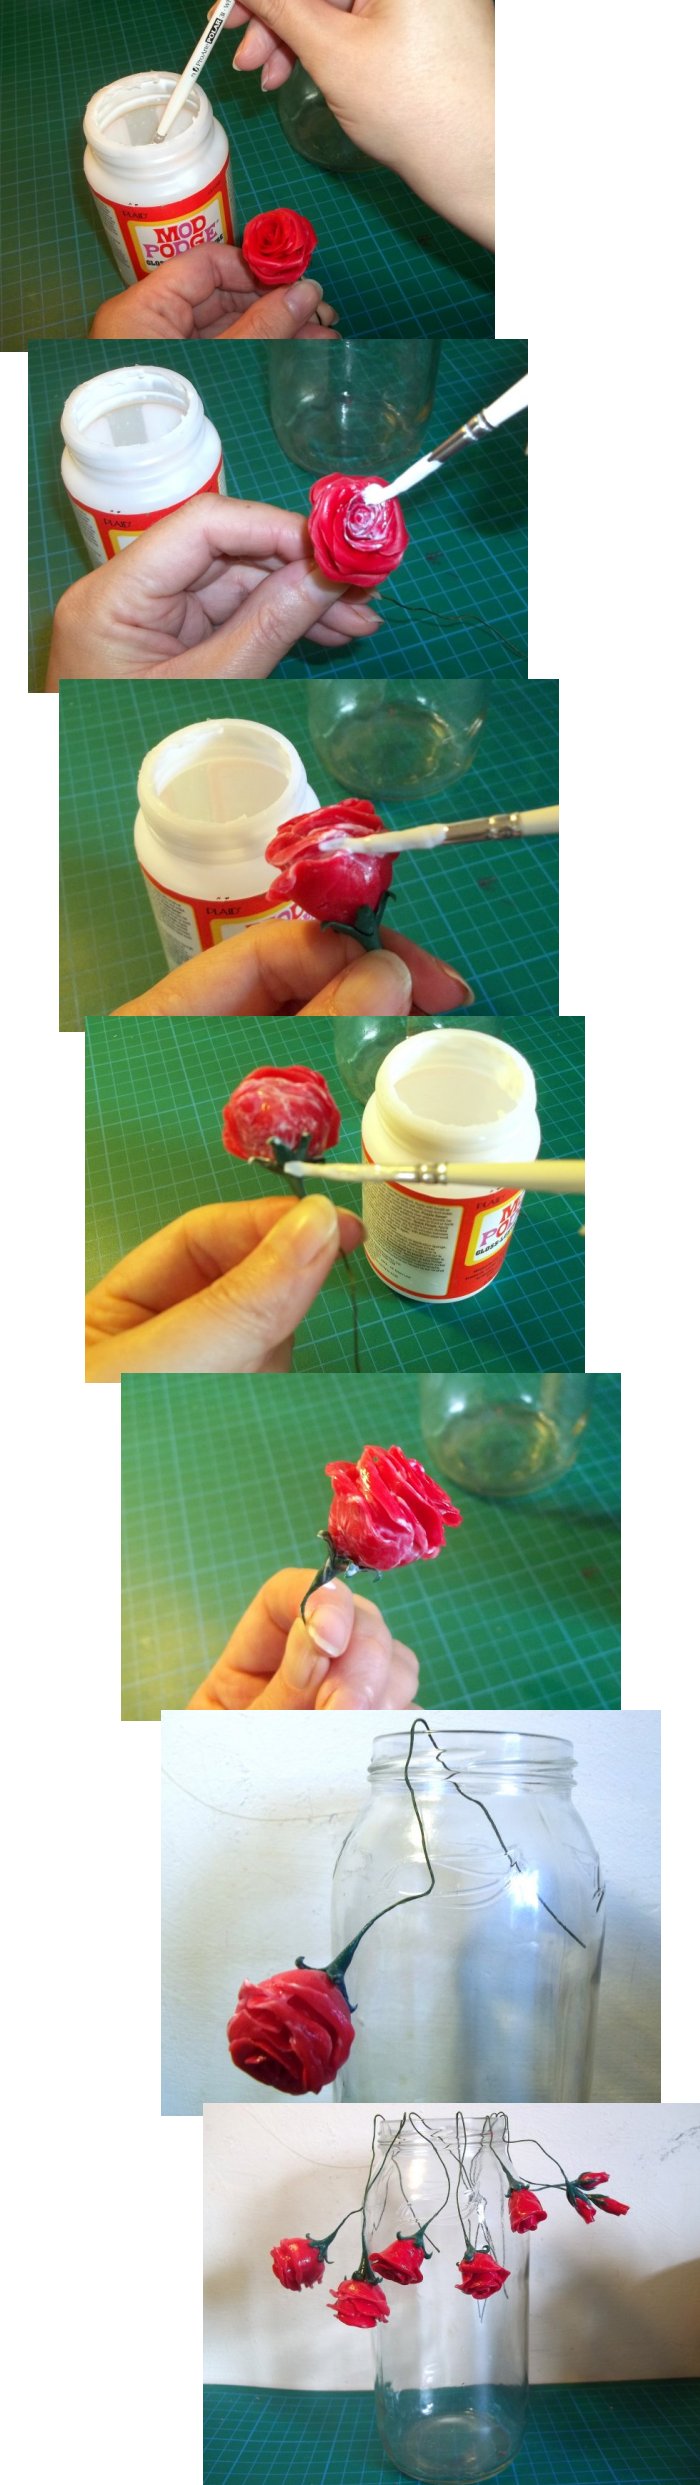
**TOP TIP - To make realistic roses use a dark coloured clay for the centre petals, then gradually lighten the colour for each subsequent petal layer. The petals should be as thin as you can make them to aid the life-like appearance - TOP TIP**
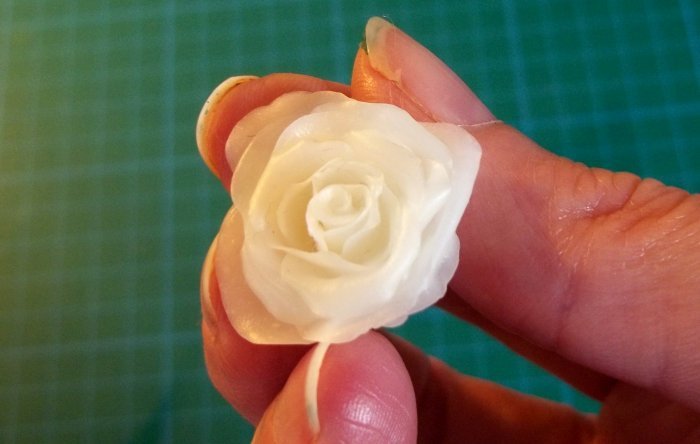
Of course, you don't have to colour the clay; you can leave it in it's natural state. Here's what an uncoloured rose looks like:
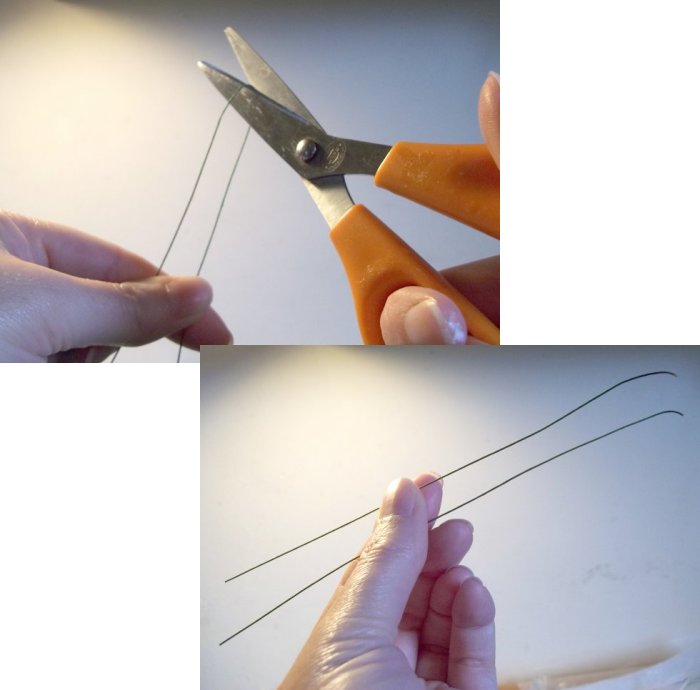
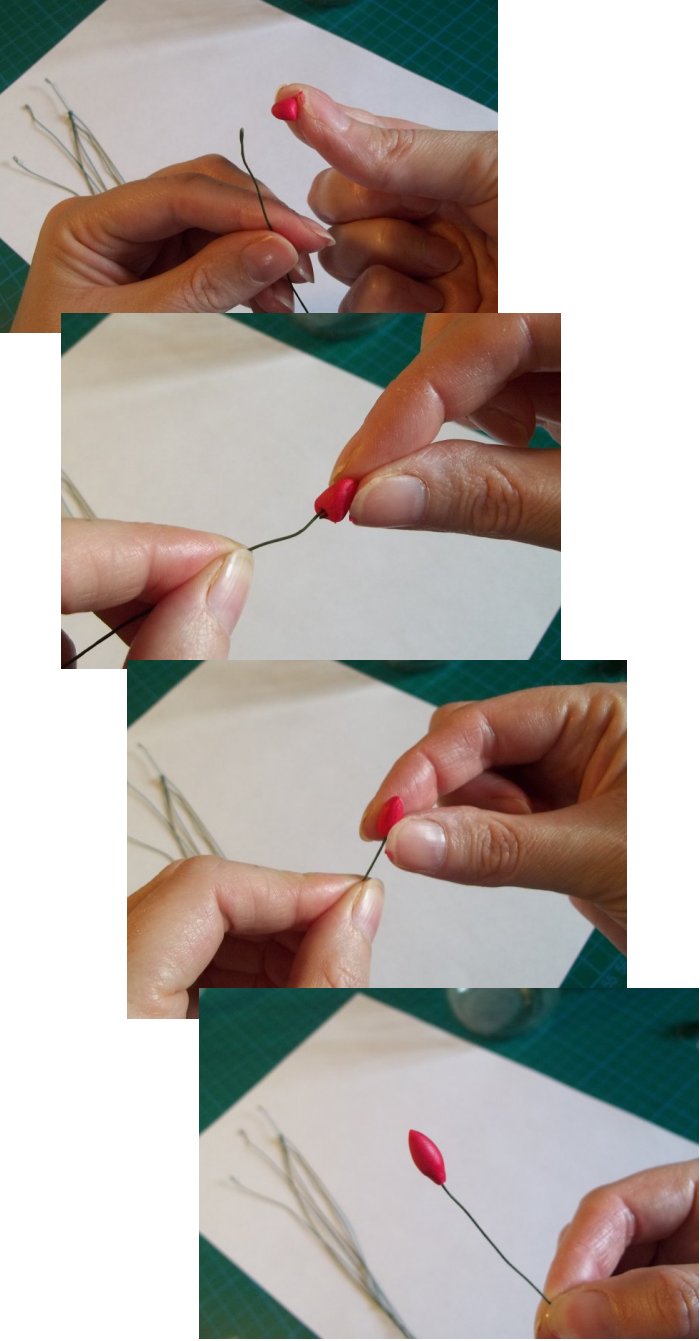
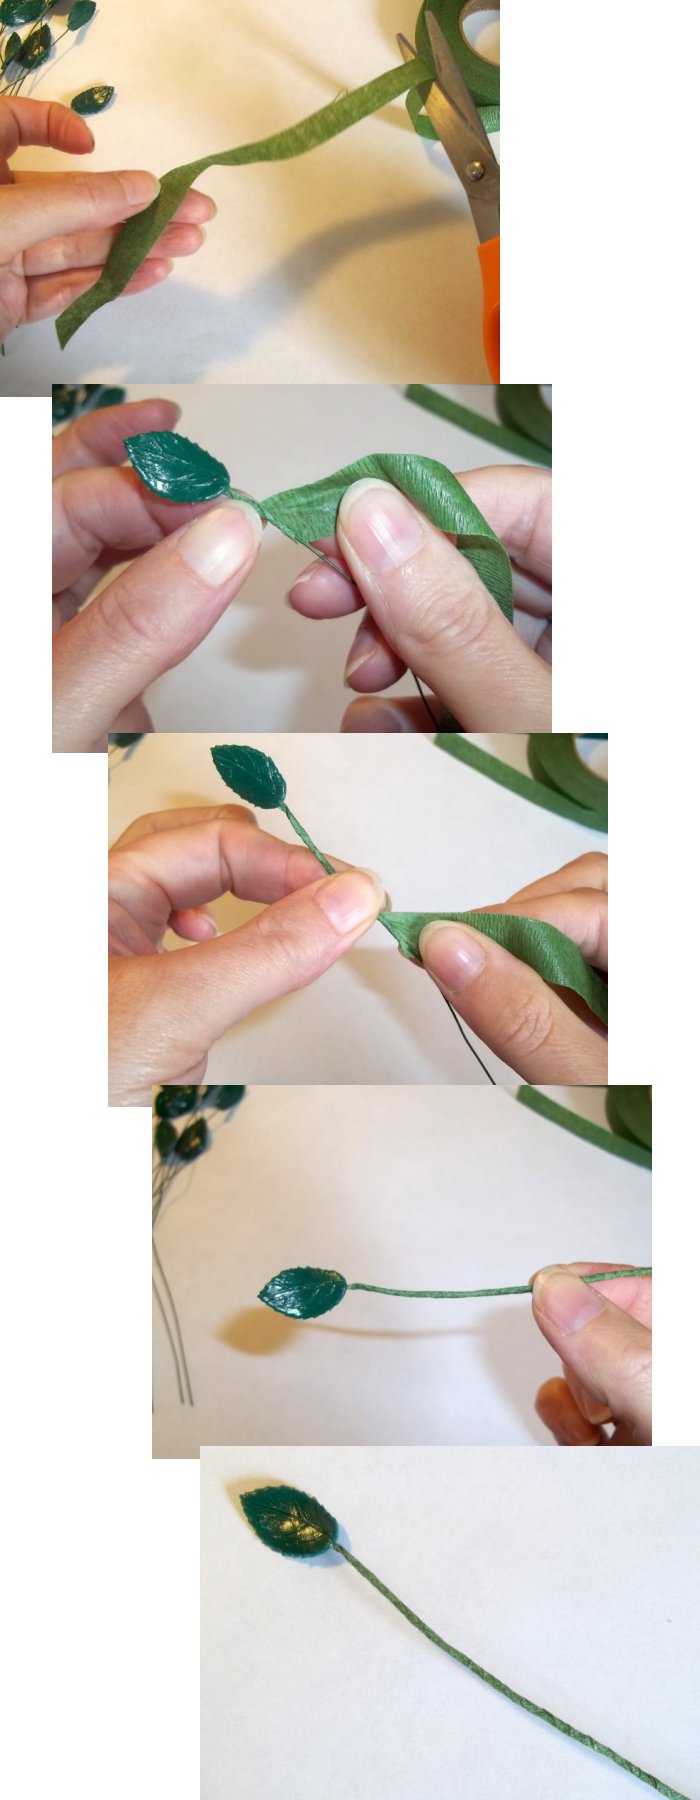
4. The wire is usually sold in about 14 inch lengths, so cut them in half, into more manageable lengths (unless you want to keep the wire longer).
5. Make a small hook at one end of the wire.
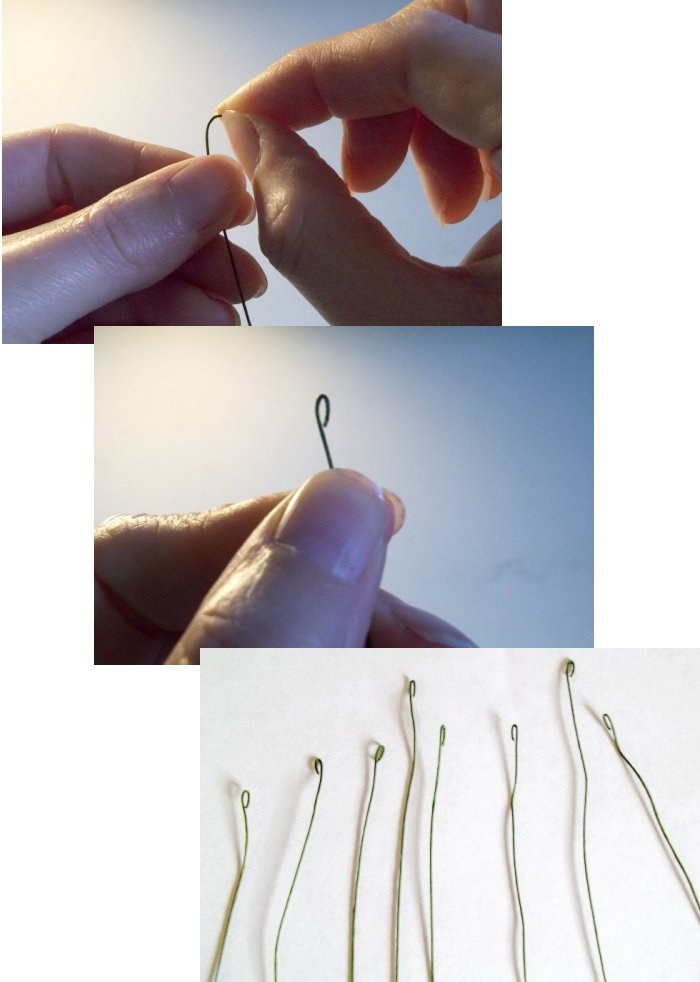
6. Mould a piece of clay into a cone shape over the hook (the size of cone will determine the size of rose). Make sure the hook is secure in the cone and that there is no gap at the base.
**TOP TIP - Remember this is air-drying clay so only use a small amount of clay at a time and keep the clay that you are currently not using in a plastic food bag to stop it from drying out - TOP TIP**
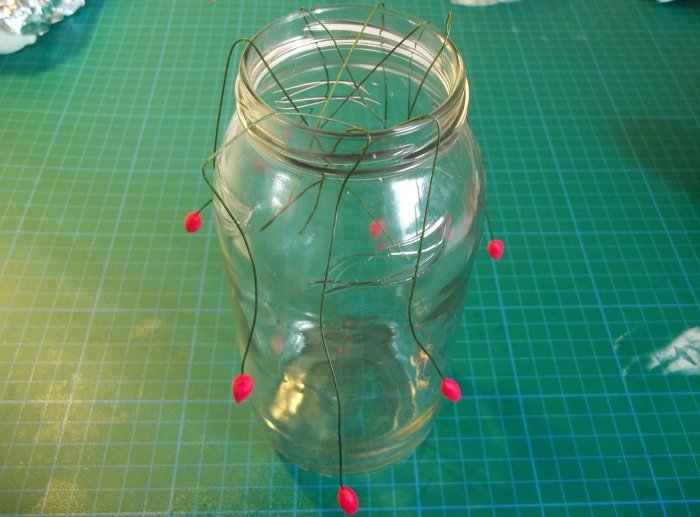
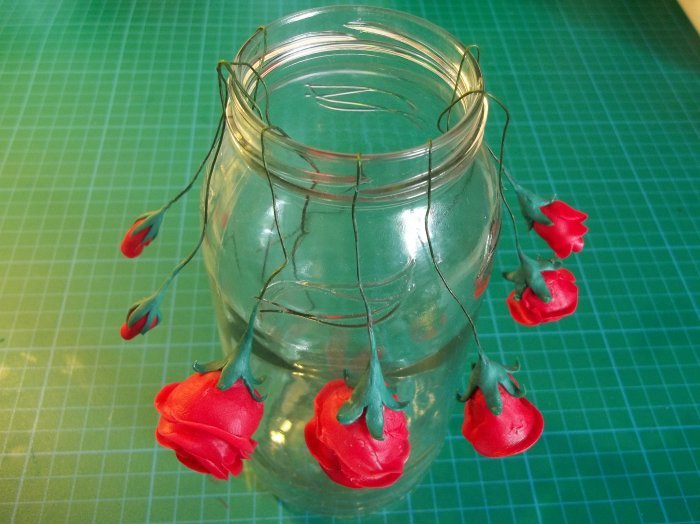
7. Hook the wire over the glass jar and leave to dry overnight.
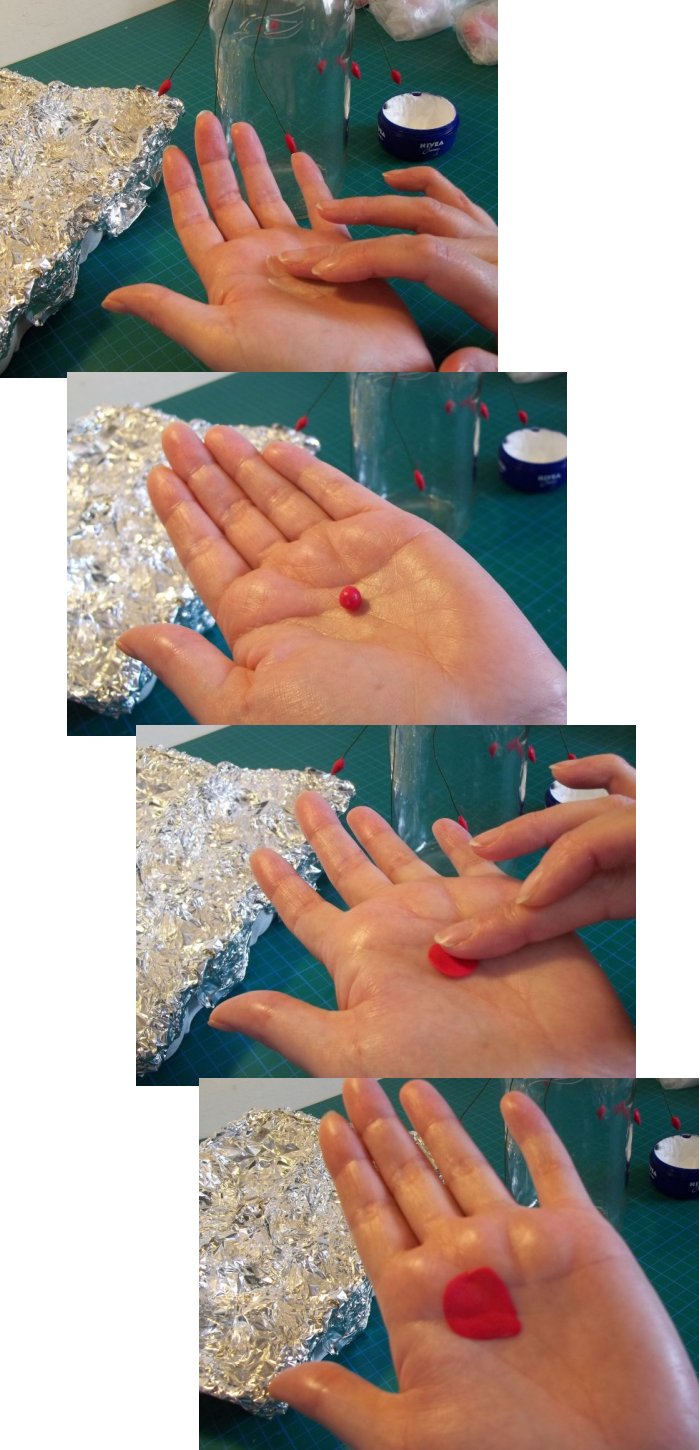
8. Moisturise your fingers & palm of left hand if you are right handed (moisturise right palm if you are left handed). Roll a small amount of clay into a ball and press it with your finger ends in the palm of your hand to make a petal shape (your palm is ideal as it adds a natural curved shape to the petals)
9. Wrap the petal around the cone leaving a small opening at the top (carefully lay the flower on the foil covered egg box between placing petals).
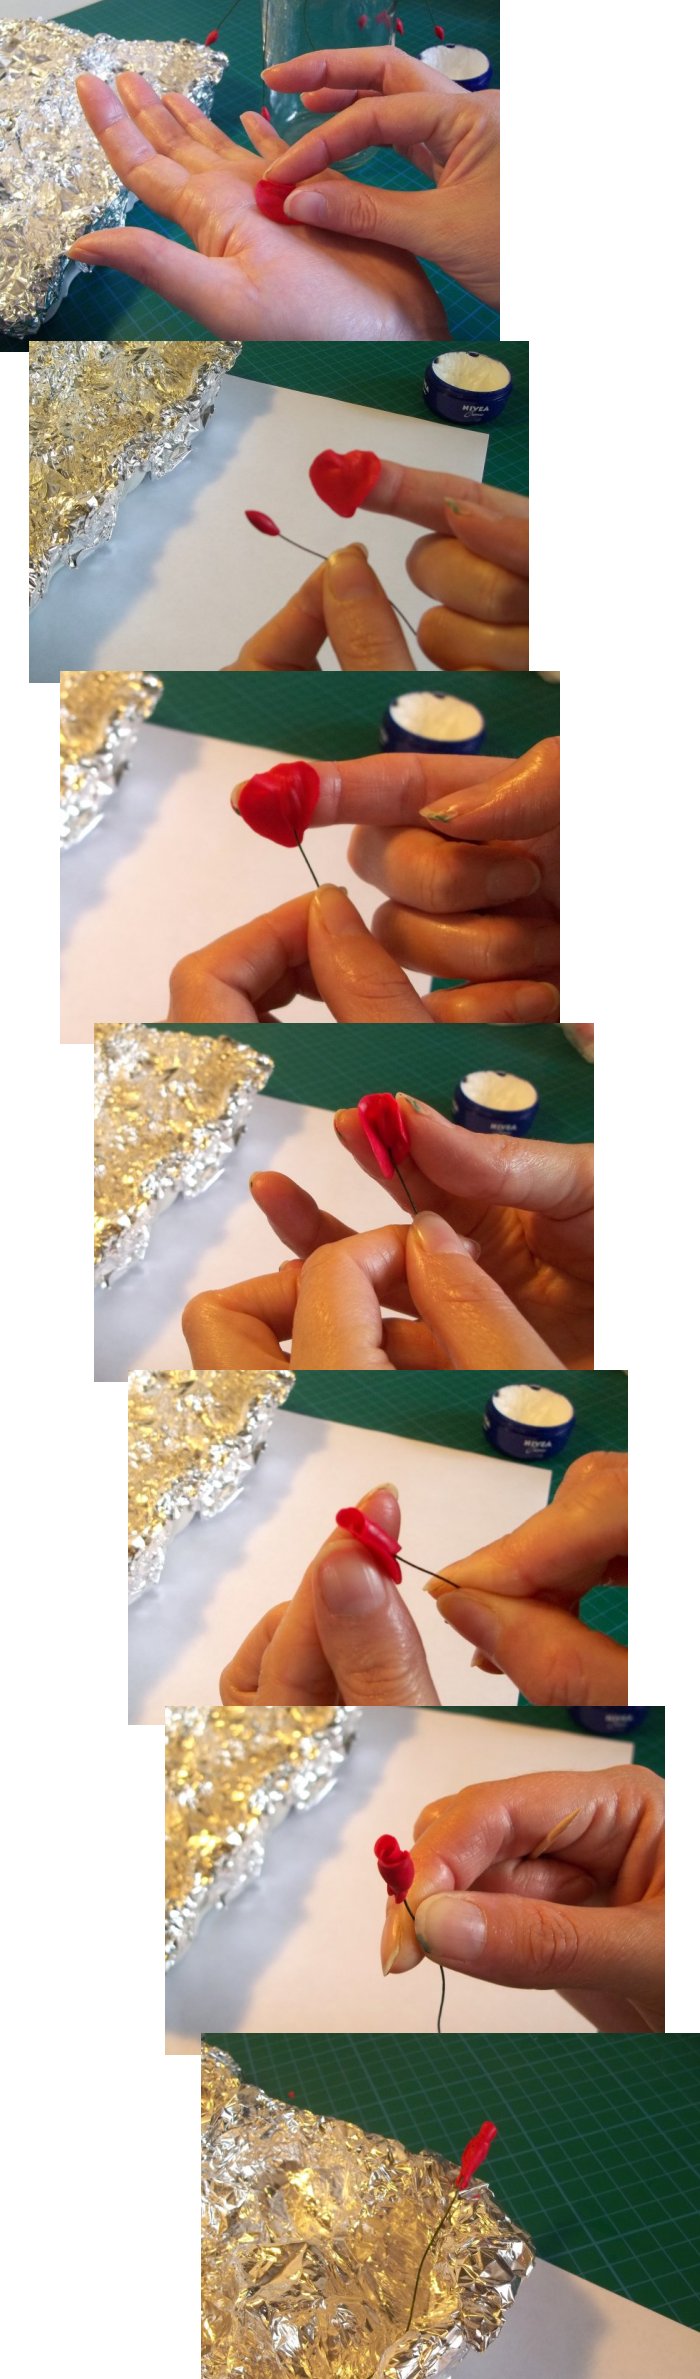
10. Make another petal and wrap around the cone again, overlapping the last petal, leave one side of the petal open.
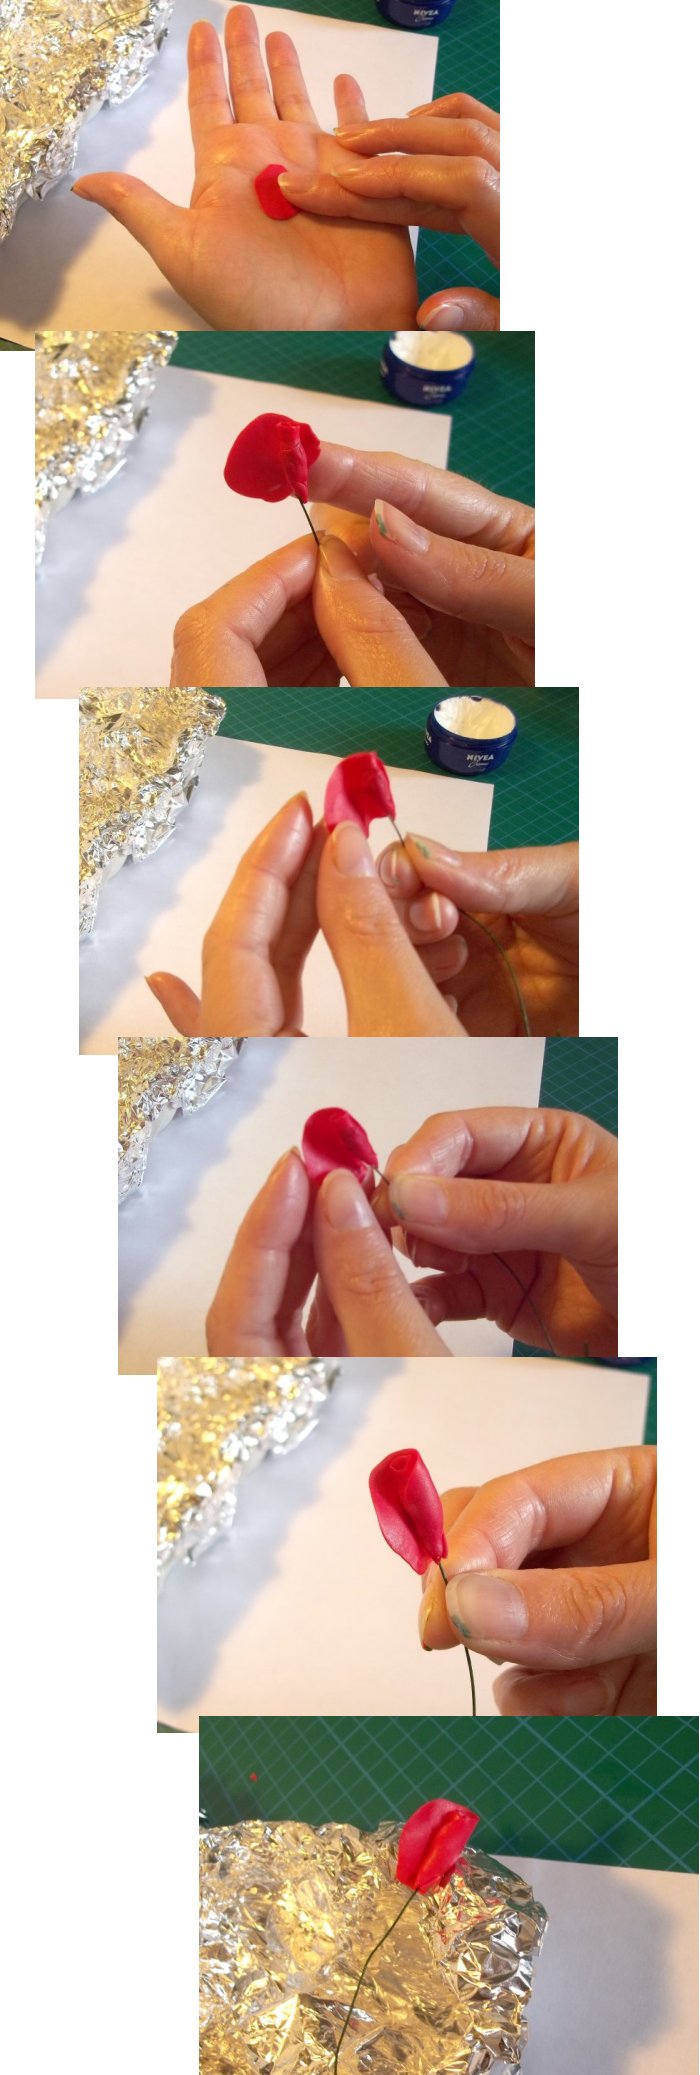
11. Make the next petal and tuck it inside the open side of the previous petal.
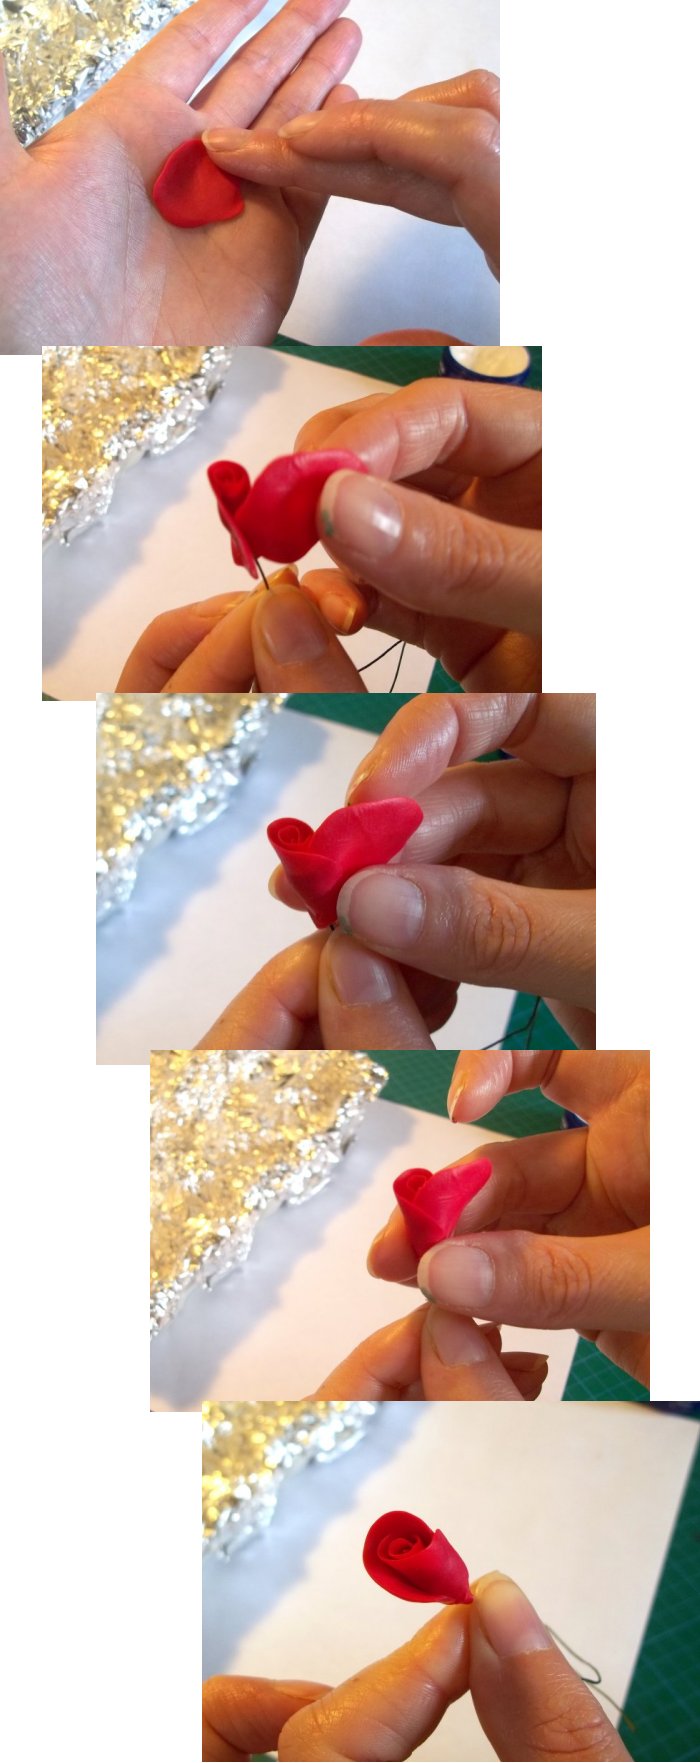
12. Continue making and placing the petals until you have the size rose you require (1 or 2 will make a bud - 9 or 10 will form a half rose - 14 or 15 will make a full rose)
**TOP TIP - You will need to make the petals a little larger as the rose grows in size. Open out the later petals just like in a real rose by attaching them only at the lower section - TOP TIP**
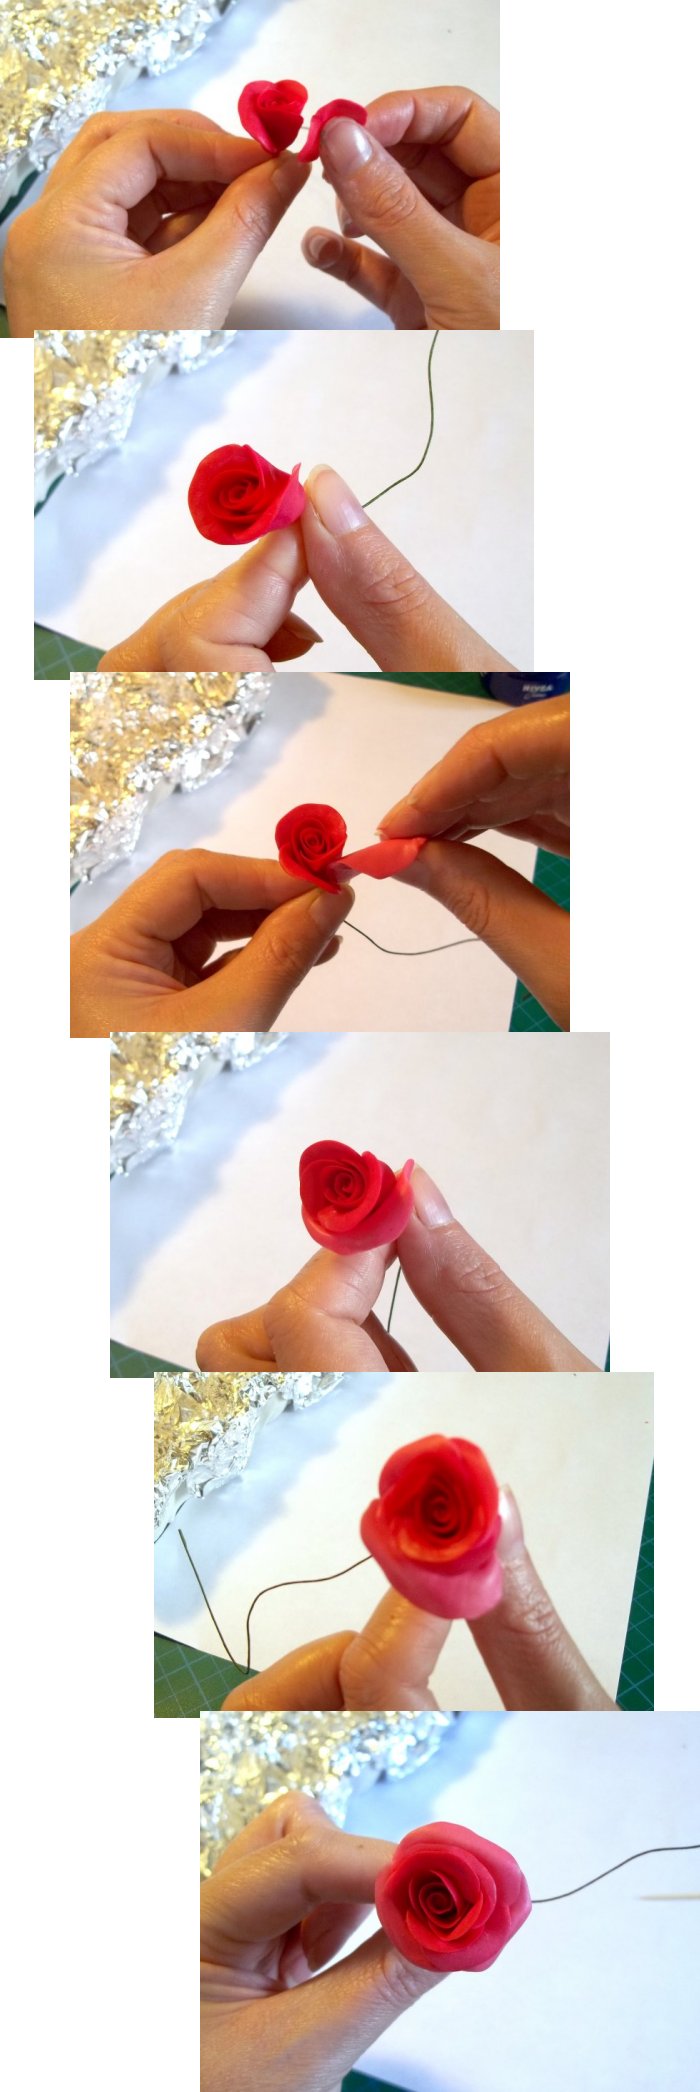
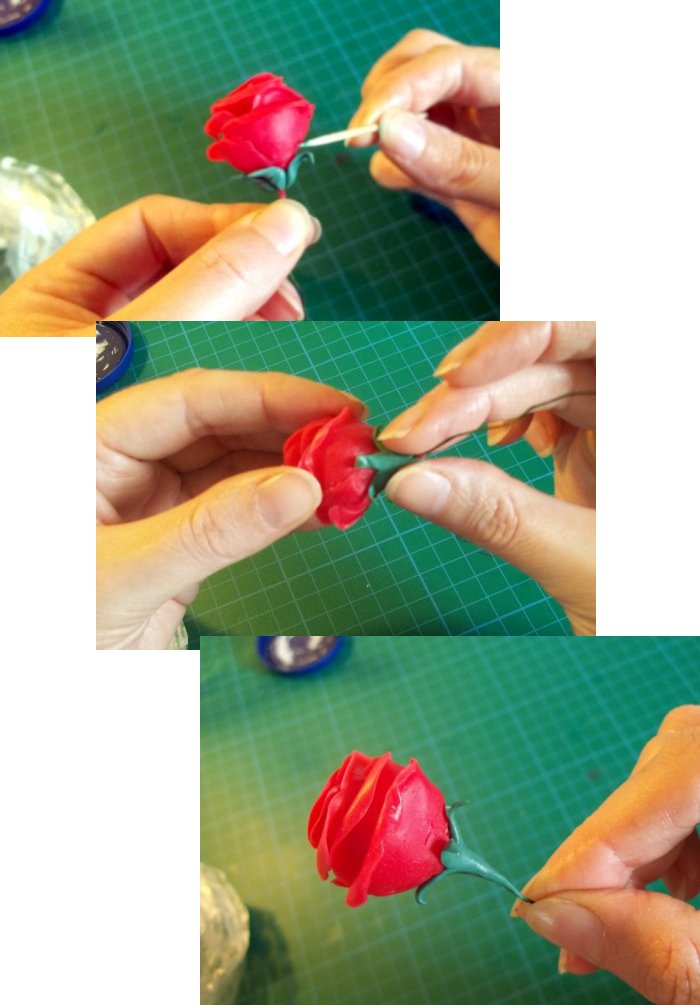
13. Use a cocktail stick to gently bend and curl back the outer petals.
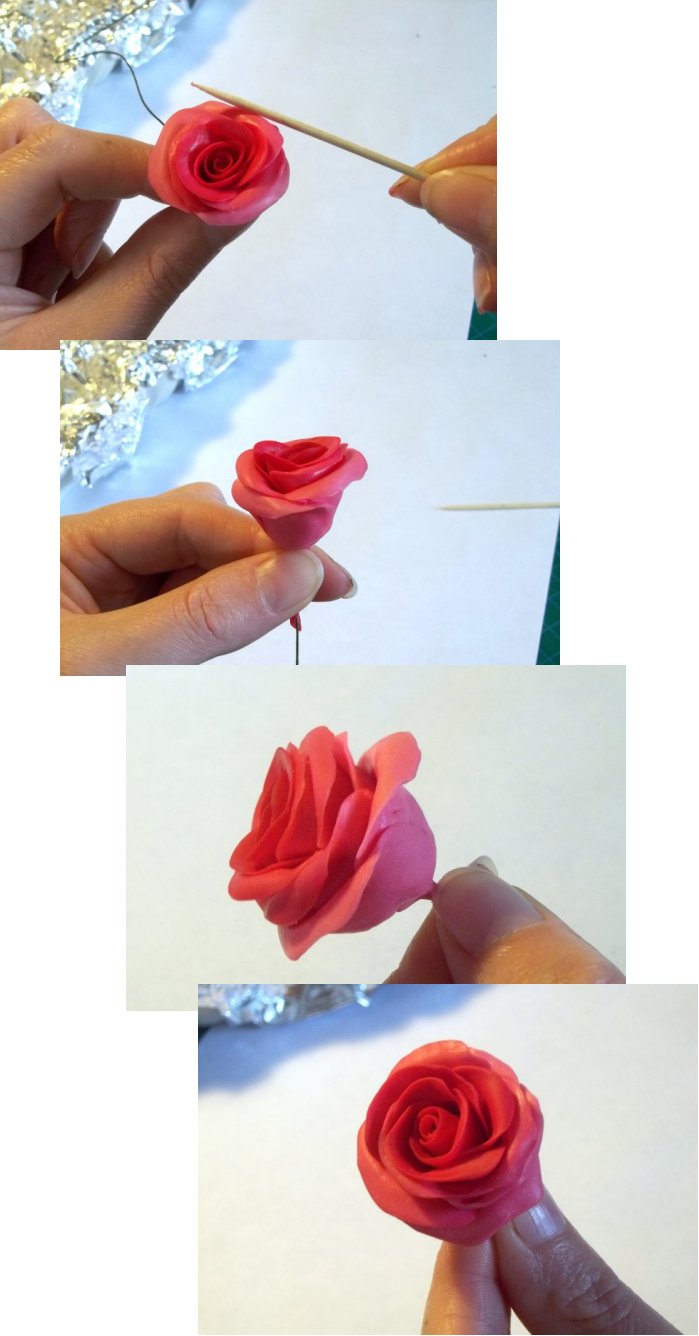
14. Leave to dry by resting gently in the foil covered egg box (this may take a couple of days due to the thickness of the base of the rose)
15. Calyx - Colour some clay with a little green acrylic paint and remember that any clay you don't use straight away should be kept safe in a moisturised sandwich/freezer bag.

16. Shape 5 small cone shapes and between your moisturised palm and fingers, flatten and shape one end of each cone to a point.

17. Place them one at a time in a circle around to the base of the rose, with the thicker part of the cone at the base (the flower is dry so it is okay to hold it gently by the rose part while fitting the calyx).
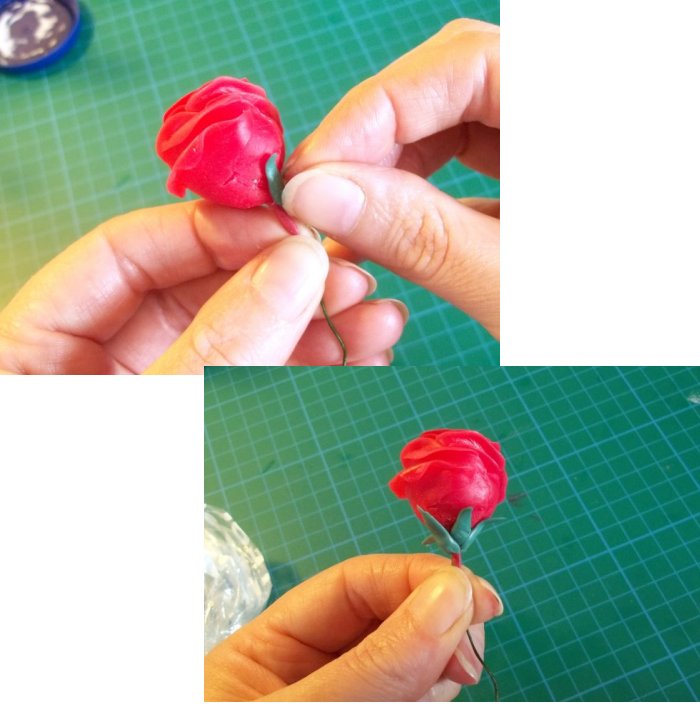
18. Carefully curl the points back slightly with a cocktail stick. (for small bud roses - the whole of the calyx fits snugly against the rose). Smooth the joins and tidy the base of the calyx with your finger, adding a little more clay if you need to, blending it to the wire.
19. Hook the wire over the glass jar and leave to dry overnight.
20. When the flowers are completely dry, seal and protect them with Mod-Podge or clear acrylic varnish (make sure to get into all the nooks & crannies, covering the flower & calyx completely) and leave to dry.
21. Leaves - Mix a little green acrylic paint into some clay for the leaves, and remember that any clay you don't use straight away should be kept safe in a moisturised sandwich/freezer bag. (I used the same clay that I coloured and used for the calyx.)
22. Cover work surface & rolling pin with wax paper, spread some moisturiser over them. Roll out some clay and cut out - remembering to apply moisturiser to all cutters and surfaces etc to stop the clay from sticking. Lightly draw on some vein details with a cocktail stick. Do not try and take the leaves off the paper, leave them to dry on the wax paper, to give them extra shape & interest place the paper over a curved surface (such as a rolling pin) and leave to dry overnight.
**TOP TIP - Do not use all your green clay making leaves, keep some left over to attach the leaves to florists wire when they are dry -TOP TIP**
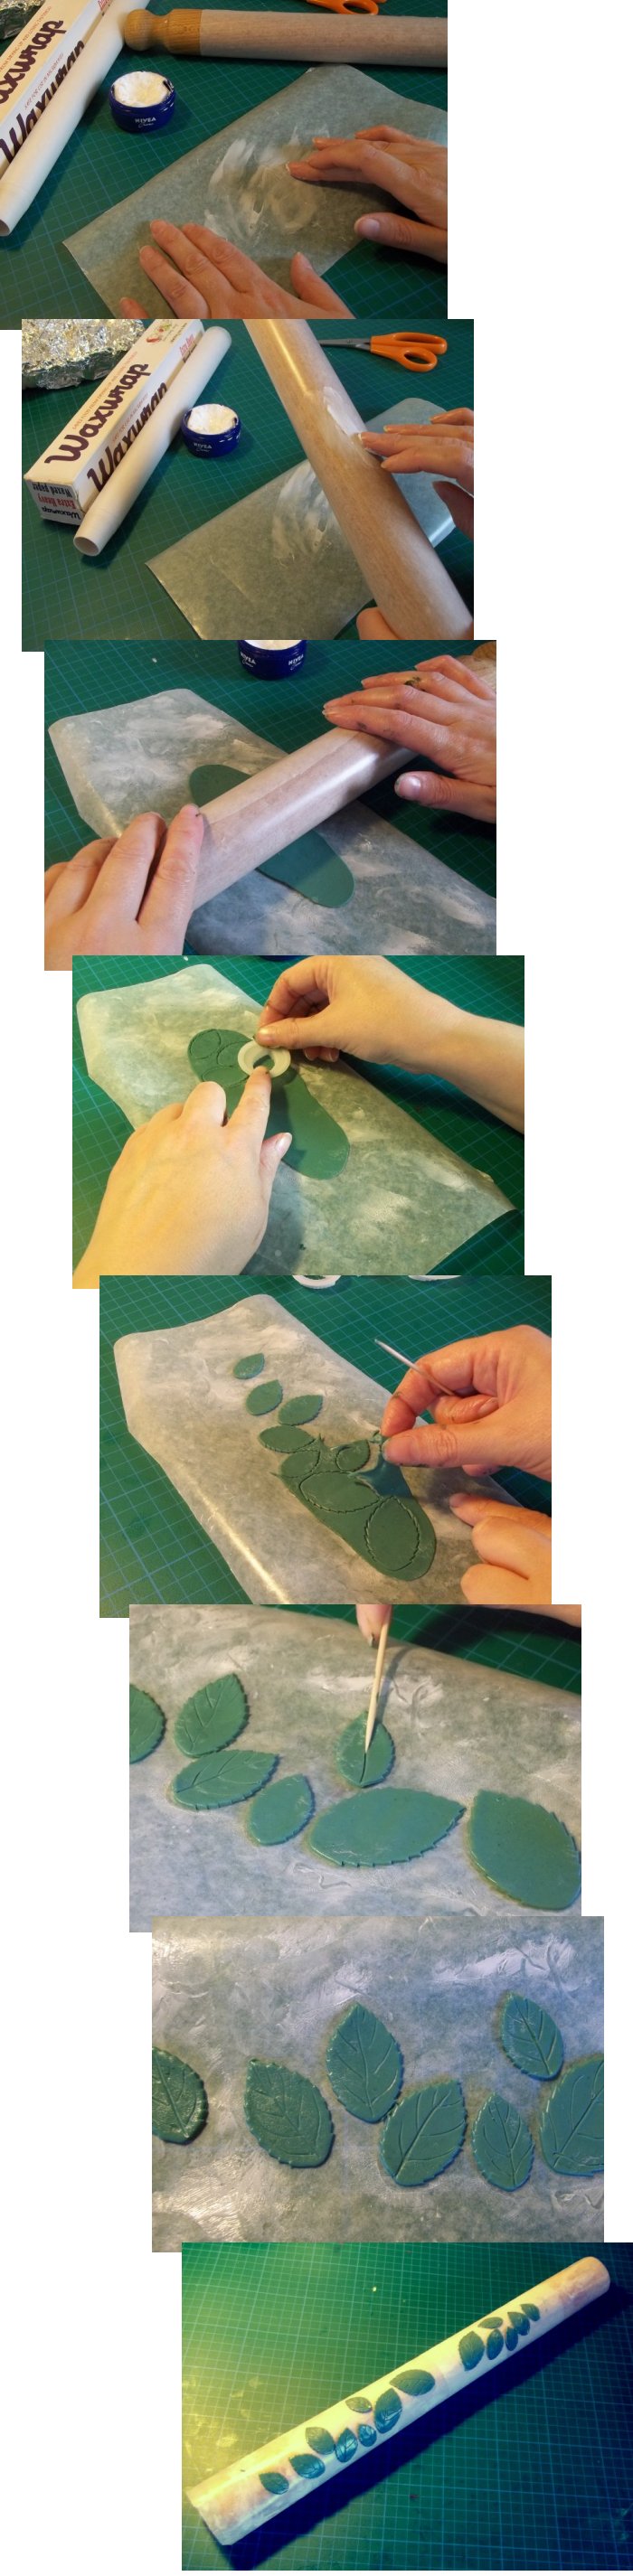
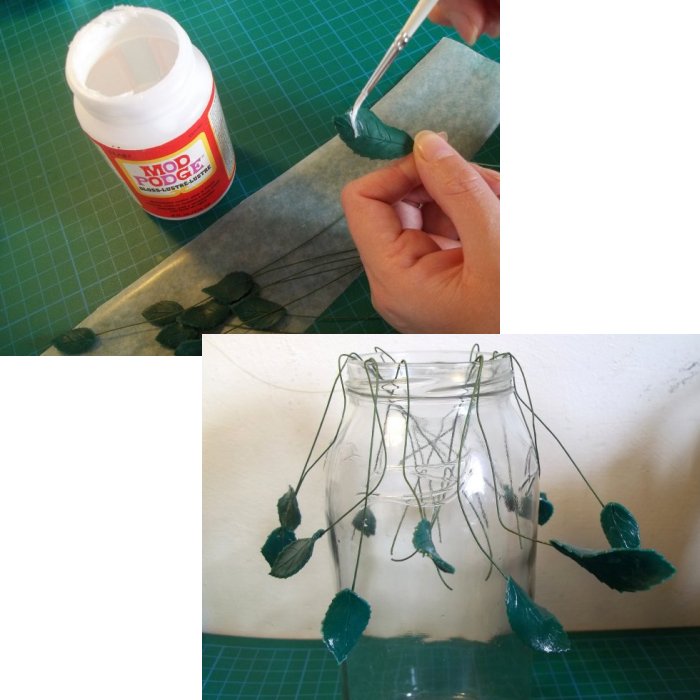
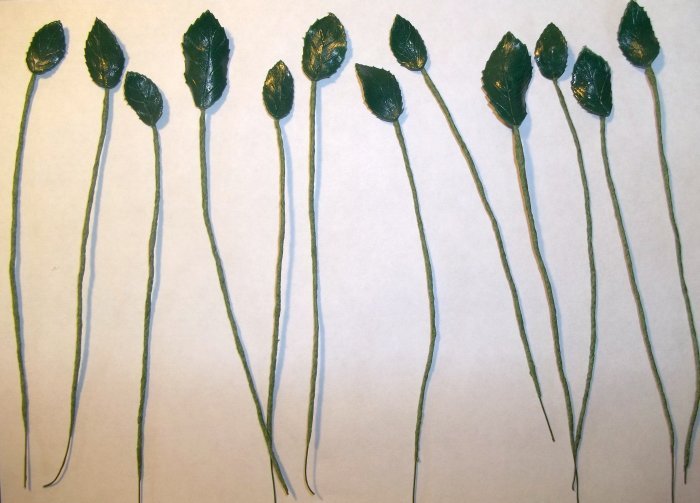
23. After the over night drying you will find that they are dry & peel easily off of the wax paper. They will probably be a little flexible, this is quite normal at this stage. Curl the ends of some wires and place them on the back of each leaf, securing in place with a little green coloured clay and leave to dry. As the clay dries it shrinks slightly, this will alter the shape of the leaves giving them more life. Leave them overnight to dry.
**TOP TIP - When dry you will find that the clay is still a little flexible until it has been sealed with Mod-Podge or clear acrylic varnish - TOP TIP**

24. When the leaves are completely dry, seal and protect both sides of the leaves with Mod-Podge or clear acrylic varnish and leave to dry.
25. Cover the wires of the flowers and leaves with the florist tape - Florist tape has a shiny and a dull side, place the shiny side against the wire, you need to pull the tape slightly as you wrap it around the wires to get it to stick, and also twist & smooth it with your fingers at the same time.


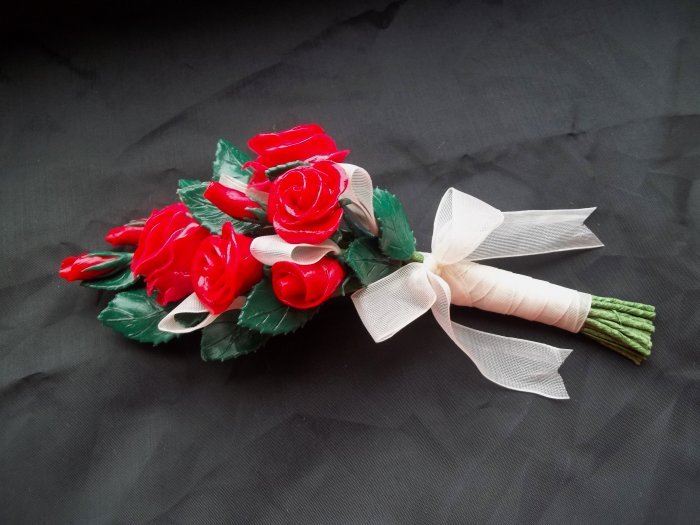
26. I've added some cream ribbon that I attached to wire with some florists tape to add another colour and texture to the arrangement. To make the wired ribbon bend a short length of ribbon into 1 or 2 loops, fold together at the base. Wrap some wire around the folded end and then wrap and smooth some florist tape around the base of the ribbon and continue to wrap & smooth down the wire.)

27. Assemble your floral arrangement by joining the flowers and leaves etc together with the florists' tape.
**TOP TIP - Don't rush assembling your floral arrangement, keep looking at it from all angles as you attach the flowers & leaves etc - TOP TIP**

Back to the Sculpting and Modelling menu...