
Paper Weaving - make a greetings card


Weaving with Paper/Card
Weaving is very versatile as it can be made out of many things such as paper and card, wool, fabric, ribbon, as well as organic material such as willow reeds and long leaves, anything flexible, long and not too wide will probably work. Here Im showing you how to weave with paper/card and how to use it in a greetings card. Its a great way to have a go at weaving, once youve tried it I guarantee youll want to weave with other materials. There will be other projects involving weaving with other materials on the things-to-make-and-do website so try them out and have some fun.
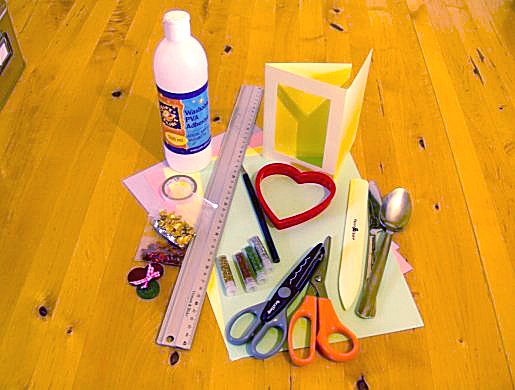
You will need:
A selection of coloured papers or cards for the weaving and backing if needed
Pencil
Ruler
PVA Glue or double sided sticky tape
A bone folder or rounded end knife and spoon
Scissors (normal or fancy)
Extra decorations (ribbon, sequins,buttons etc)
What to do
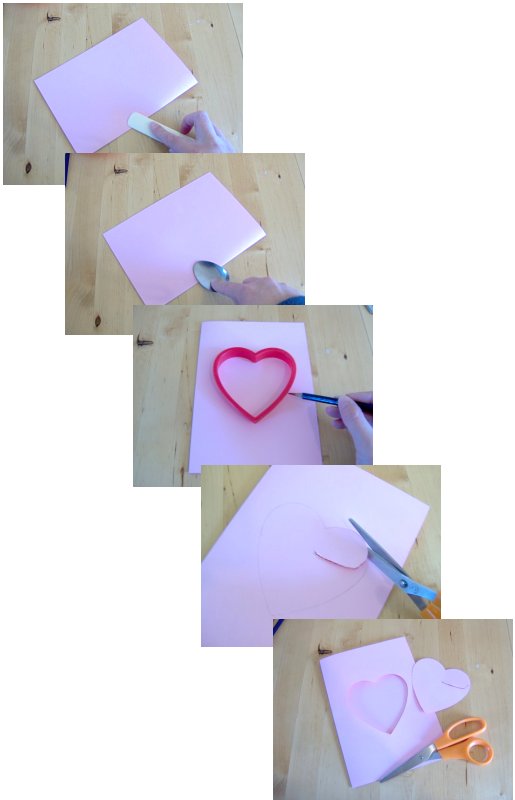
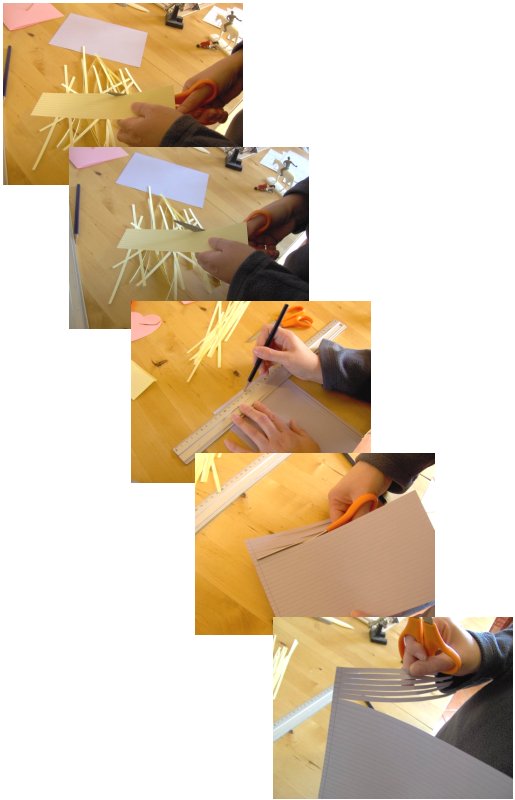
1. If you do not have a window card then fold your piece of card in half, and smooth the crease using a bone folder or the back of a spoon. Then draw around a shape (Ive used a heart shaped cookie cutter) and cut this out (remember to start cutting by making a hole inside the shape not on the outside of the card).
2. Measure the size of the opening and cut two pieces of card/paper 4 or 5cm larger than the opening.
3. Decide how wide you would like the strips of card to be that you will be weaving with and mark these on two opposite ends of the card, join these marks together with a pencil.
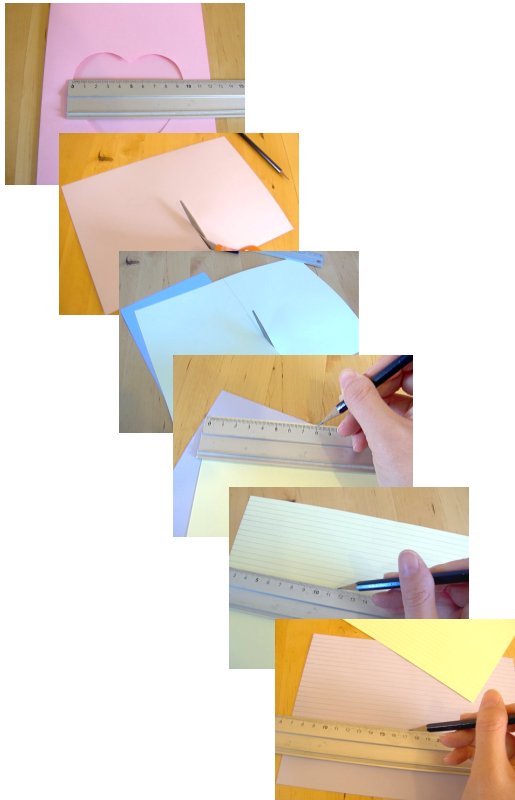
4. On one of the pieces of marked card cut the strips out, on the other piece draw another line ½ cm from the edge of one side in the opposite direction to the lines already drawn. Cut out the strips but STOP at the line (this makes it a lot easier to weave onto.)
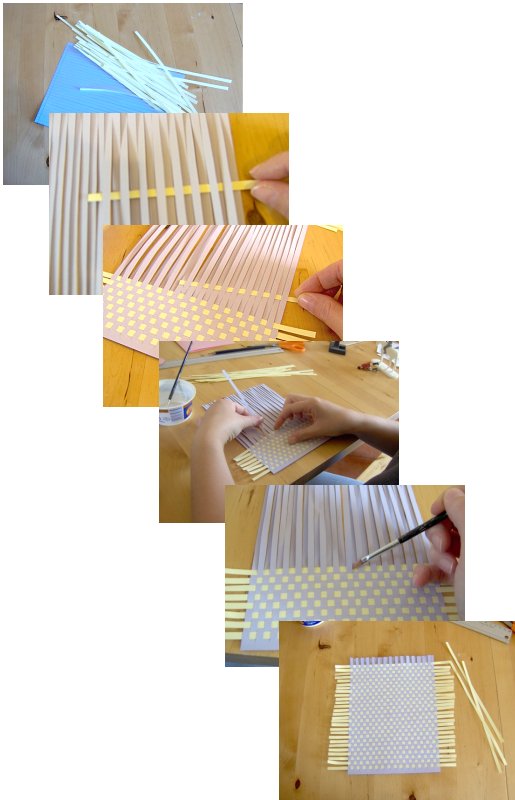
5. Place the card with the strips attached in front of you, making sure that the side with any pencil marks on it is underneath. Take one of the cut off strips of card and start threading over and under the fixed strips, again making sure any pencil marks are underneath. Ease it to the end that wasnt cut (this may be a little stiff to start with but gently lifting up some of the top strips as you move it into position will help), also put a small dab of PVA glue between the two end strips and one in the middle to help hold it in place.
6. Take another strip and this time go under then over the fixed strips, easing it as close to the previous one as you can adding a small dab of glue on each end and one in the middle as before.
7. Keep doing this until you have used all the strips or you reach the end of the fixed strips. It is important to keep checking that the pattern it correct, it is very frustrating to discover that you went wrong a few lines back and have to undo it or start again (glued so cant undo).
8. You now have a complete piece of paper weaving. Cut it so that it is 2 or 3 cm bigger than the opening in the card. KEEP the cut off pieces as they can be used to make a bookmark (see the bookmark section in paper and card projects) or they can be used to fill smaller shaped openings in other projects. Using either PVA glue or double-sided sticky tape, attach the weaving to the back of the opening, remembering to have the best side facing the right way.
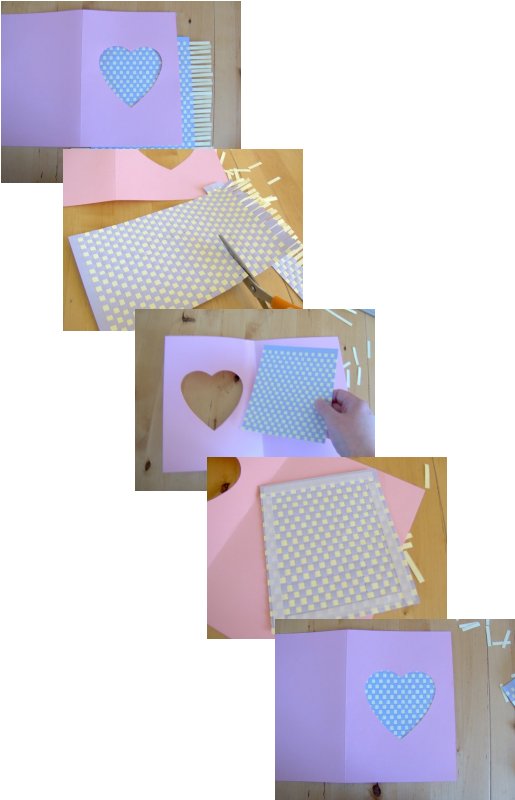
9. If you have used a ready made window card you will have a third side to cover the back of the weaving. If you have made your own card then with normal or fancy scissors cut a piece of paper or card slightly smaller than the card itself. Stick this to the inside of the card with PVA glue or double-sided sticky tape.
You may want to score a line where the card should fold, using a bone folder or the back of a table knife.

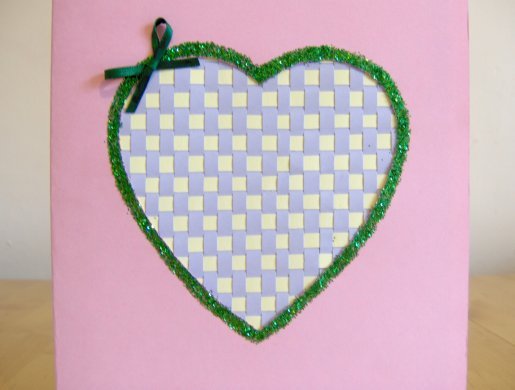
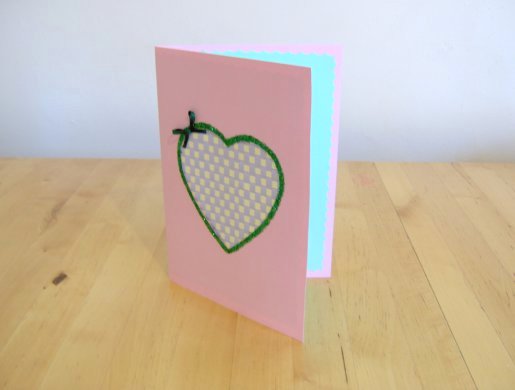
10. The weaving is now complete so you can finish off your card with decorations of your choice. I spread some PVA glue around the edge of the heart and sprinkled on some glitter then added a little ribbon bow to match.
Back to the Paper and Card projects menu...