

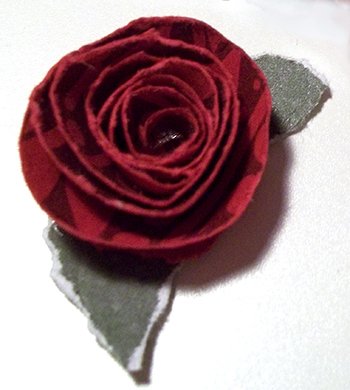
Paper Roses
These roses must be one of the quickest and impressive projects I've tried. In literally a couple of minutes you'll have completed roses in front of you ready to adorn a gift or card. For a traditional look make them from plain natural coloured papers or for a more contemporary twist use multi-coloured or bright shades. They are also a great way of using up scraps of paper left over from other projects, make a whole bunch of them in a variety of colours and then just wait for the right project/gift etc to come along.

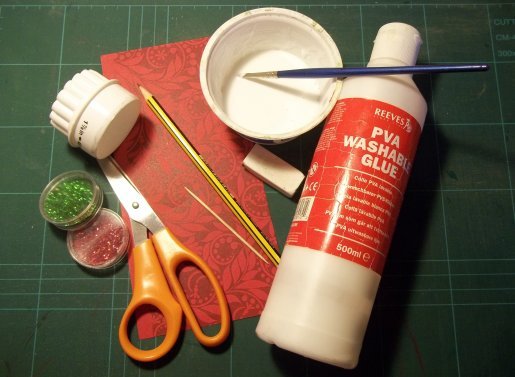
You will need:
Pencil and eraser
A pair of compasses or a round object to use as a guide (lids, cups, cookie cutters etc)
PVA glue and brush/spreader
Cocktail Stick
Scissors
Inks, glitter etc (optional)
What to do
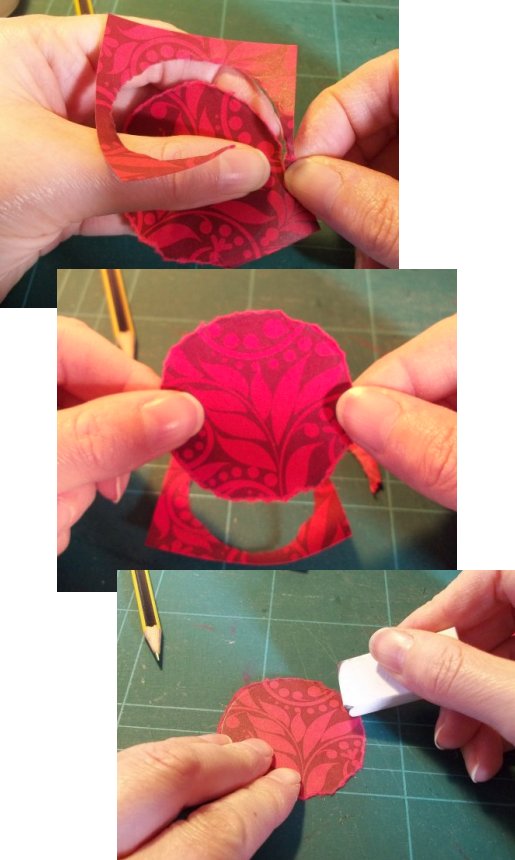
1. Lightly draw a circle on a piece of paper (the larger the circle, bigger the rose. I've used a small cookie cutter).
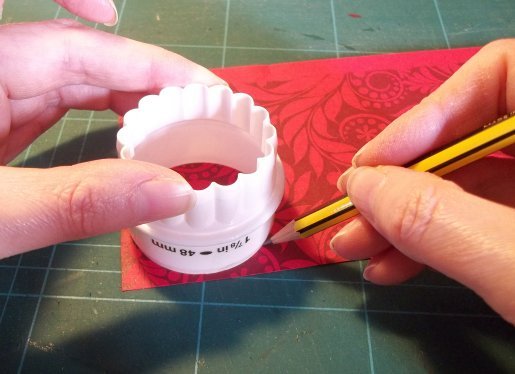
2. If you are using a large piece of paper, cut it to a more manageable size around the circle (not on the drawn line).
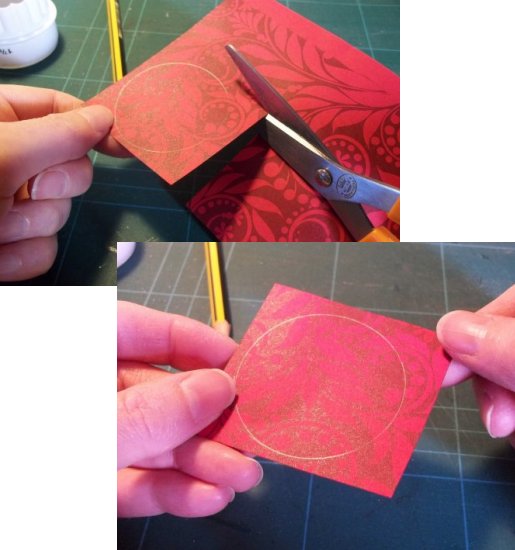
3. Tear the paper using the drawn circle as a guide. Rub out any remaining pencil marks.
4. Carefully tear a spiral leaving a small circle of paper in the centre.
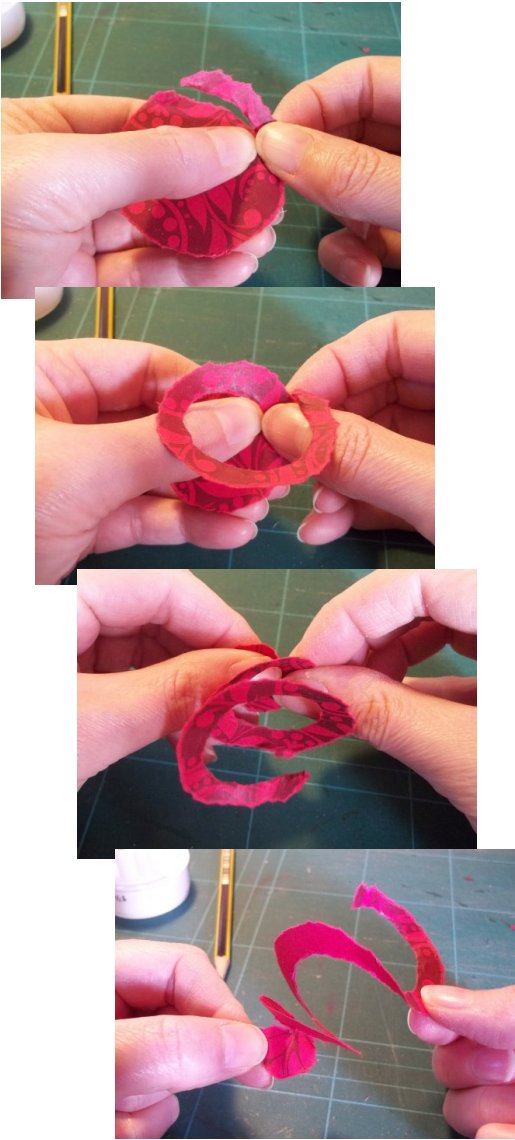
5. Starting at the outer edge gently wind the spiral around a cocktail-stick, ending at the small inner circle.
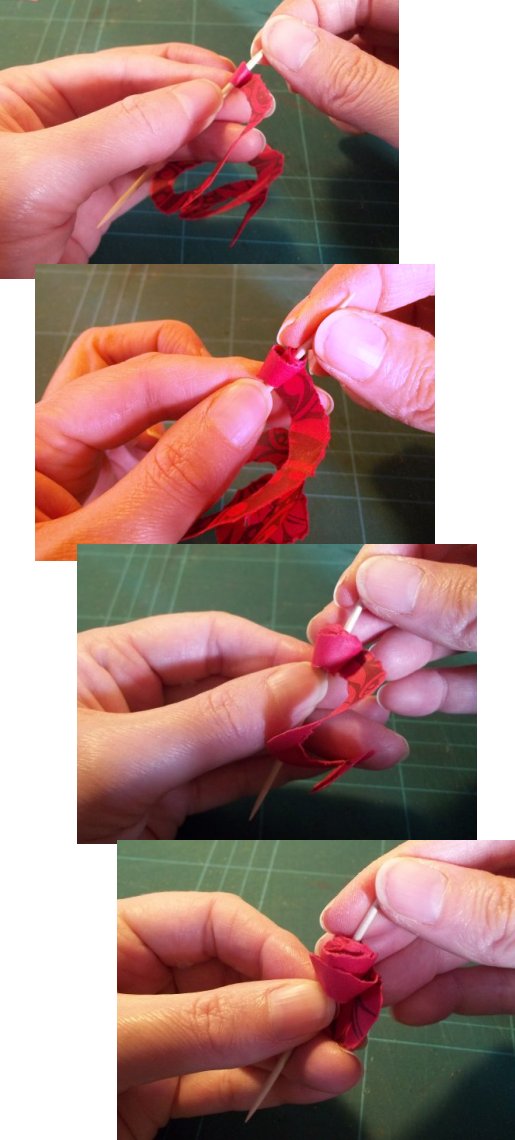
6. Remove the cocktail-stick letting the spiral naturally unwind a little.

7. Some paper roses will look good straight away, but others may need to be teased into your desired shape (as with real roses, every paper rose is unique, even those made from the same piece of paper and using the same circle template will vary in size and shape)
8. Spread some PVA glue over the small circle and gently press the rose into position. Hold in place for a few seconds until stuck then leave to dry (don't worry if you can see some glue as it will dry clear).
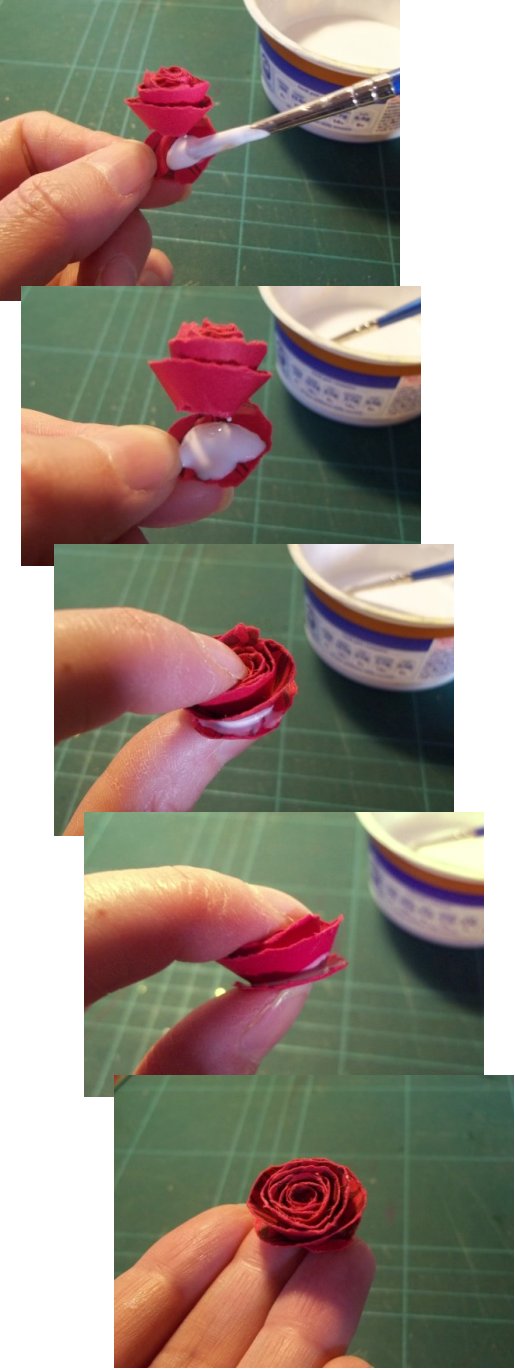
9. If you would like to add some leaves to your rose lightly draw a small leaf shape on a piece of green paper and tear the shape out, erase any pencil marks and glue to the underside of the rose. Leave to dry.
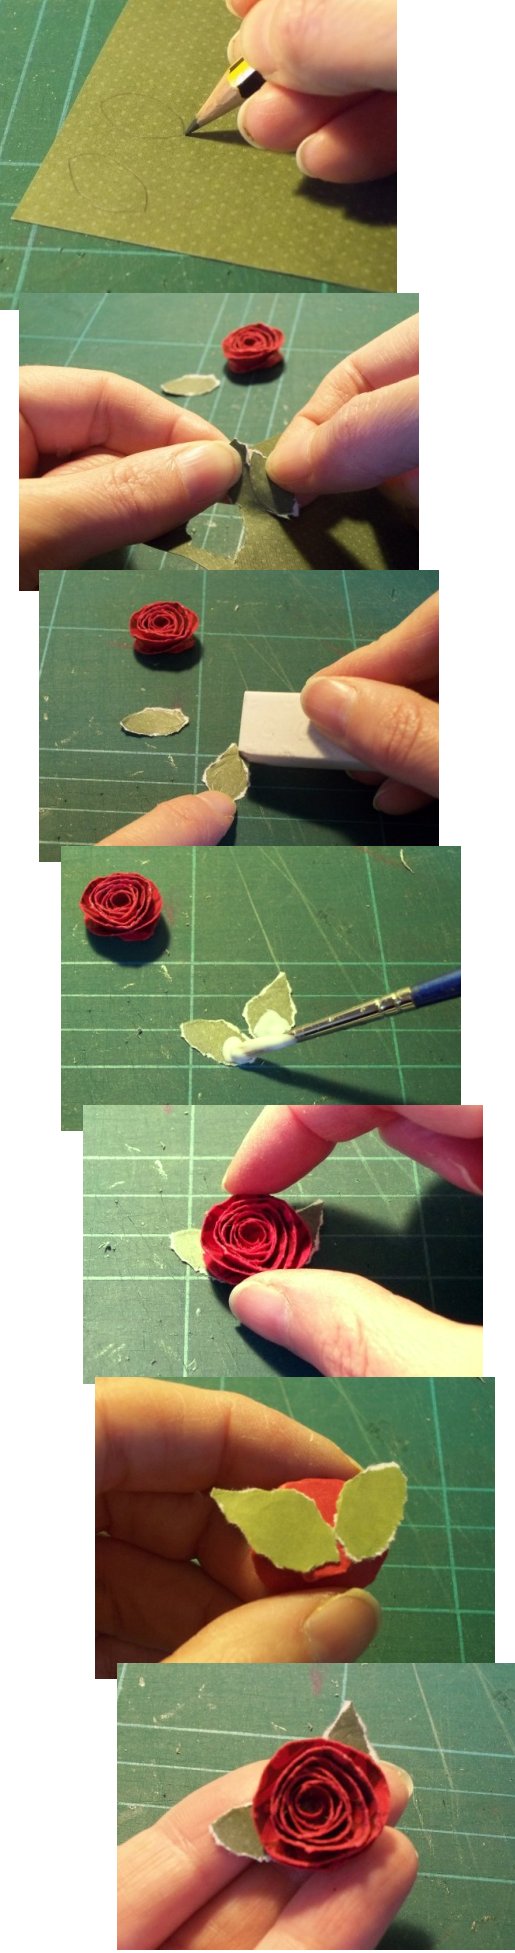
10. Optional - You can add an extra interest to the roses and leaves by highlighting the edges with a little PVA glue and a sprinkle of glitter. Leave to dry.

11. The rose is now ready to add the finishing touch to a card, gift or other craft project.

Back to the Paper and Card projects menu...