

Make a Paper Bead Bracelet
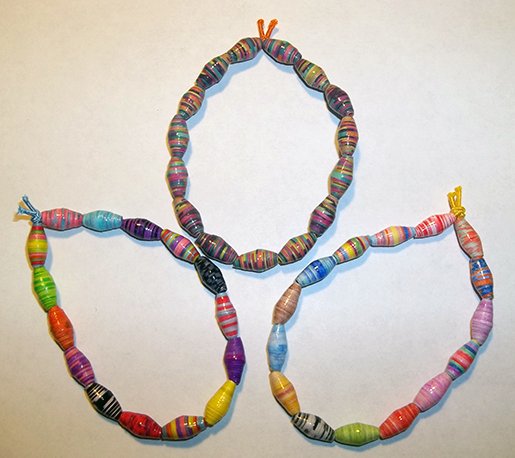

Paper Bead Bracelet
I just love creating beads from paper. They are so simple to make and require very little materials to achieve fantastic results. Once you've got the hang of them I guarantee you'll be churning them out in all the colours of the rainbow and making a whole collection of bracelets & necklaces, adding them to bookmarks & tassels or even making them into belts and dainty tie-backs for curtains, the options are endless.
For really quick results use coloured/patterned paper, but if you're after a specific shade or colour combination then raid the printer for paper and grab some felt-tips for a strong colour or pencils/crayons for a more subtle shade.
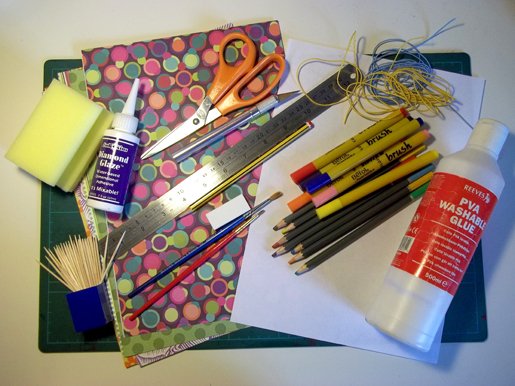
You will need:
A4 double sided coloured/patterned paper OR
A4 white paper and felt-tips/crayons/coloured pencils
Pencil and eraser
Ruler
Scissors or craft knife
PVA glue
Paintbrushes
Diamond Glaze (available from good art stores) - a good quality varnish could be used instead, remember to follow the instructions that accompany the varnish as it may take longer to dry between coats - DO NOT use nail varnish, it is brittle and will not last.
Cocktail sticks/toothpicks
Foam sponge/polystyrene block/corks (to stick cocktail sticks into while beads are drying)
Cord elastic
What to do
To make a bracelet you will need approximately 15 beads depending on how big your wrist is - to make a necklace simply make more beads and increase the length of the elastic.
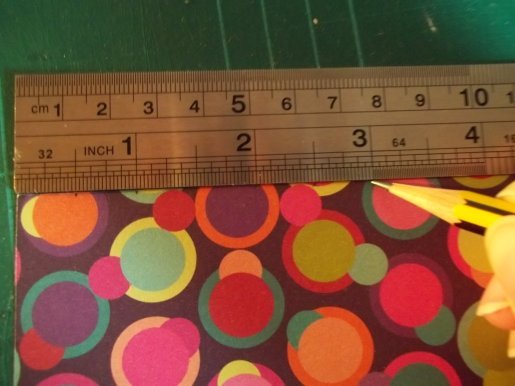
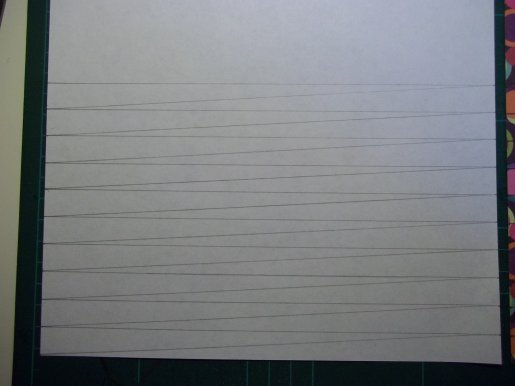
1. Measure and mark both of the long sides of a piece of paper every ½ inch (start at the same end so that the marks are level with each other).
2. Using the ruler draw a straight line from the very bottom corner of the paper on the left hand side to the first ½ inch mark on the right hand side. This should make a long triangle shape. (If you are using a craft knife to cut out the triangles then you can just cut them straight out rather than marking them with pencil first)
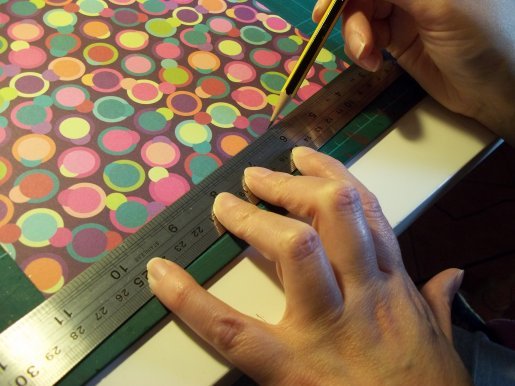
3. Draw another line from the first mark on the right hand side (where the first line ended) to the first mark on the left hand side (this should make another triangle exactly the same as the first one).
4. Each triangle will turn into a bead so keep drawing the triangles in the same way until you have enough triangles for the number of beads you need (plus a few extra) or until you fill the paper (an A4 sheet of paper will make 46 beads).
**always make a few extra beads than you need in case any don't come cleanly off the cocktail-sticks**
Coloured paper marked with lines:

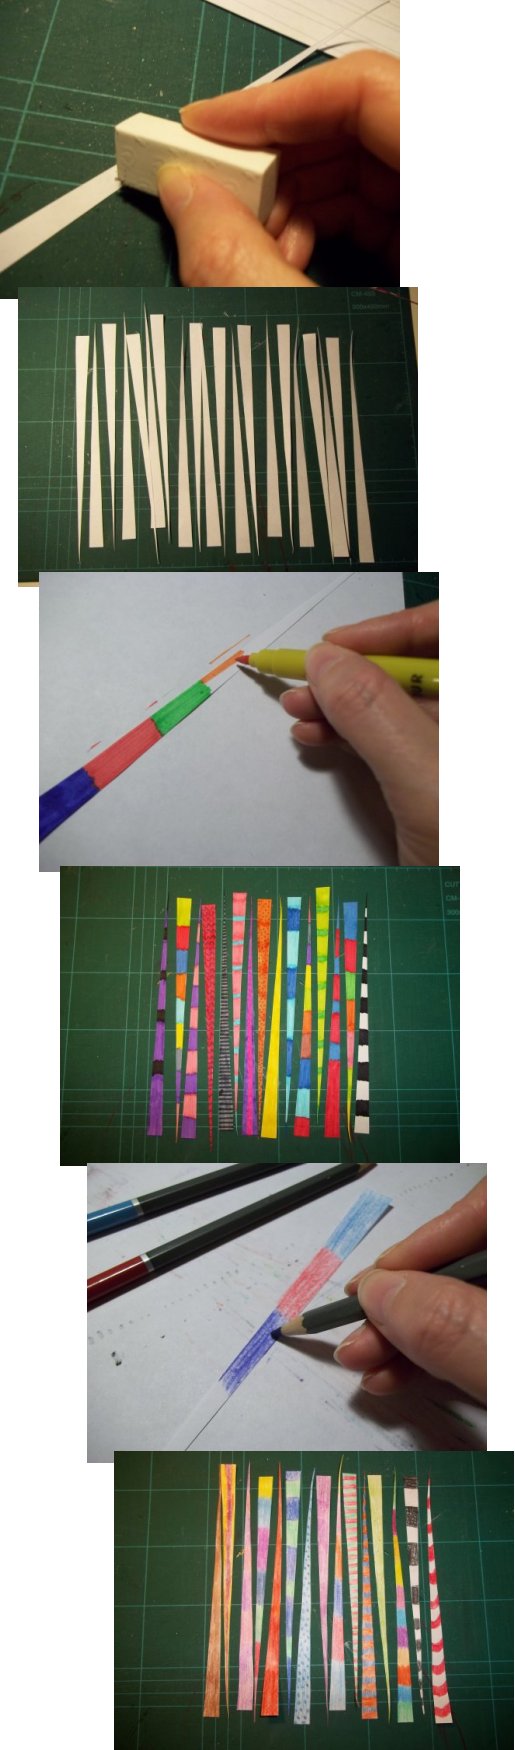
Plain paper marked with lines:
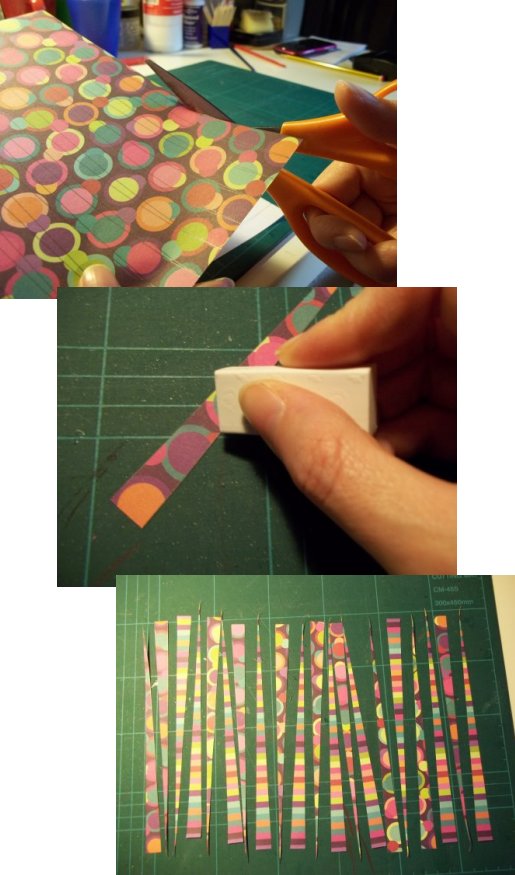
5. Carefully cut out the first triangle and rub out any pencil marks that remain. If you are using coloured paper you can go straight to step 6, if you are using white paper and want to colour the beads yourself, now is the time to do it. Colour both sides of the paper making sure the edges are covered.
The coloured paper:
And the plain paper, coloured using felt tips or coloured pencils:
6. Starting at the widest end of the triangle, carefully wrap the paper triangle tightly around the centre of a cocktail stick. To make a bead with a good, even shape it is important to keep the paper central whilst wrapping, if you feel you are veering off to one side just unwrap it a little and re-wrap to get back on track.
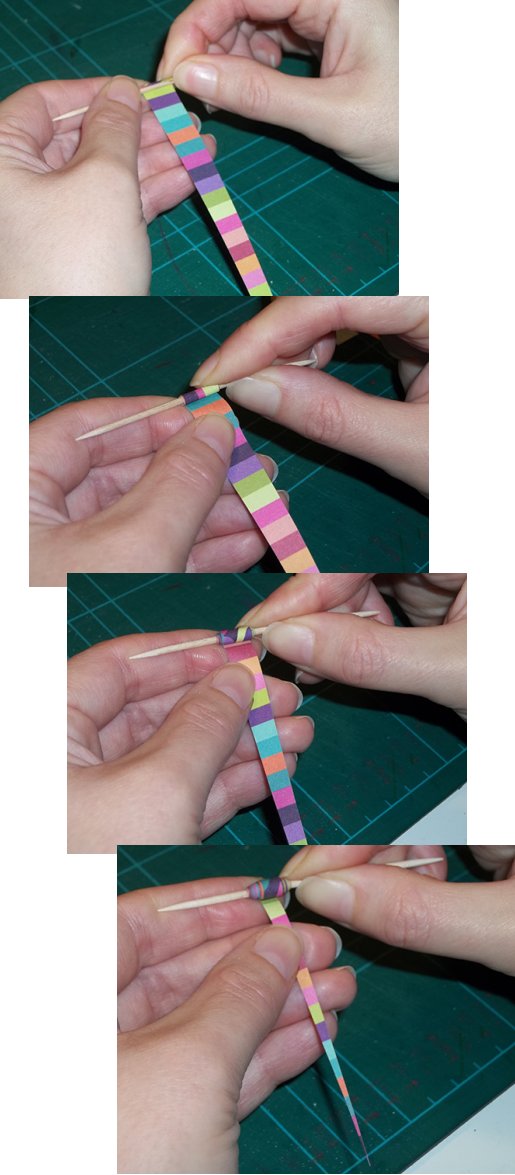
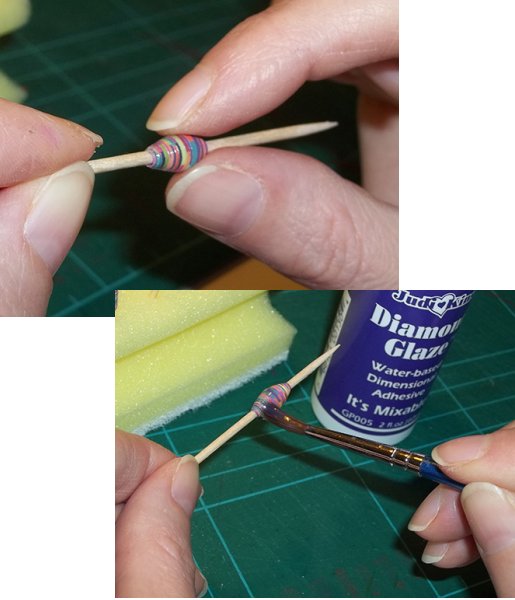
7. When you get near the pointed end of the triangle dab on a little PVA glue and finish wrapping the end smoothing over with your finger.
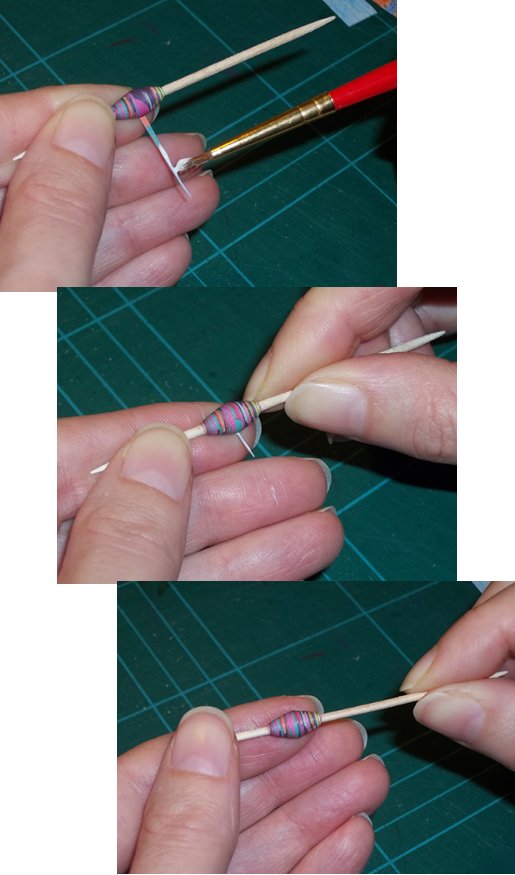
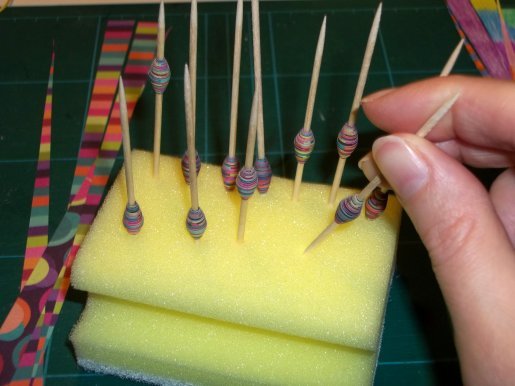
8. Place the cocktail stick into foam/cork/polystyrene etc to let it dry and keep it safe while you make some more beads. Place them in some kind of order so you know which ones you made first/last, this will help you keep track while you are glazing them.
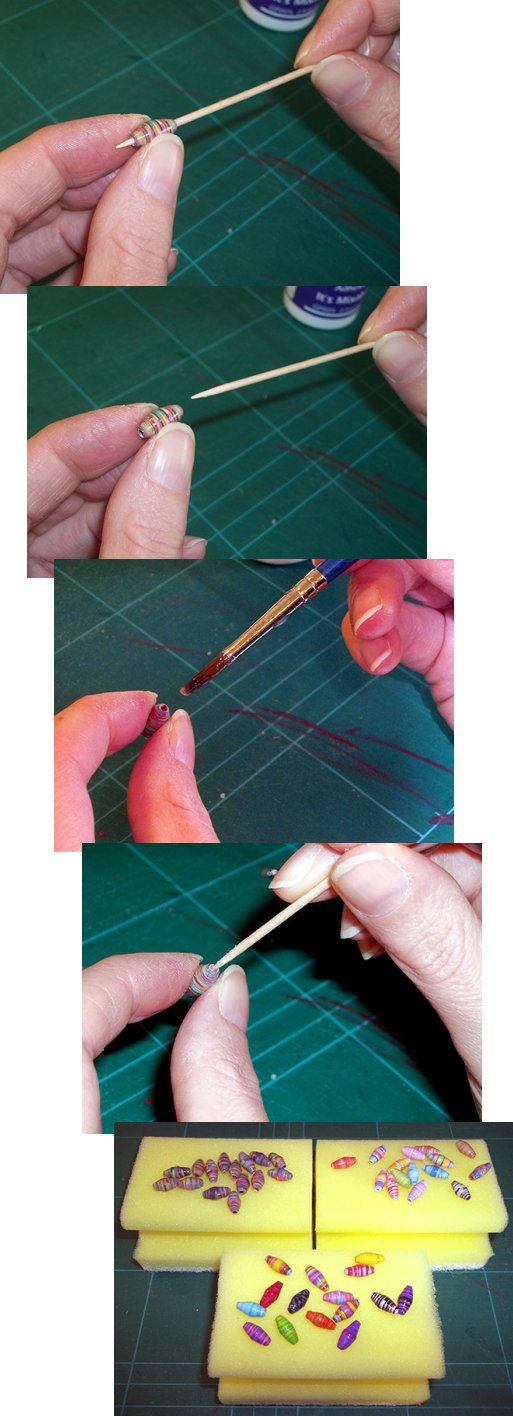
9. Next is the glazing part - Start with the first bead and glaze them in order. Holding the cocktail stick, carefully and evenly paint a thin coat of glaze over the bead using a paintbrush dipped in the diamond glaze. Place back on the foam/cork/polystyrene etc and leave to dry. Pick up the next bead and glaze in the same way. Continue glazing until they have all been glazed once. (they only need to dry for a couple of minutes before they are ready for the next coat, so if you have made quite a few beads by the time you have glazed the last one the first one will be ready for its second coat.
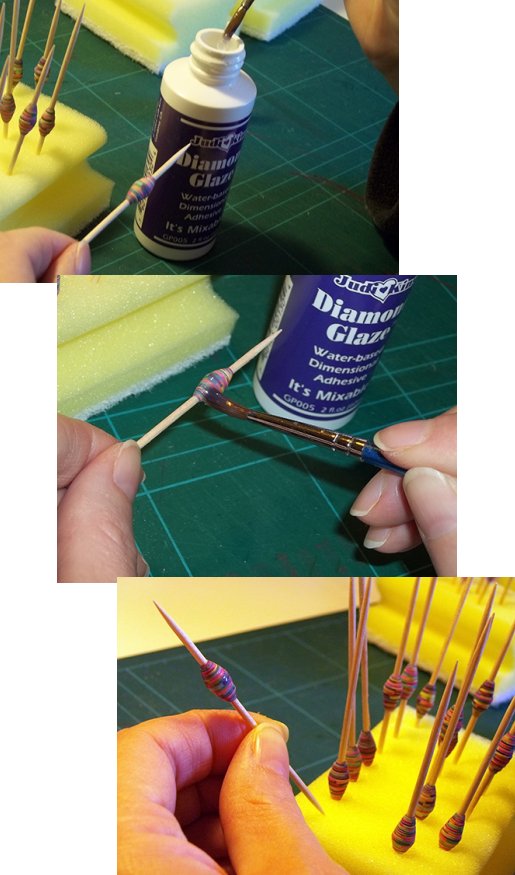
10. Gentle give each bead a little twist to loosen the bead from the cocktail-stick. Apply the second coat of glaze and leave to dry for a few minutes.
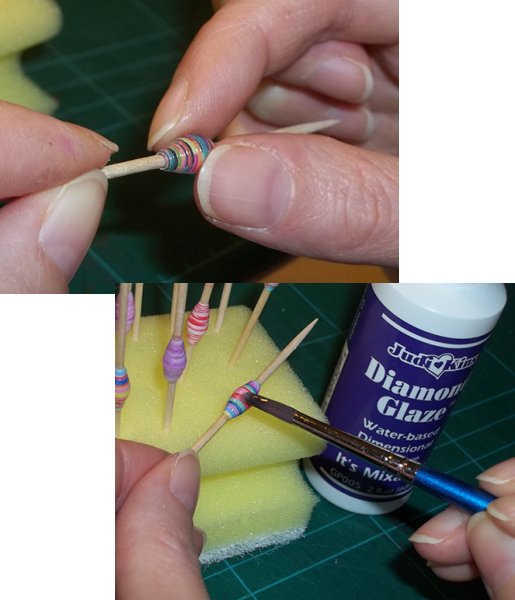
11. Carefully loosen the bead again and apply the third coat of glaze. Leave to dry for a few minutes until they are no longer tacky.
12. As soon as they are dry gently twist them and take them off the cocktail sticks and apply a little glaze to the two holes on each bead and smooth with a cocktail-stick making sure the opening is clear. Leave to dry and harden for a few minutes on the sponge (you can use them for a project as soon as they are dry and they will harden even more with time).
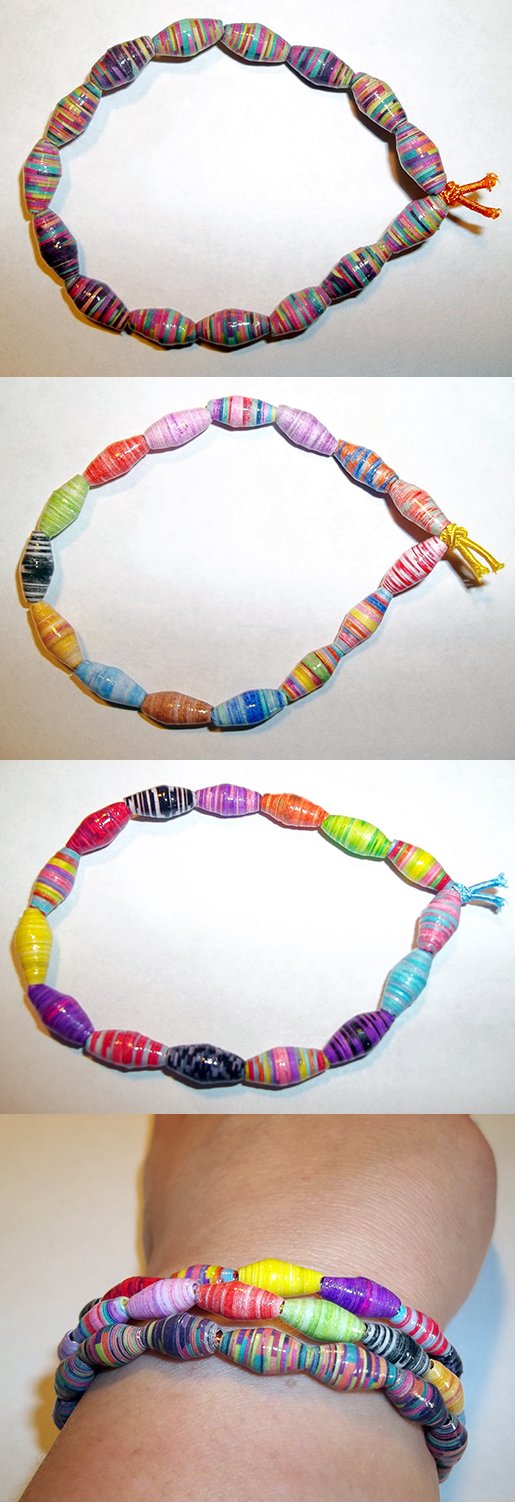
13. Now make into a bracelet etc or store for a later date. To make a bracelet cut a length of cord elastic which fits loosely around your wrist. Thread some beads onto the elastic, when you are happy that it is big enough tie the ends of the elastic together and trim the ends. For added protection you can add a drop of 'fray check' to the ends of the elastic but this is not essential.

Back to the Paper and Card projects menu...