

Weaving with a simple homemade loom


I love weaving, it is fun to do and results can be seen very quickly. It's a great project for children on a rainy weekend afternoon or to keep them entertained during the holidays or on winter evenings and you only need a few things to get started. It's a useful and colourful way to use up any part used balls of wool too.
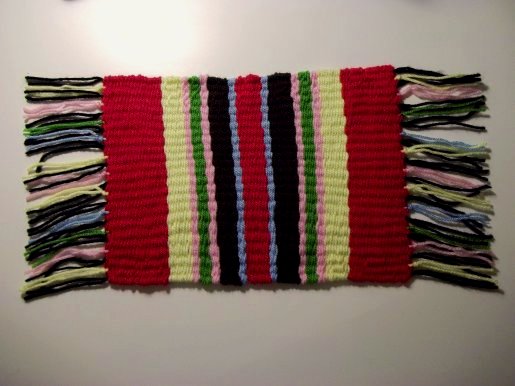
They can be made in any size. I remember making a small woven mat when I was at school which I gave to my Nan and Grandad as a present. For years they used it to sit their telephone on. Another idea is to make several the same size and use them as place mats, and then make matching square ones for coasters. A long thin version would be a wonderful bookmark too. So this weaving project can be turned into a variety of items and presents. Have fun.
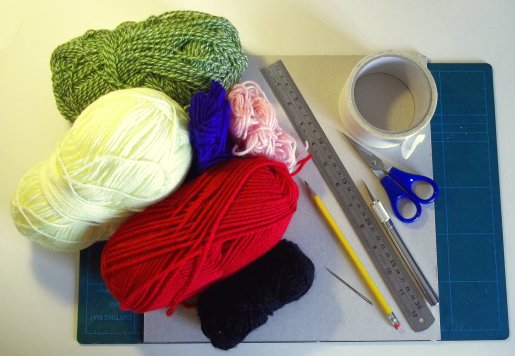
You will need:
Ruler and pencil
Craft knife
Scissors
Wools
Masking/sellotape tape
Tapestry needle (blunt end, big eye)
What to do
1. Decide how big you want your finished piece to be. It must be an odd cm width (eg 23cm for a large mat or 5cm for a bookmark) Cut a piece of stiff card 2cm wider than your chosen width (25cm for mat or 7cm for a bookmark) and 1cm longer than your chosen length (eg 30cm for the mat or 20cm for the bookmark)
The sizes I have given here are the ones I used, but you can make your weaving any size you like as long as it is an odd cm width.
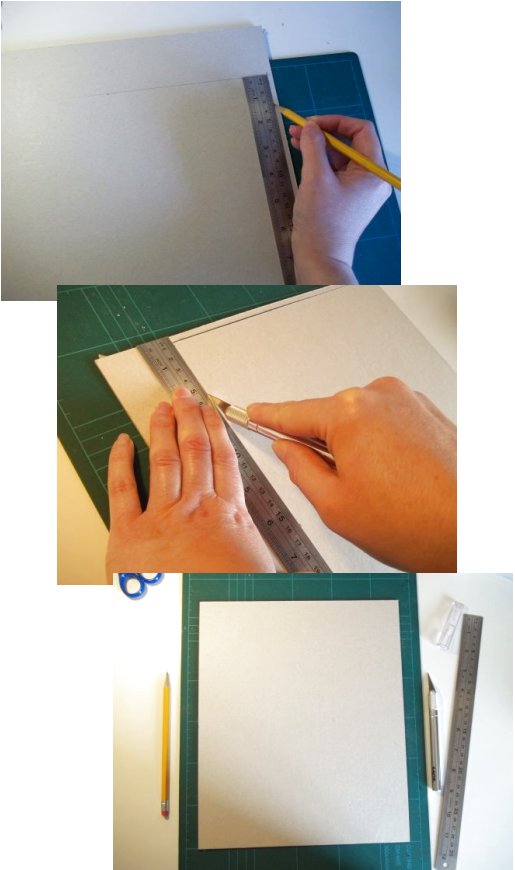
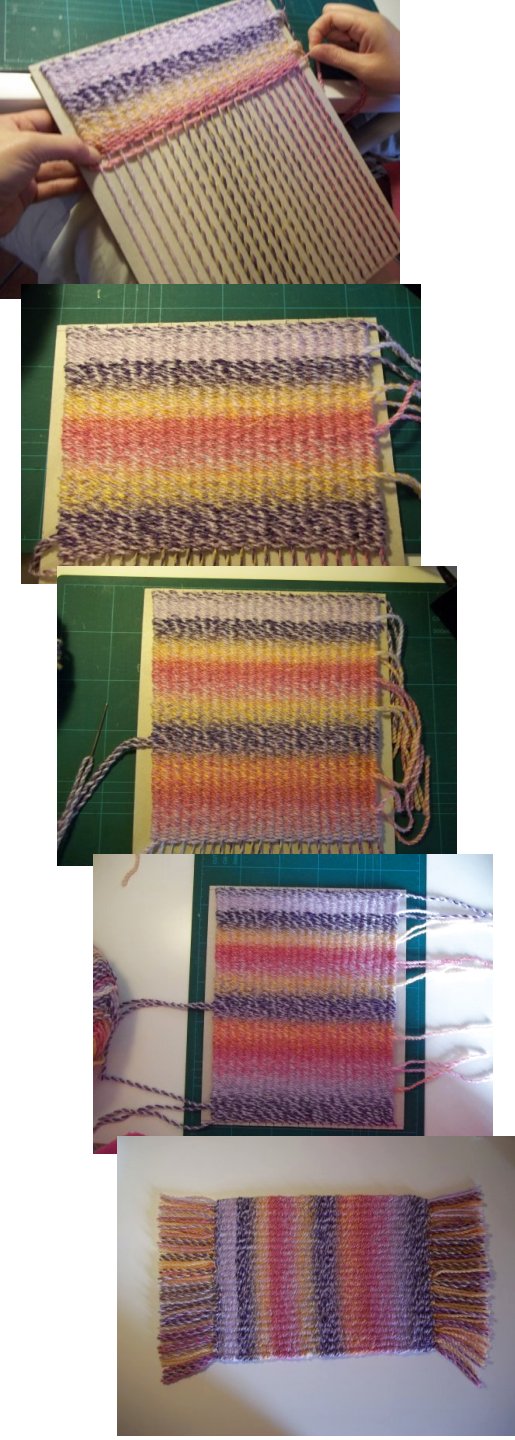
2. Draw a line widthways across the cardboard ½cm from the ends. Mark every cm from the end of the card to the lines going across the width of the card (there should be an even number of lines. Cut slits in the card at these points (there should be an even number of slits). This is the loom.

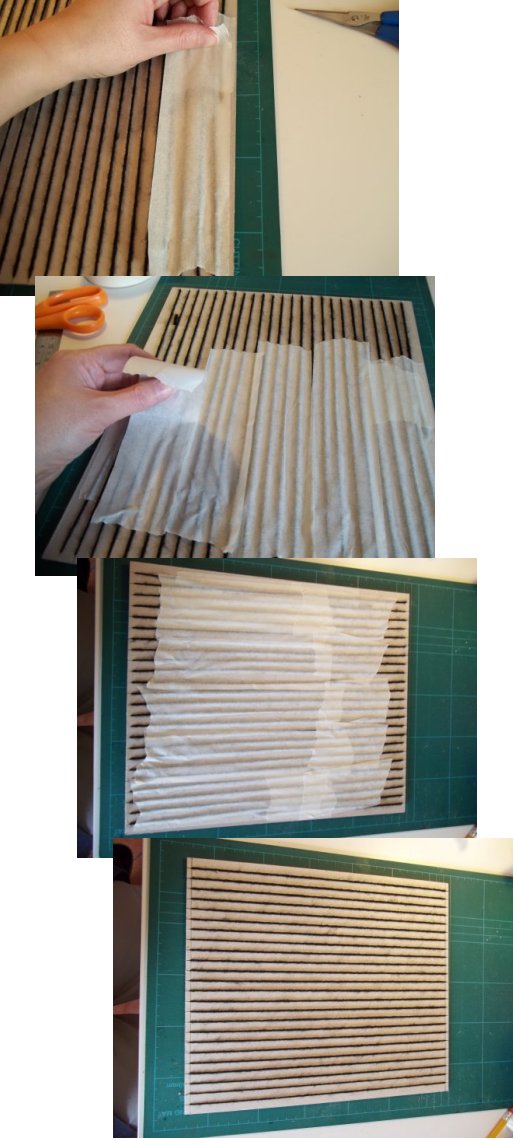
3. Either use the same colour wool as the chosen main coloured wool or use a contrasting colour for the warp threads (I'm using a contrasting colour so it's easier to see what's going on). Tape the end of your warp wool to the back of the board and slide it into the first slit at the top left hand corner, take it down to the slit directly opposite it (bottom left corner) and slide it tightly into the slit so that it is now at the back of the card. Continue winding the wool around the card slipping securely into each slit as you go. Cut the wool and tape the end to the back of the board.

4. Tape down the threads at the back to help hold them in place whilst weaving.
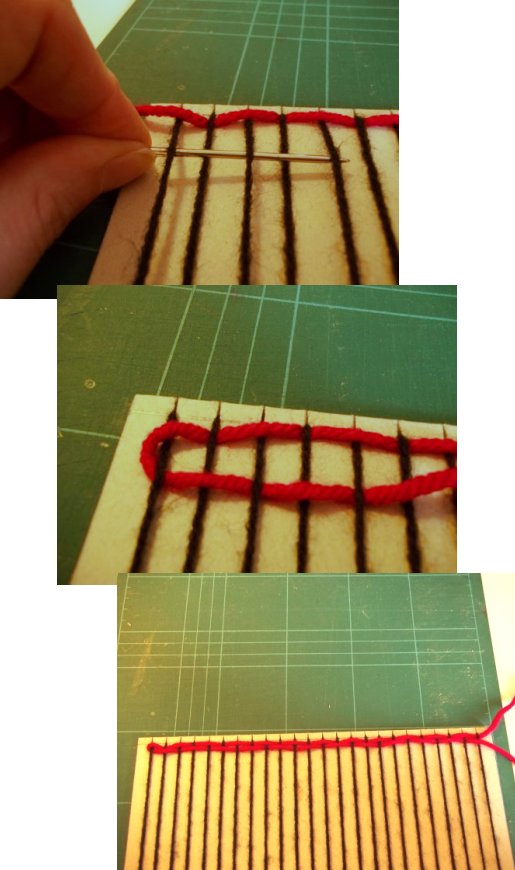
5. Thread a long length of wool onto a tapestry needle and leaving a 3 inch tail start weaving (if you are right handed) from the right hand side. Weave first under and then over the warp threads until you reach the end of the first line (the last weave should be an over).
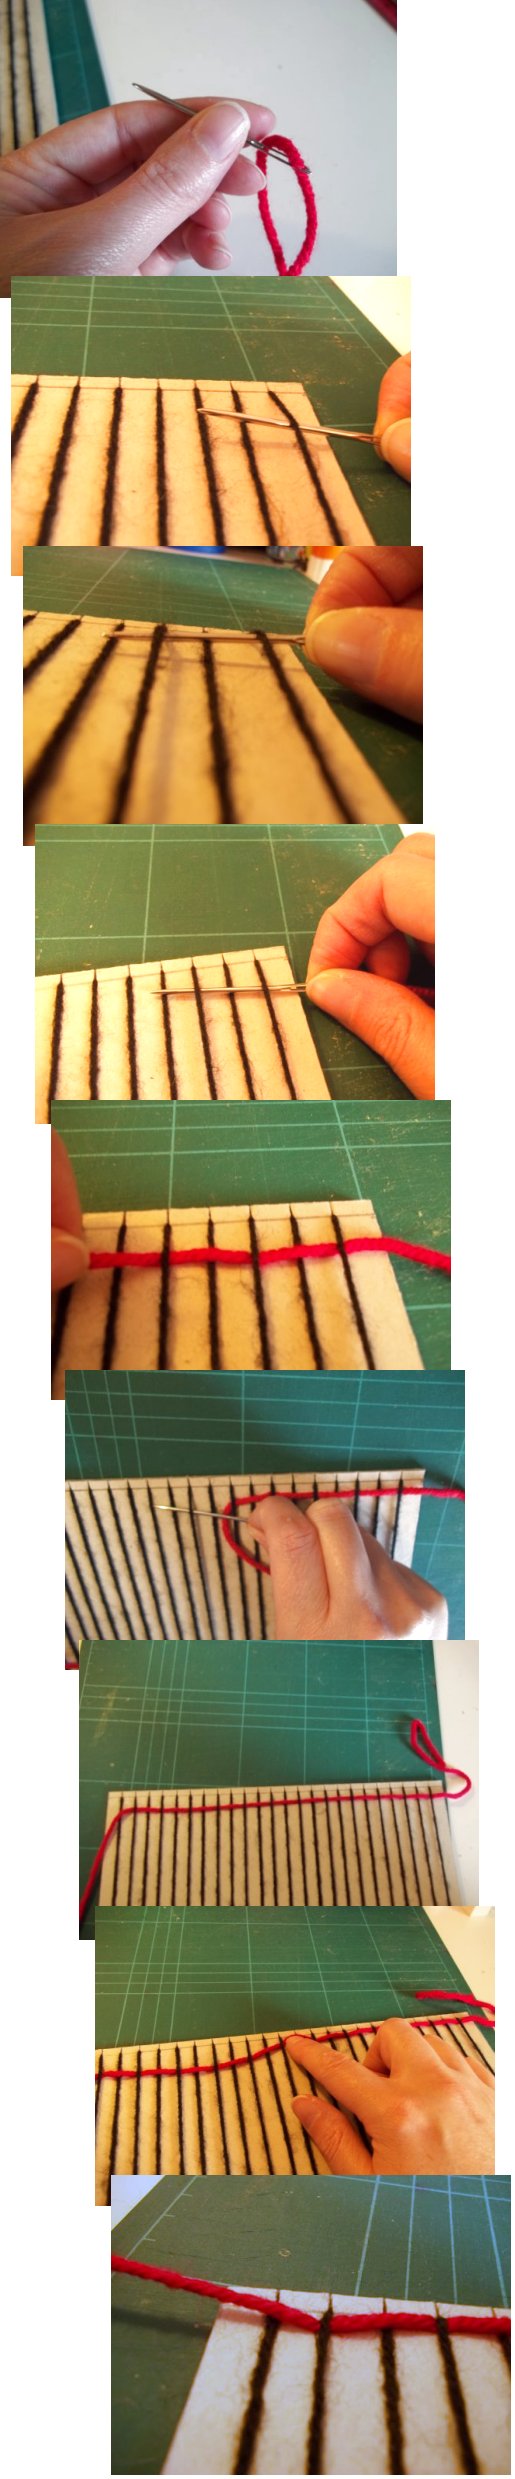
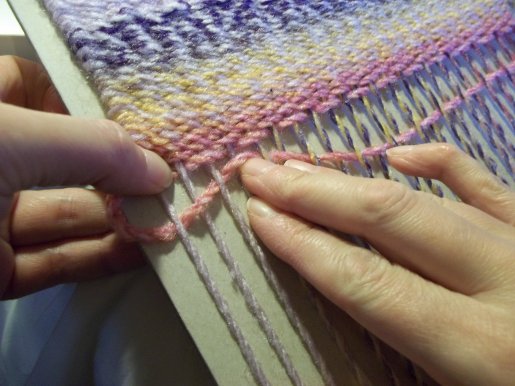
6. Turn and start the next line. Each line should start with an under and end with an over. Gently push each line together to the top of the loom.
(Be very careful not to pull the wool too tight when turning to weave the next line or this will pull the sides towards the middle stopping the sides from being straight)
**TOP TIP** I was very careful when weaving this mat to not pull it tight at the sides but it still pulled in a bit. I found when I tried it on my next woven piece that if I held the end of the previous line with my thumb when I pushed the line up to the rest of the weaving and then gently pulled the wool straight it was much easier to keep a straight edge by not pulling it too tight.**TOP TIP**
7. Continue weaving until you have nearly reached the end of the length of wool (change pieces of wool when you have reached the end of a row of weaving and leave a couple of inches that can be woven into the back when finishing off after being removed from the loom.)
Keep any strands of wool that you snip off as these can be used to add fringing at the end.
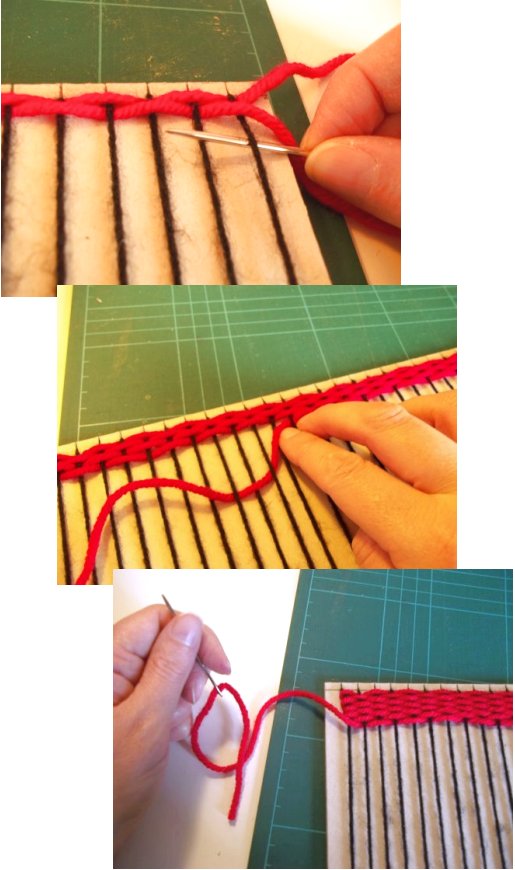
8. Cut another length of wool either in the same colour or a different colour and continue weaving until you reach the end of the loom. Carefully push each line together keeping the lines straight, remember not to pull in the sides too tight.

9. When you've reached the end of the loom turn to the back and carefully peel off the masking/sellotape tape and cut the warp threads across the centre.
10. Carefully take one end off of the loom and in pairs tie the warp threads together close to the weaving.
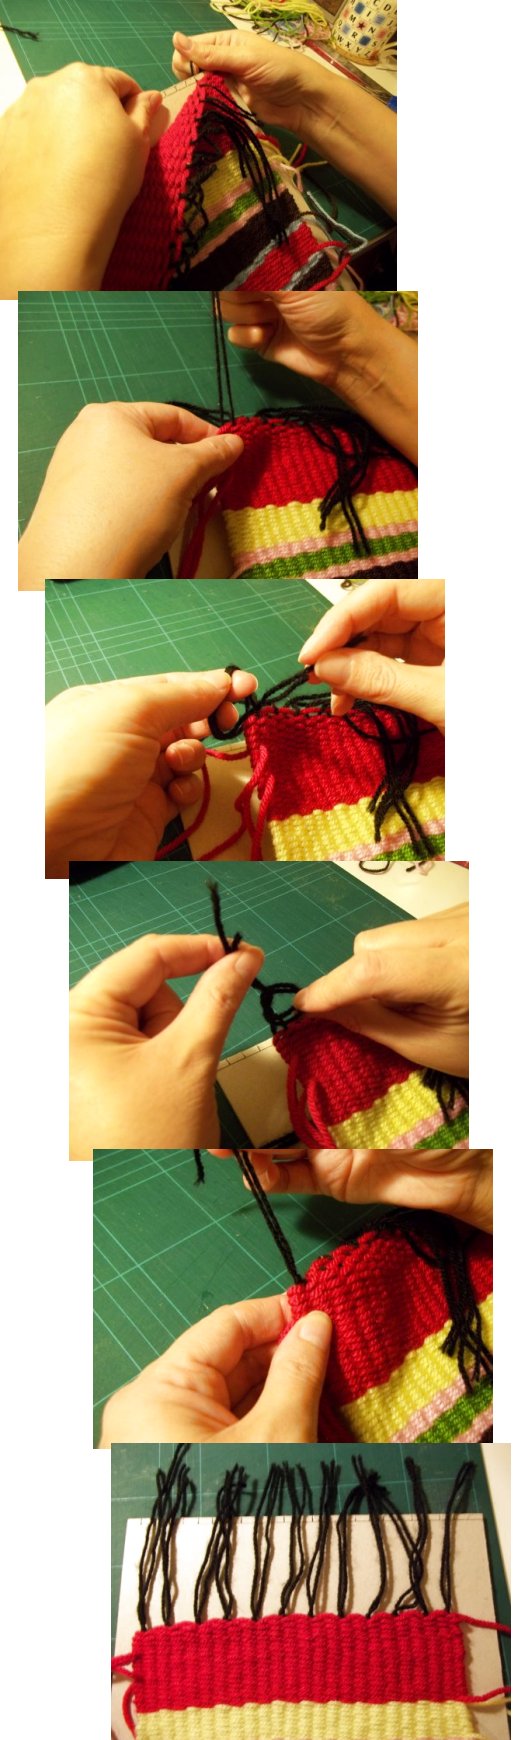
11. Repeat on the other end, removing from the loom and tying the threads together in pairs close to the weaving.
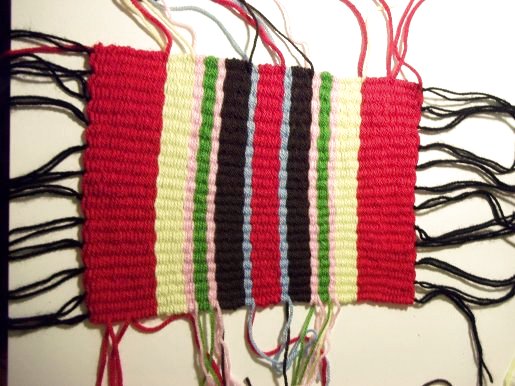
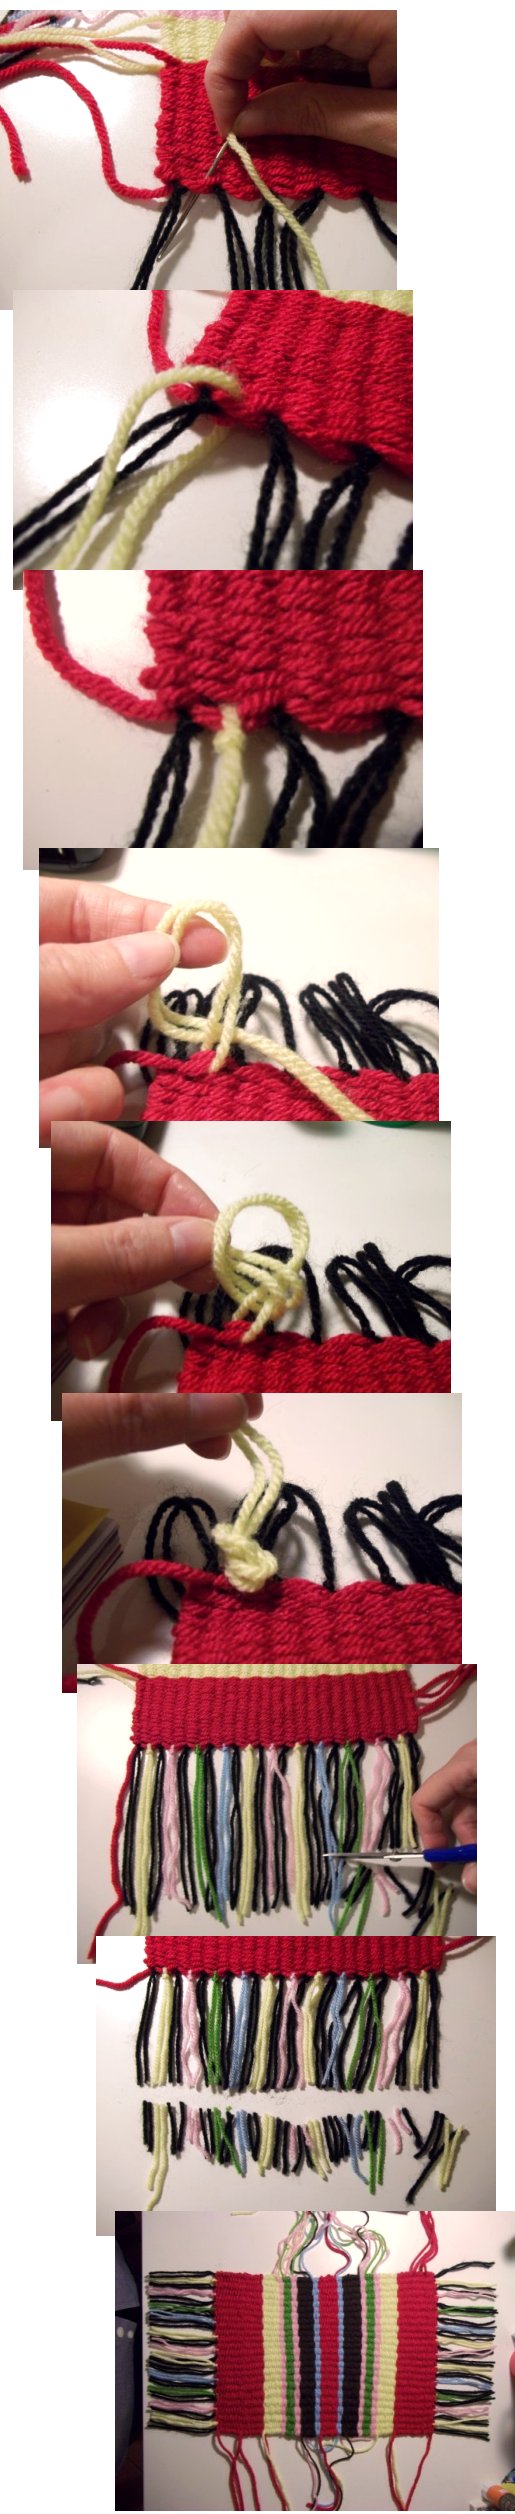
12. If you would like the fringing to be thicker, thread a length of wool between each fringe section and tie together as you did with the warp threads. When you are happy with the fringes thickness, trim the ends.
13. One at a time thread the loose ends (starting and ending pieces of wool) onto a tapestry needle and carefully take the strand around the side and weave it into the piece, going up and down between several threads at a time and then carefully snip off the wool close to the weaving (if you have used more than one colour always weave the ends into the same colour - these should be fairly hidden - once completed you should not be able to tell which side was originally the back and which one was the front.
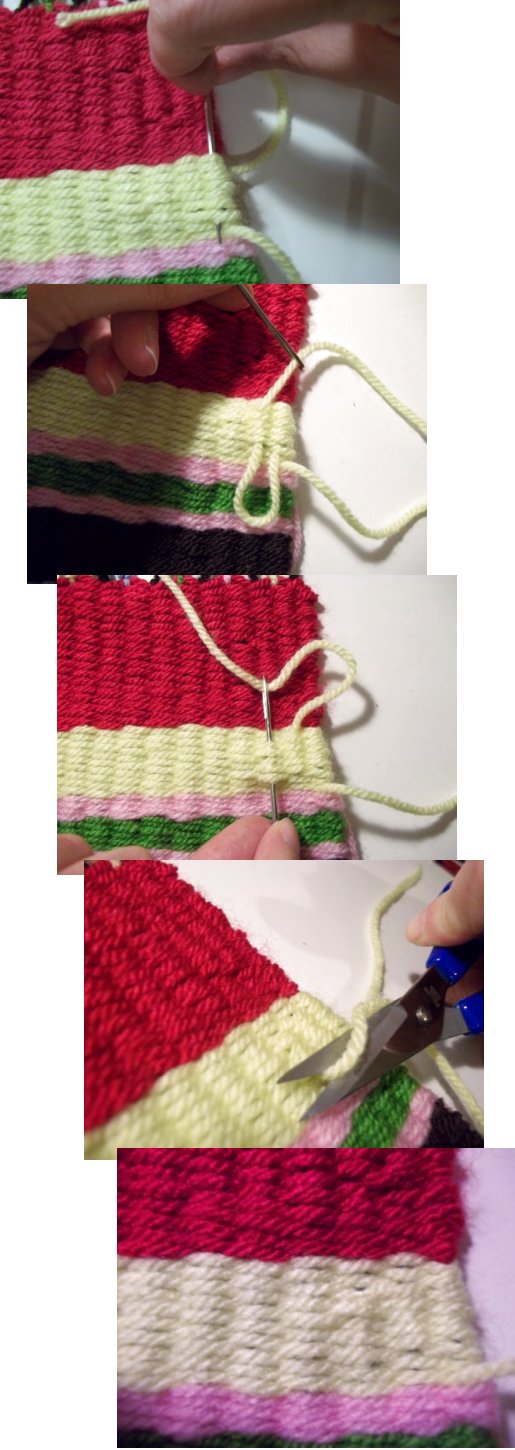
14. The weaving is now finished.
**TOP TIP** Why not try using variegated/marbled wool - it adds interest with a variety of colours/shades but you don't have to spend time figuring out which colour to use where.and you only need to buy one ball of wool so it saves money too. Oh, it also looks great! **TOP TIP**
Back to the Other Stuff projects menu...