

Japanese Braiding

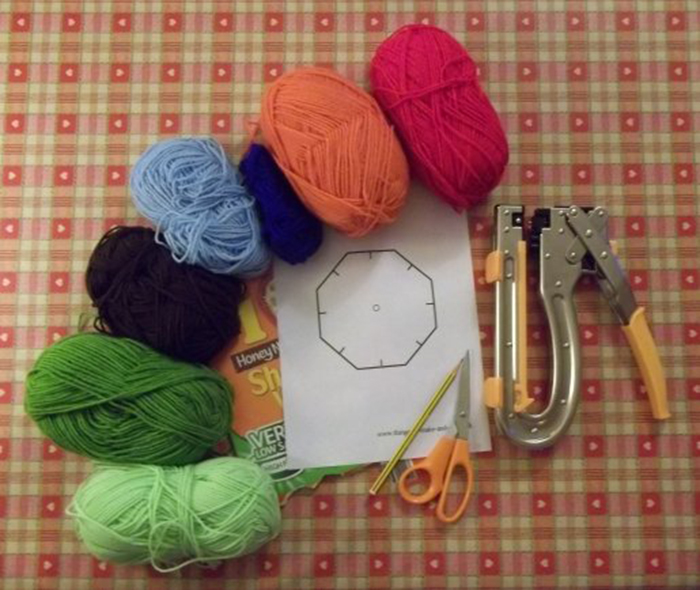
You will need:
Cereal Box Card
Pencil
Scissors
Hole-punch
Wool in 7 colours
What to do
1. Print out the template onto printer paper, cut out cutting the eight slits and punch out a small centre hole.
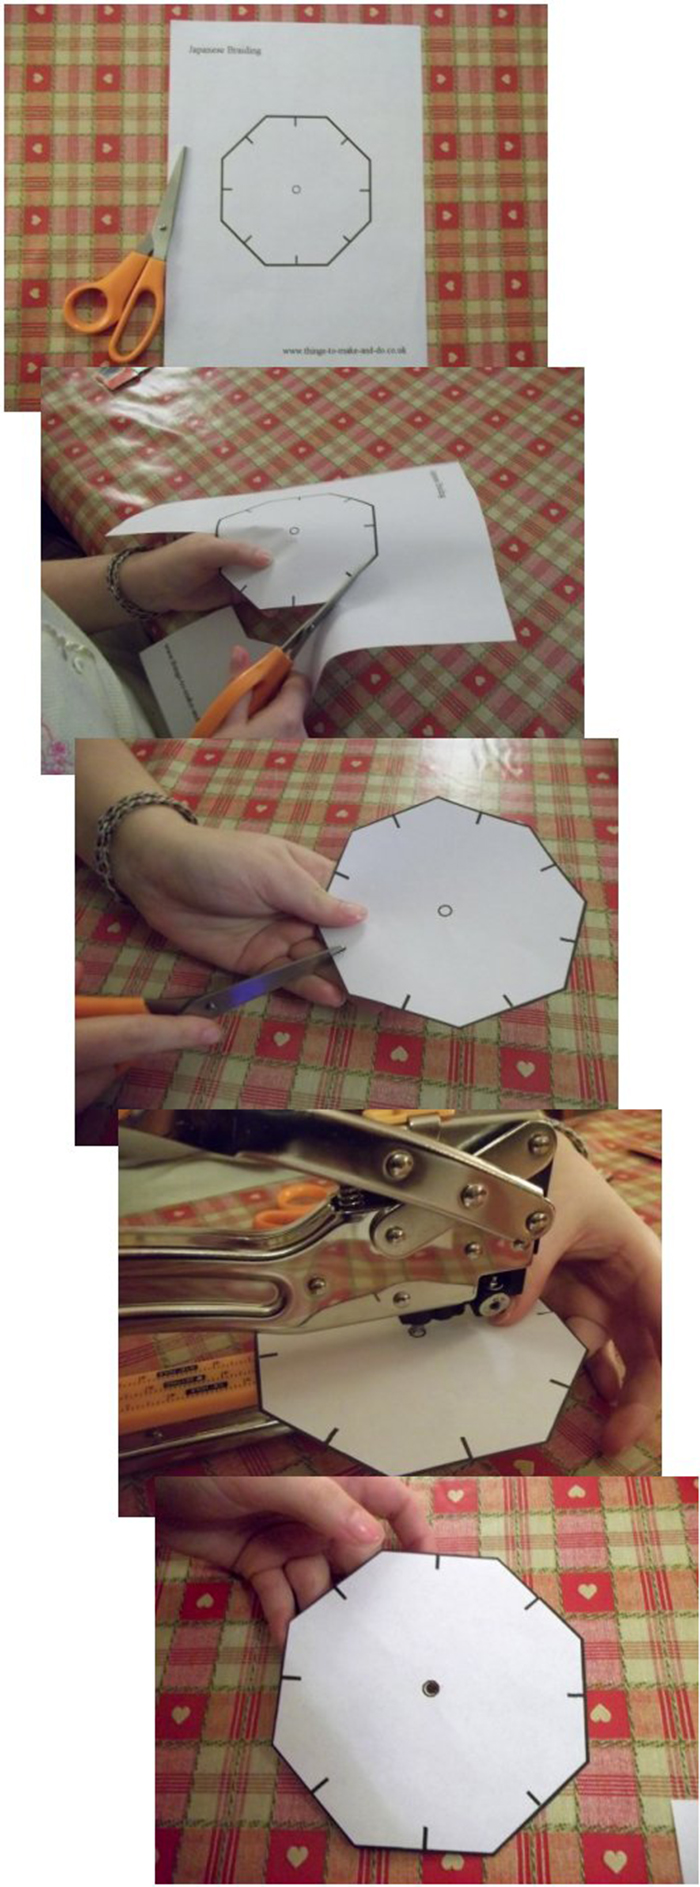
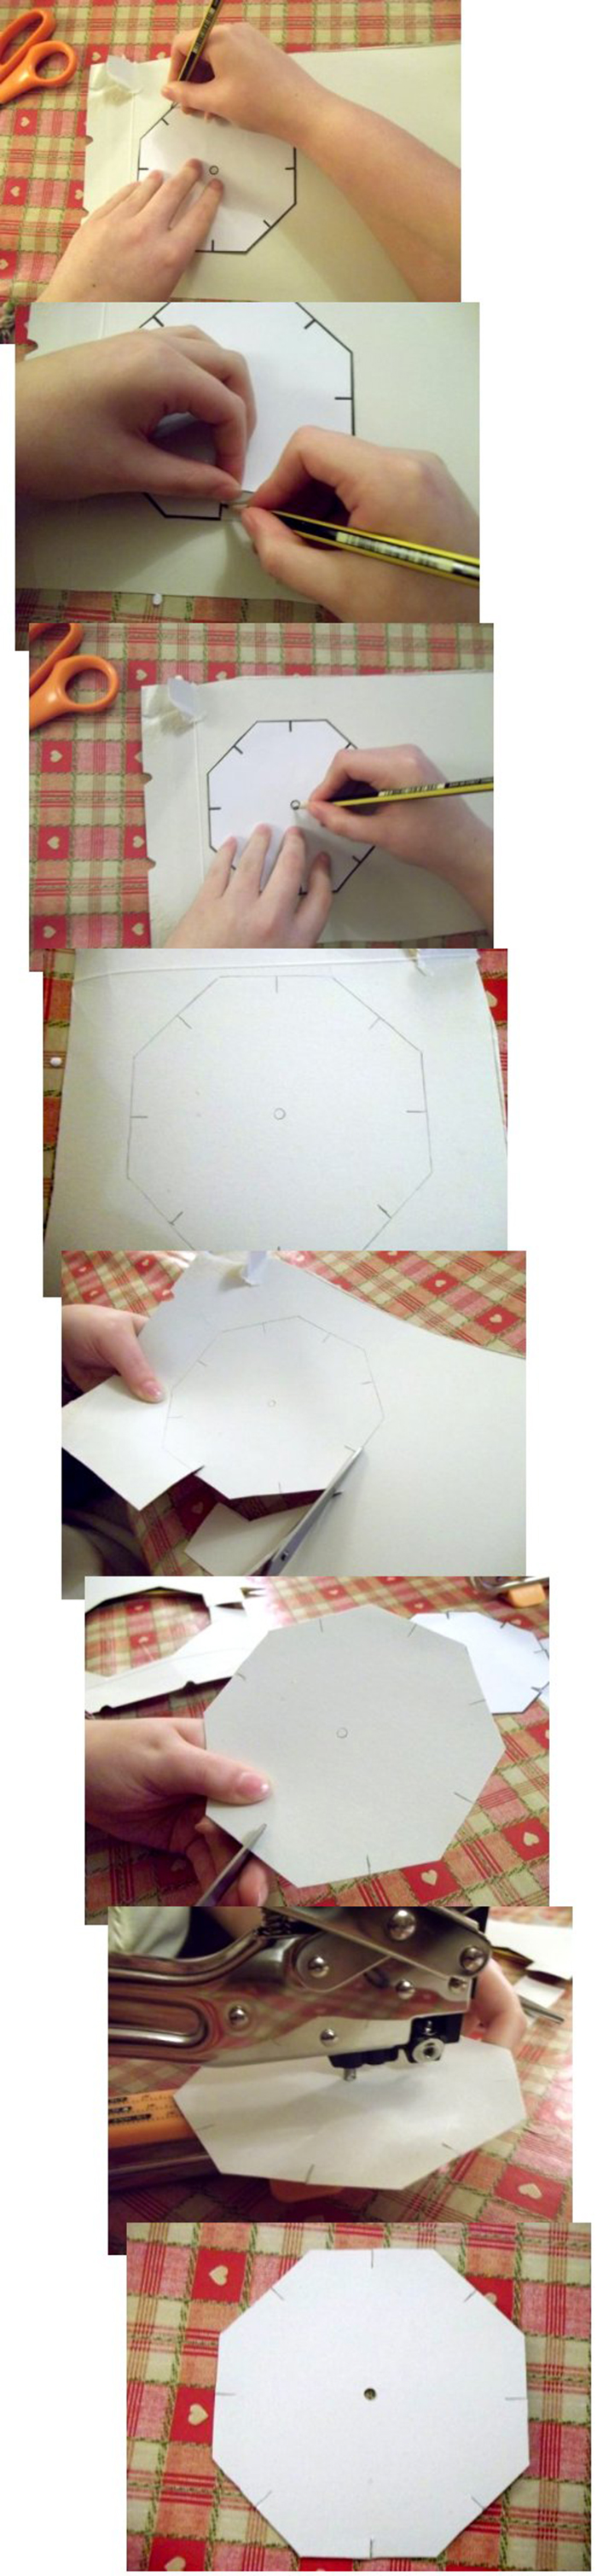
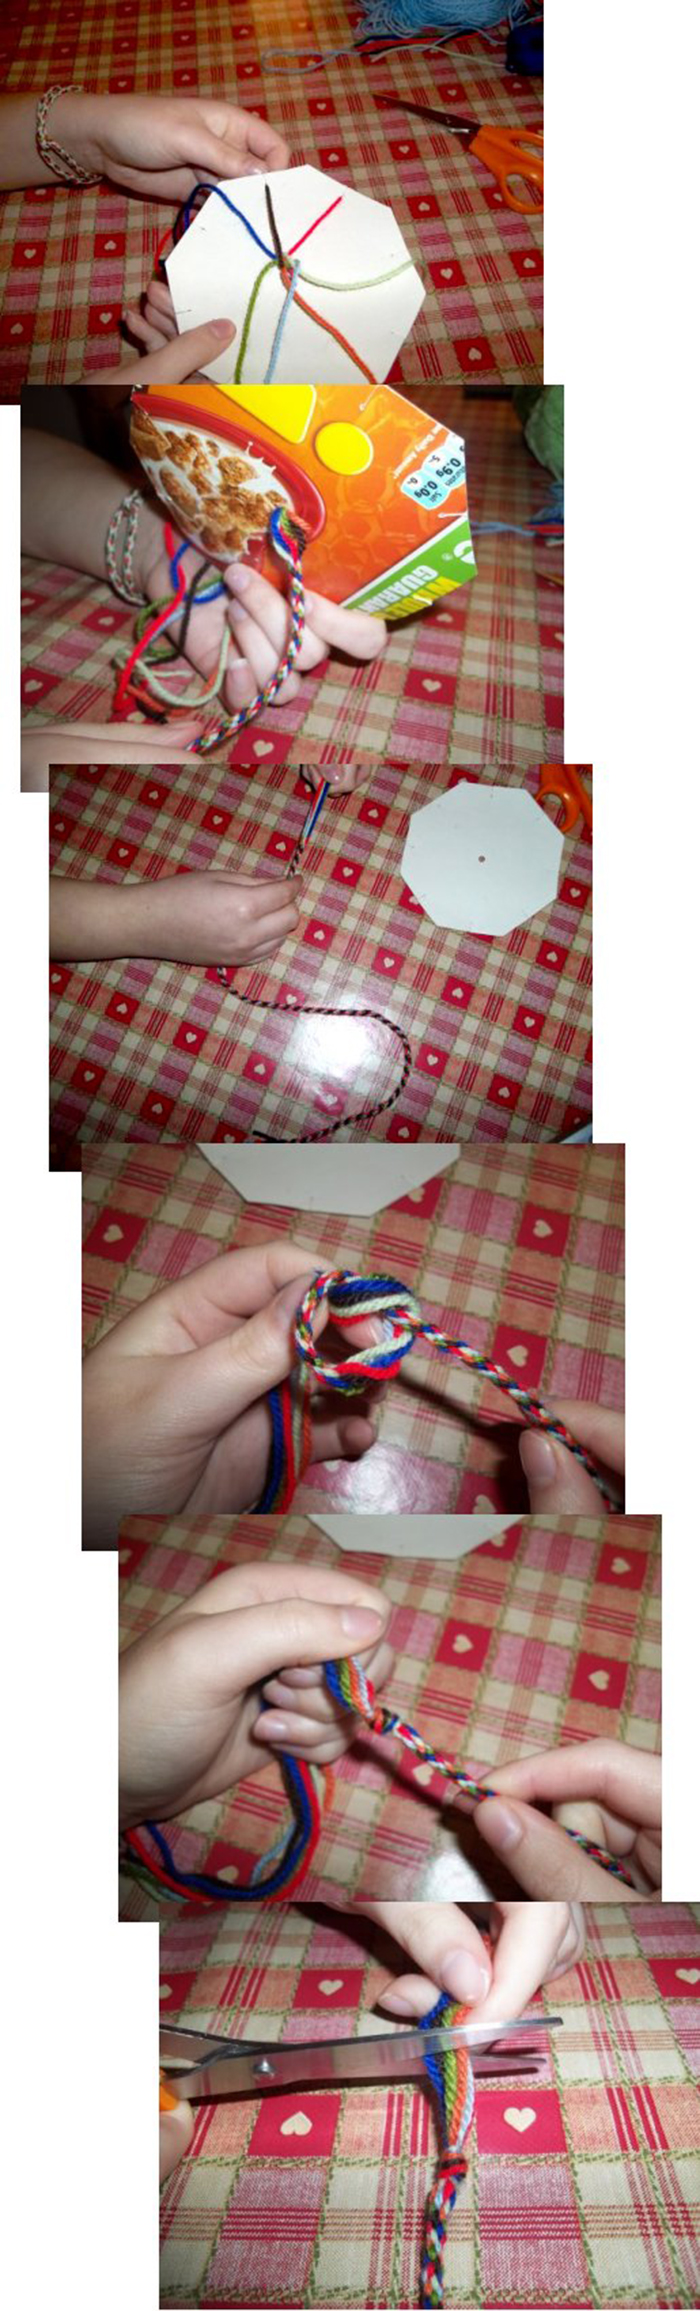
2. Place the template on the cereal box card. Draw around the template marking the slits and centre hole. Cut the octagon out of the card, cut the eight slits and punch out a small centre hole.
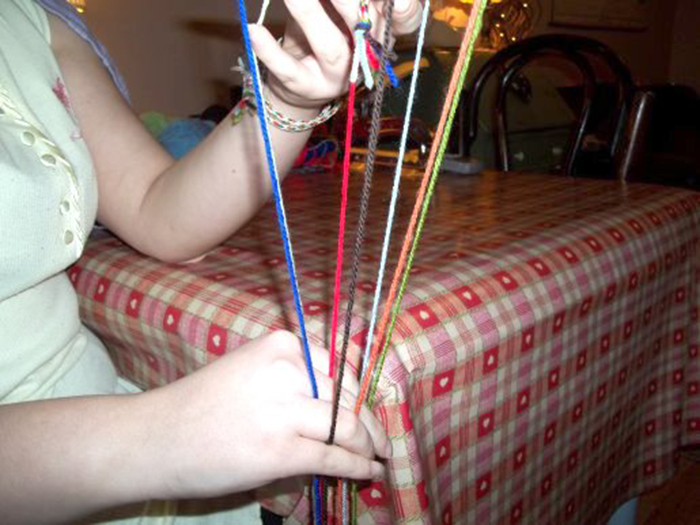
3. Cut seven equal lengths of wool (all in different colours) and tie them together at one end.
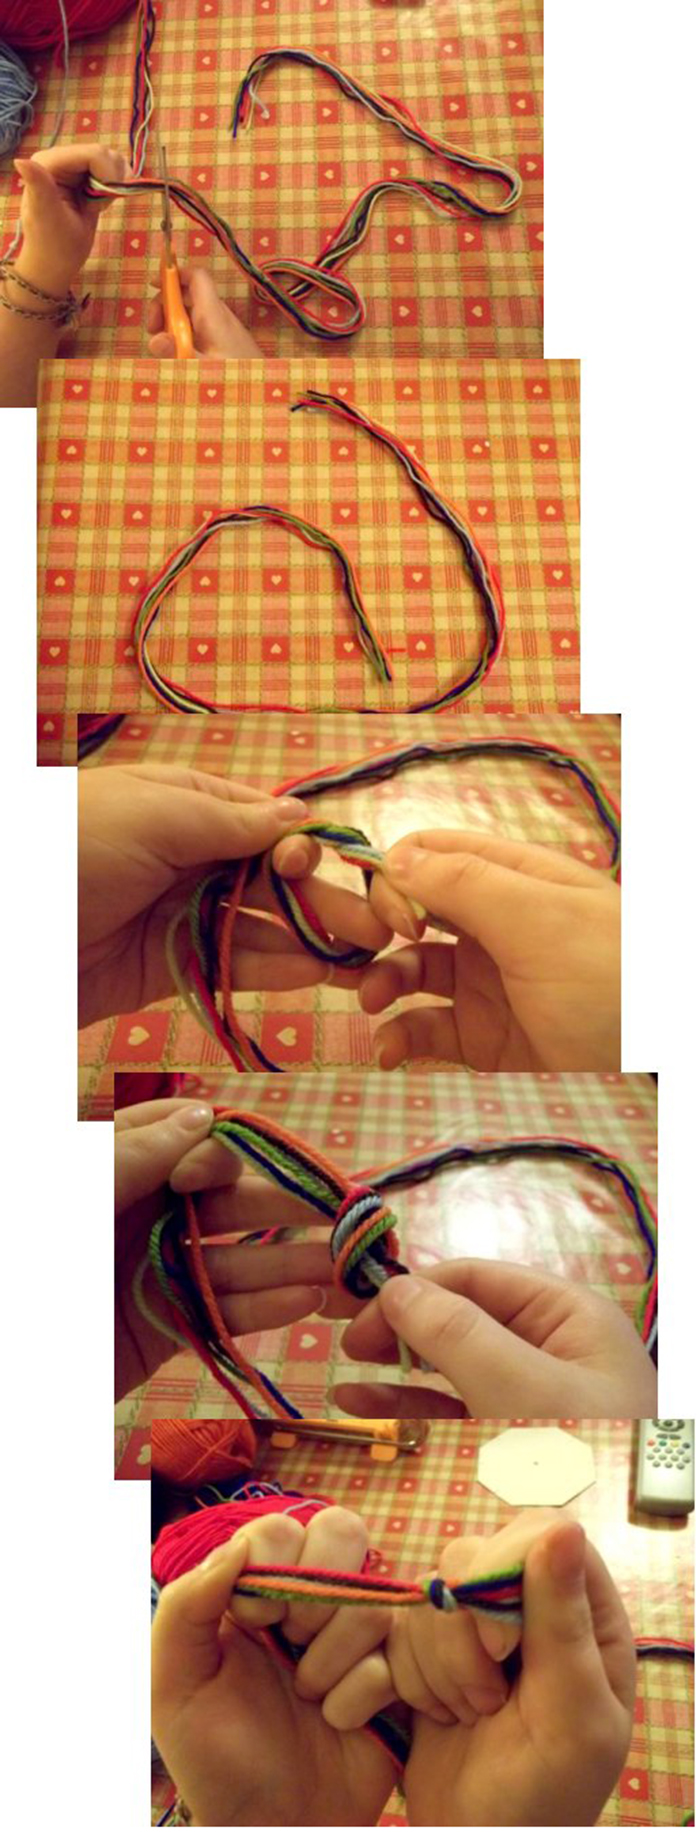
4. From underneath, thread the strands of wool one at a time through the central hole and place a separate strand firmly in each slit (you should be left with an empty slit). The knotted end should be against (but not able to go through) the hole, touching the underside of the card.

5. Holding the empty slit closest to you count up three strands to your right (anti-clockwise), take the strand of wool from the third slit and slide it into the empty slit. Run your fingers through the strands underneath so that they don't get tangled.
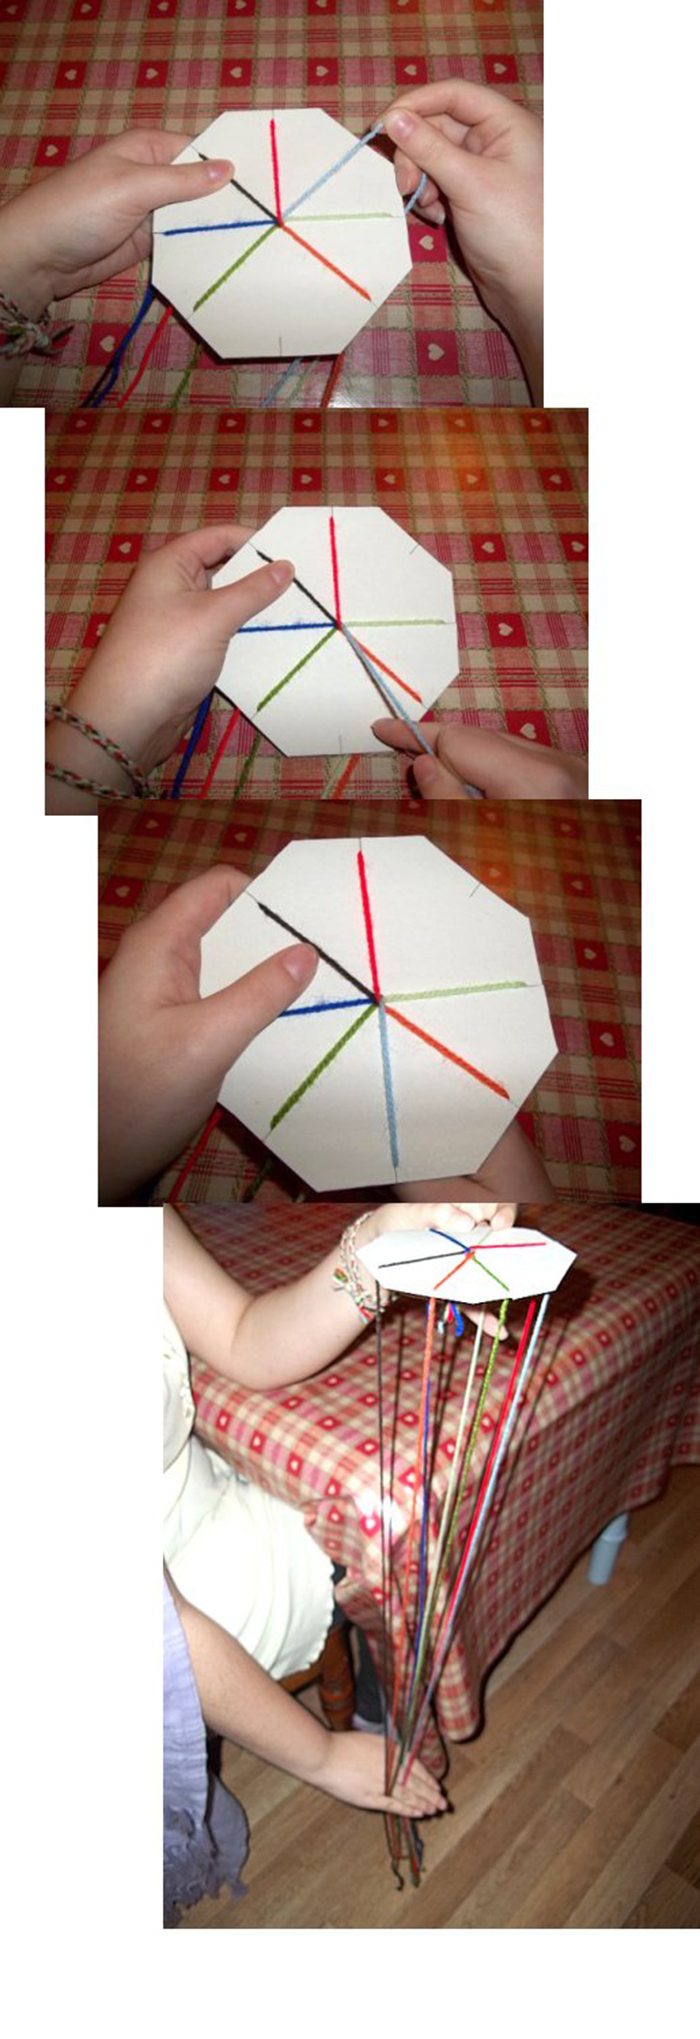
6. Turn the octagon so that the empty slit is again closest to you and repeat the step (count up three strands to your right (anti-clockwise), take the strand of wool from the third slit and slide it into the empty slit.)
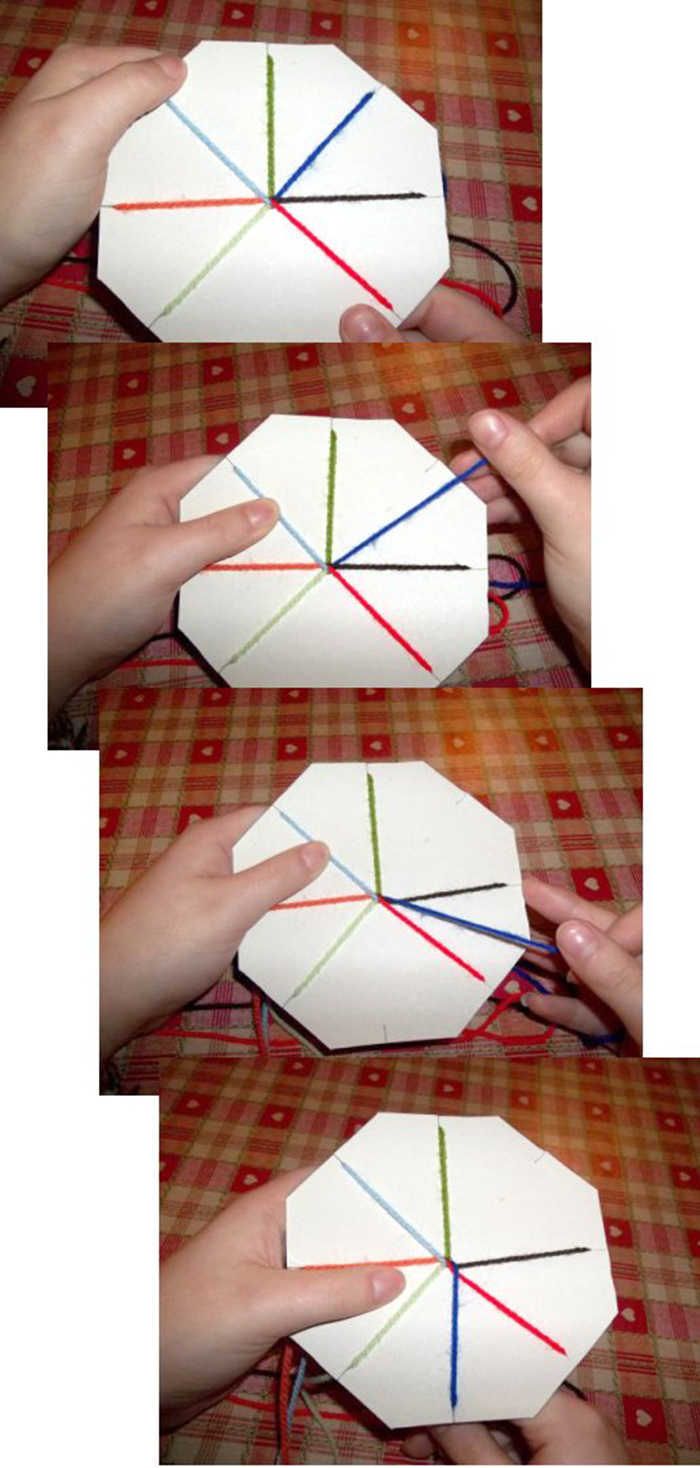
7. Repeat this step until you reach the end of your wool or until the braiding is the length you need. Gently pull the braid as it grows to give it room.
It is important that between steps you run your fingers through the strands underneath so that they don't become tangled.
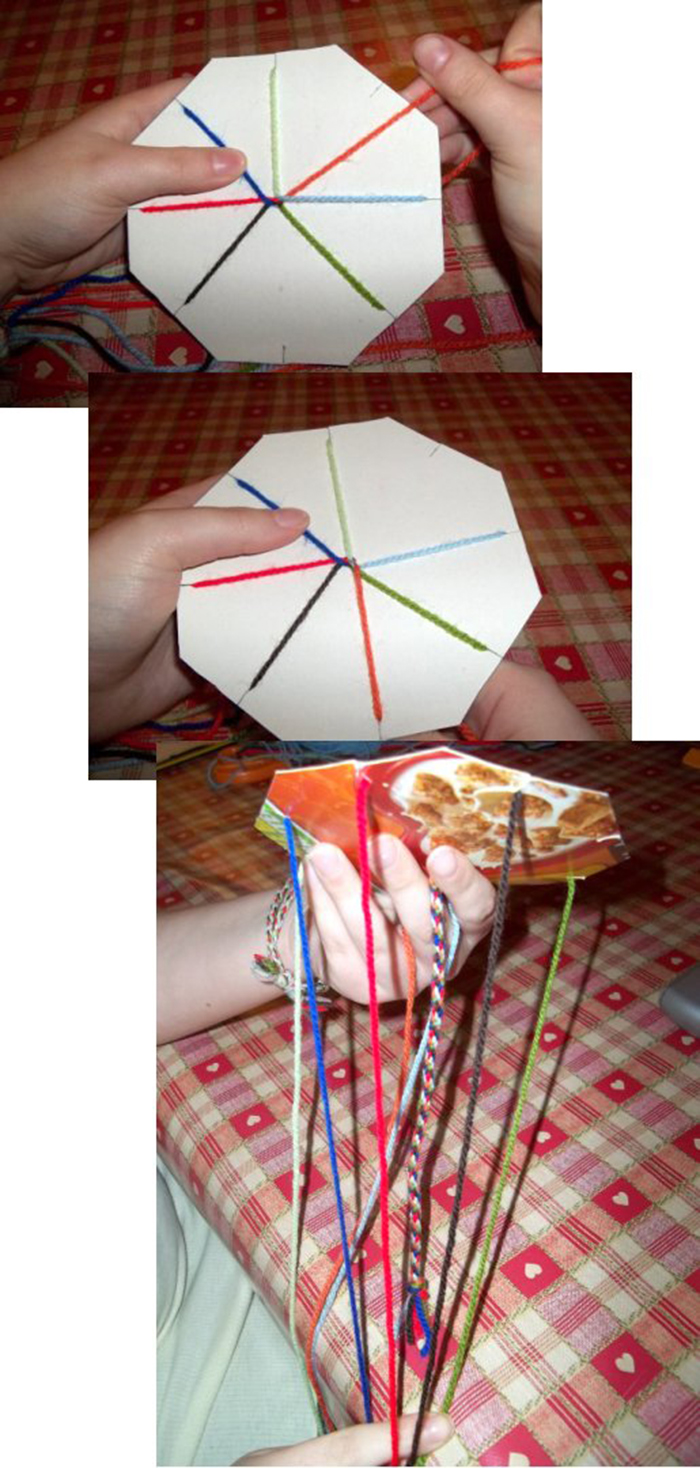
8. Holding onto the braid close to the hole underneath take each strand out of the slits, slide them back through the hole and tie them together at the end of the braided section and trim the ends.
(If the braid is too long just tie another knot where the correct length should be and trim the ends.)
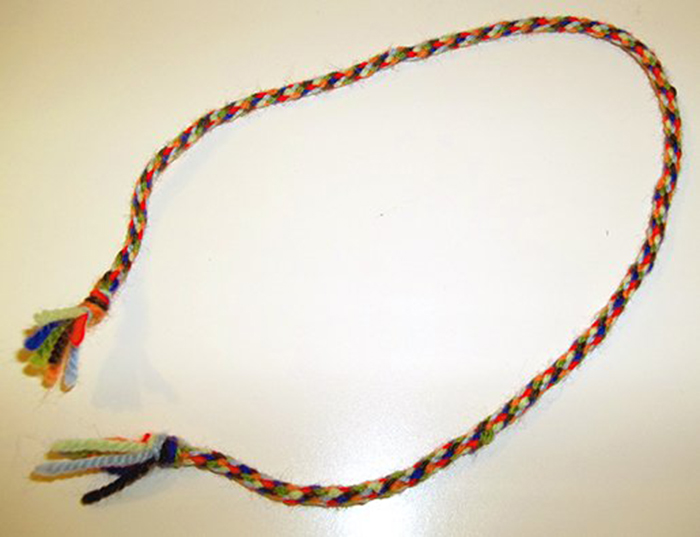
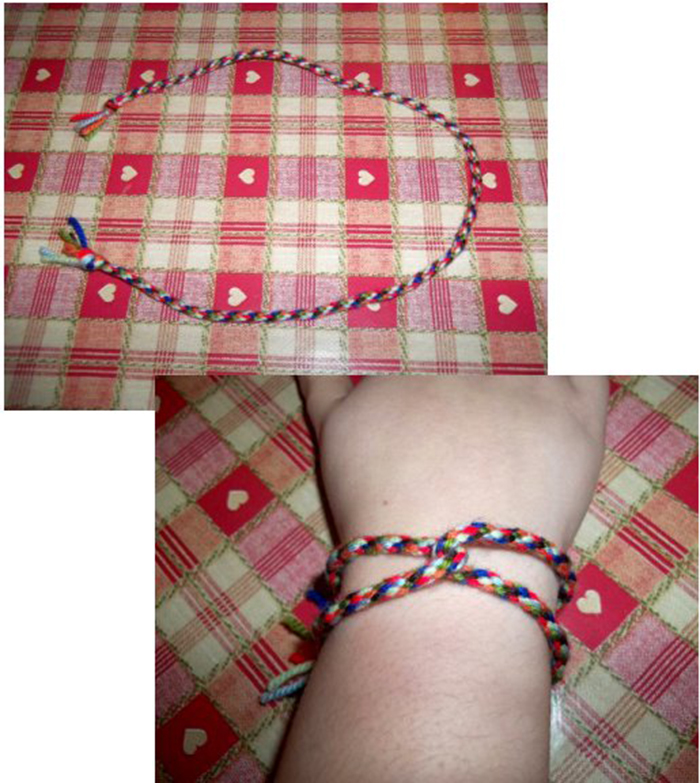
9. The braid can now be used to make friendship bracelets, hair accessories, bookmarks.wherever your imagination takes you.
Back to the Other Stuff projects menu...