

Dream Catcher
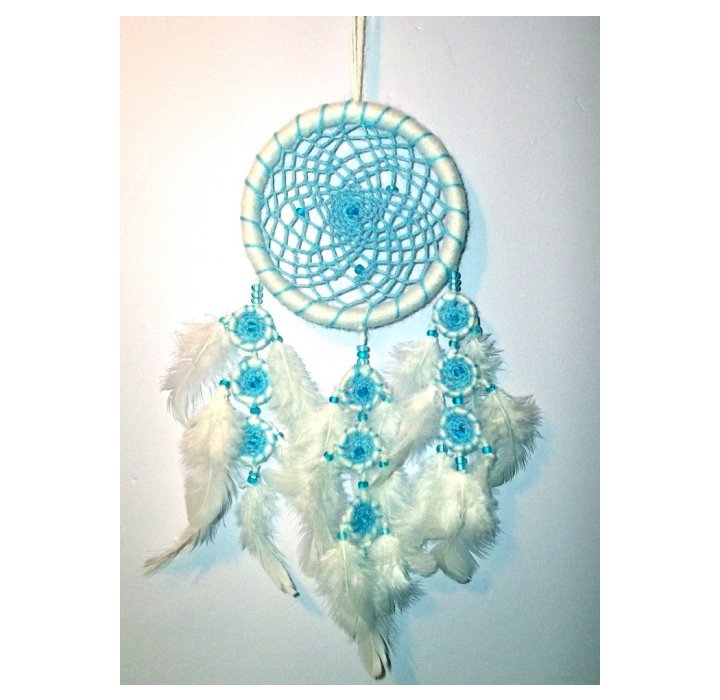

My daughter Lizzie loves dream catchers, so I thought I'd have a go at making her one myself. I had a pair of plastic handles that I'd bought for a bag project I hadn't got round to making, and I thought one of them would be ideal as the basis for the dream catcher. So I spent a very pleasant afternoon crafting and was really happy with the results especially the web part.
Since the dream catcher turned out so well I thought I'd share the project with you. I've used the second handle for this project, in the first one I just platted some wool and added beads and feathers for the dangly trimmings, in this one I've added smaller webbed hoops using curtain rings (made in the same way as the large hoop, only much smaller) together with the beads & feathers to show a more extravagant style. Dream Catchers are very beautiful and personal; they can be decorated and embellished to suit your taste.
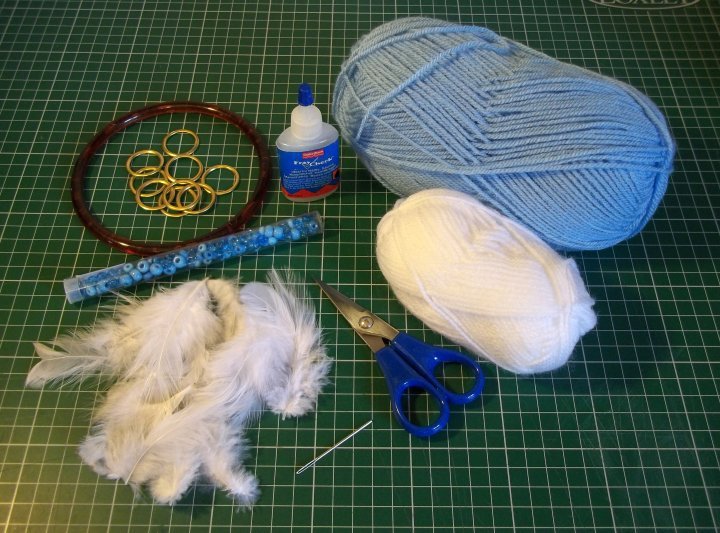
You will need:
plastic handle available from haberdasheries)
Wool (or embroidery thread for a finer web)
Tapestry needle & scissors
Fray check (a little dab of fray check on knots
stops them unravelling, giving extra strength)
Curtain rings (optional - to make smaller
webs for added decoration)
Beads (with a hole big enough to push
a feather stalk into)
Feathers
PVA glue - not in picture (may be needed
to help hold the feathers in place)
What to do
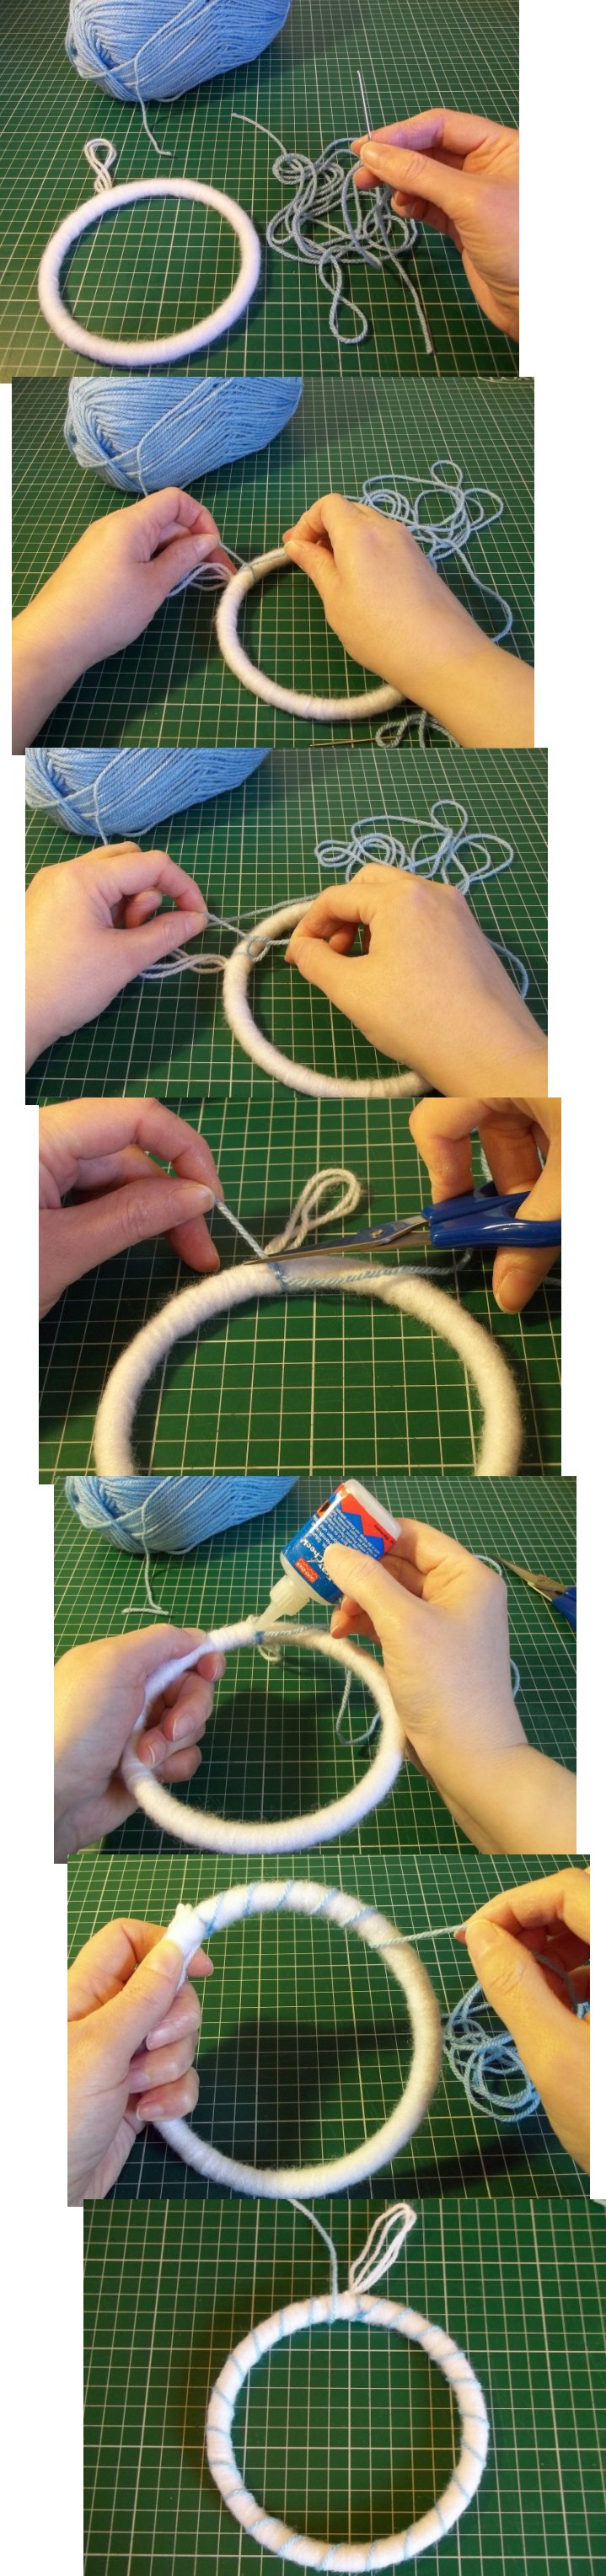
1. Leaving a long strand (to make a hanging loop), tie the wool to the hoop with a knot and then completely cover the hoop with wool by wrapping it around & around, pushing the strands close up against each other. Tie the two end strands together at the base, thread onto a tapestry needle, make a hanging loop and then sew at the base securely, hide the ends in the wrapped wool and trim.

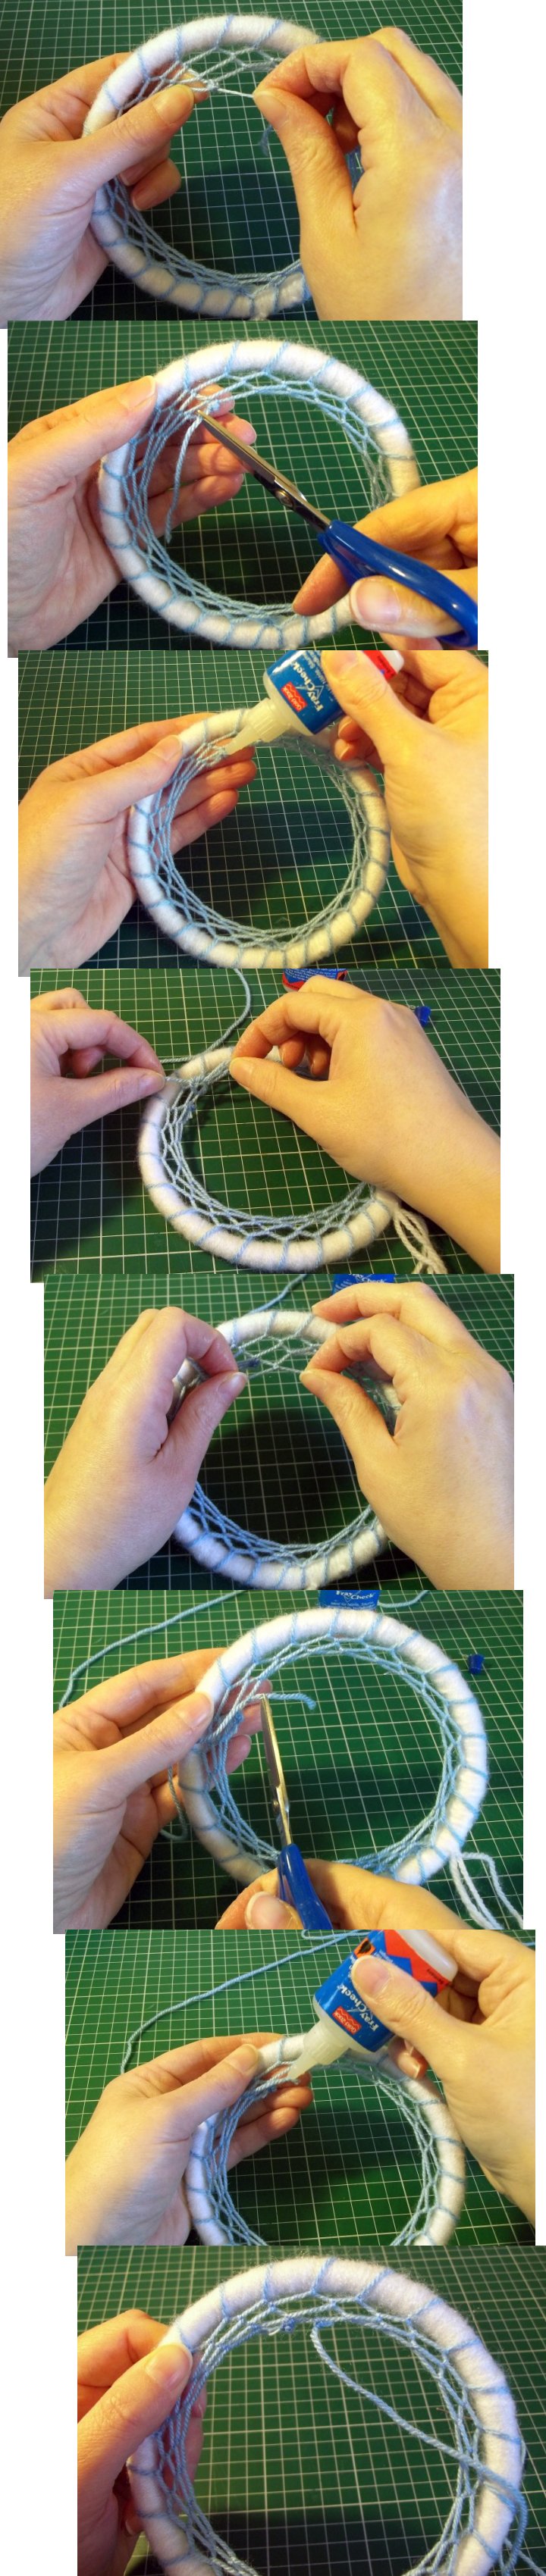
2. To make the web - Cut a long strand of wool and thread it onto the tapestry needle. Tie to the hoop with a knot and trim the end (secure knot with Fray Check). Loosely wrap the wool around the hoop clockwise leaving an equal space between each one.
3. When you get back around to the start, thread the needle under the back of the first loop (from right to left), gently pull the wool to form a new loop then thread the needle back down through the new loop created (pull thread to secure). Continue in a clockwise direction threading up through the back of each loop and down through the new loop to create the web effect.

(If your length of wool isn't long enough to complete the web or if you want to change colour then a new strand of wool can be attached at any time. Just tie off (knot onto the web) & trim the end of the old one, tie on a new strand and continue in the same direction (securing all knots with Fray Check).)
4. Beads can be added to your web at any time - just thread a bead onto your needle pushing it down the strand of wool before making the next loop. Some dream catchers have one central bead, while others have them spaced throughout the web; it's totally up to you.
When your web is complete & beads attached, tie the end of the wool to the web securely and trim the end (secure knot with Fray Check).
**TOP TIP - A little dab of fray check on knots provides extra strength and stops them unravelling. -TOP TIP**

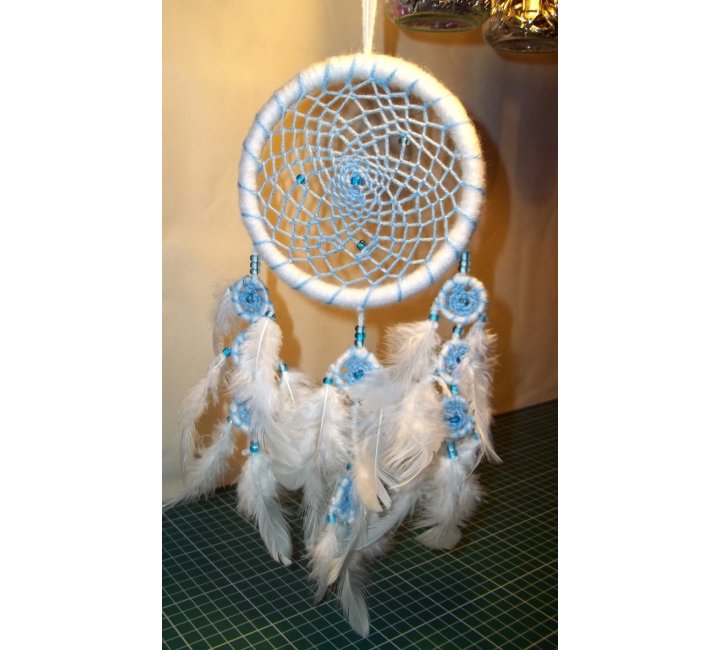
5. Now it's time to add extra decorations - When I made my first dream catcher I tied on three strands of wool equally spaced along the bottom half of the webbed hoop, I then platted them and added a bead and a feather to each one. This time I'm adding mini dream catcher hoops with the beads & feathers.
Lay the webbed hoop in front of you and play around with the layout of smaller rings together with the beads & feathers, when you are happy with your design you will know how many small rings to cover.
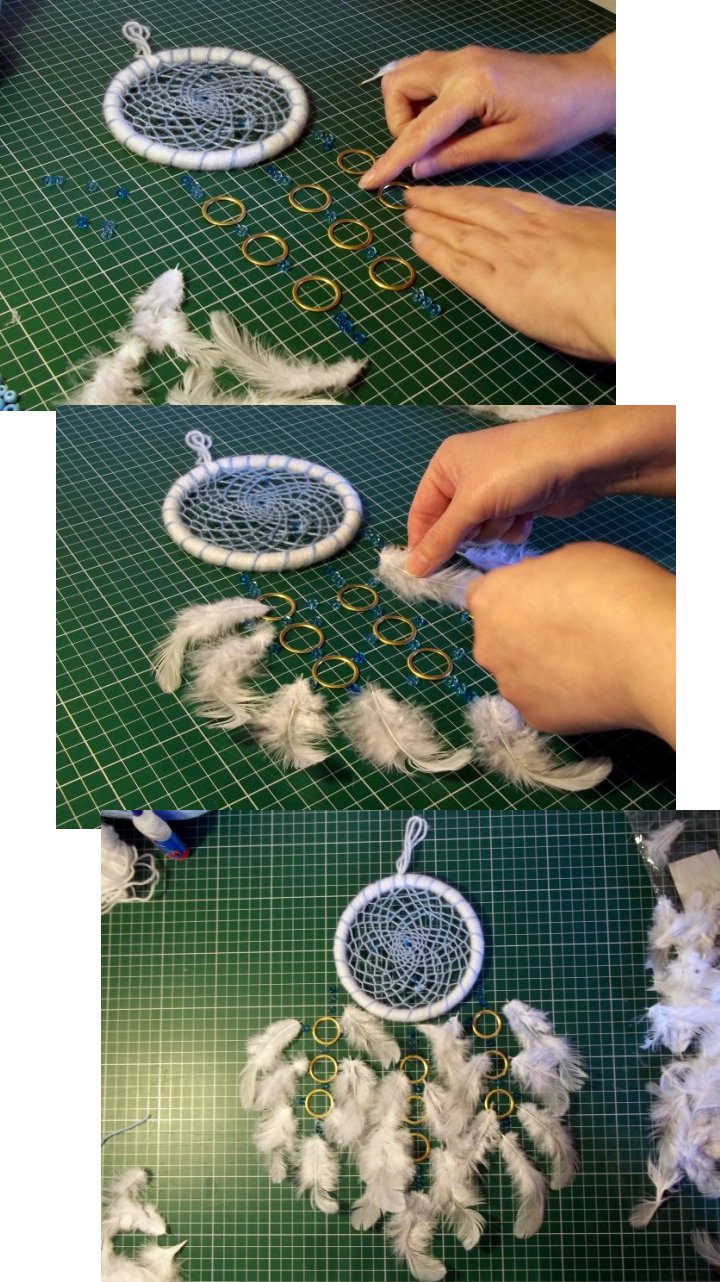
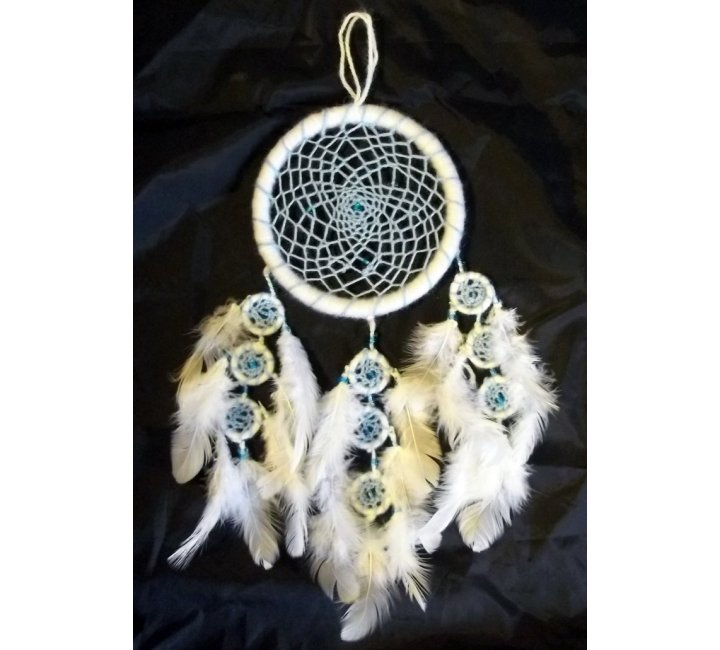
6. Cover the rings in the same way as you did with the larger ring, but leave the ends long so as to be able to tie them to each other rather than making them into hanging loops. I've used wool but you can use embroidery thread for a finer web.

7. Assembling the Dream Catcher - Decide which is the front and back of each piece. Tie the small hoops to each other and to the larger hoop together with beads and feathers following your design. Knot the wool and add Fray Check where needed (keep the knots at the back of the dream catcher).
**TOP TIP - Add beads & feathers by knotting the end in a piece of wool, thread on the bead(s) and push a feather into some of them (depending on the feathers & beads you may need to trim the stalks slightly if they are too thick or tie them on or add a dab of PVA glue to the stalks to hold them in place if they're a little loose). - TOP TIP**

8. Hang up your dream catcher and have a peaceful nights sleep.
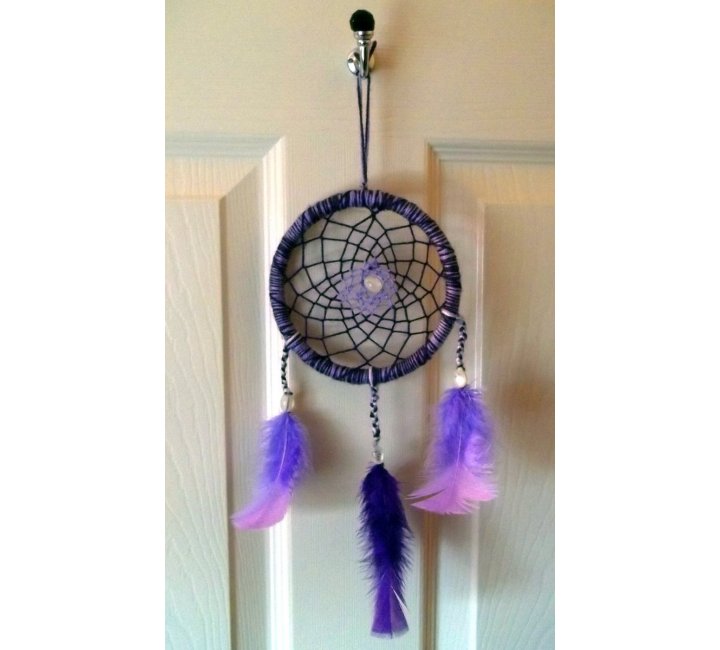
And here's the first Dream Catcher I made - it's a simpler version, but is made in the same way:
Back to the Other Stuff projects menu...